 |
Project 4: A hollow chambered fretless 5 string using a single Highlander Coaxial Pickup
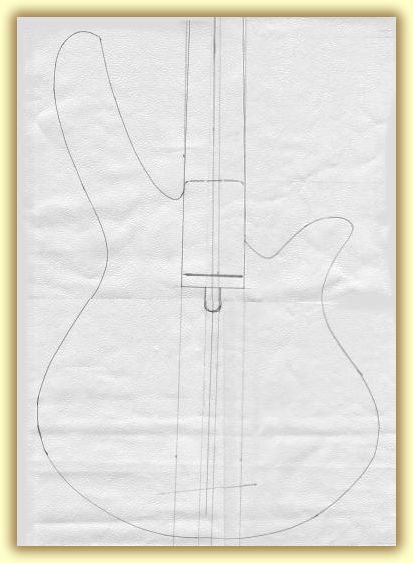
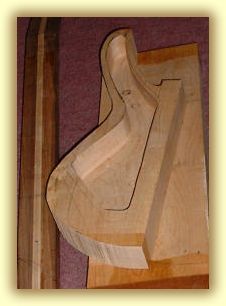
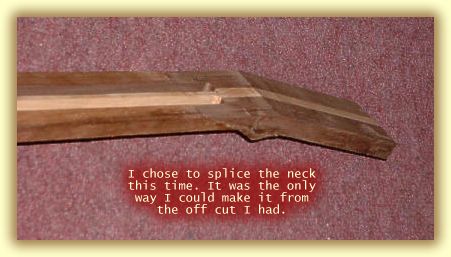
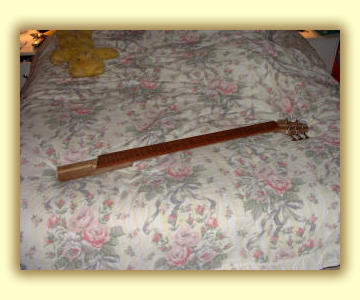
The final working drawing was planned out full size on the back of a cheap roll of wall paper Maple for the body (in 2 pieces) with a 1/4" AAAA grade Flame Maple cap. Cocobolo Fingerboard and Bridge, with maple fret lines. Walnut and Maple Neck (an offcut from the headless project). I have settled for a glued in neck and I am going to hide the butt of the neck but hiding it with the maple cap. this will require some very fine cutting but I think it will be worth it in the end. I have also desided that this Bass will be a 5 string, using a set of Satin chrome Hipshot Ultra-Lite tuners (nice and light in weight). It's difficult to put a start time for this project because I have been tinkering with it for about 6 months, in fact ever since I finished the headless project I have been trying to work out what I was going to do with the spare neck off cut. I didn't need to laminate the neck because it was already done. All I needed to do was splce the neck and sand the top and sides flat and square. I then marked it up ready for profiling. The Body: I routed out the chambers first using a template, this worked very well and I am pleased with the results. then I cut out the body shapes on a bandsaw. I did each side at a time so that I could spend time over them. If I say that 4 weeks would be a good estimate to start the photo's from. |
 |
 |
 |
 |
Notice that I have chosen
to use 2 truss rods. Walnut is not as strong as maple. On the headless
it wasn't as important, but on this bass i'm not taking any chances!
|
 |
 |
||
|
I think that a walnut
neck mated to a maple body should give this bass a nice warm solid tone
but with a bright and fast attack. The glued in neck should help to blend
the tones and the hollows should add a certain hollow to it's tonal charector.
I haven't got a clue what the Cocobolo will do to the sound, but it'll
be good to find out!
|
|
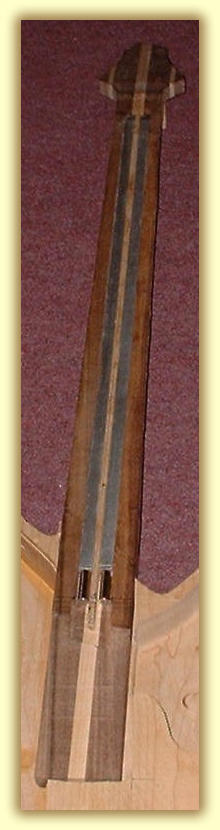
Once securly set I removed the clamps and left it settle for a few weeks. I finished carving the neck profile and a big volute (I like them OK). On this Bass I have gone super slim profile, shallow depth and a tighter string width. I then sanded a 15" radius to the top of the fingerboard and I glued in the maple veneer fret lines. This was then sanded smooth and slowly sanded though various grades upto a 500 grit paper and finishing the wood with lemon oil.
|
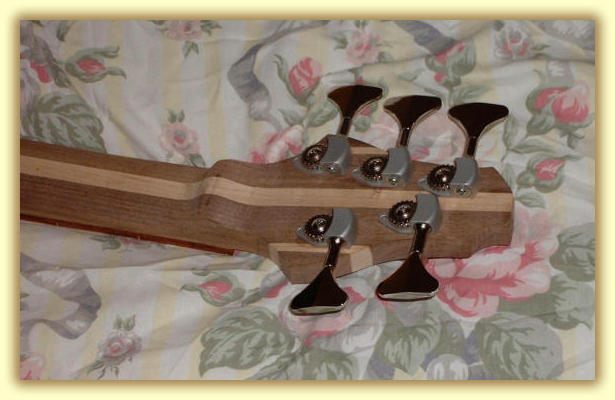
The Headstock shape was cut from a template shape on a band saw. All saw marks were drum sanded out and the flat edges were then sanded smooth. I stuck a tempory MDF leveling block to the back of the headstock so that I could keep the sides parallel to the ground. |
|
|
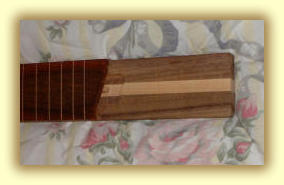
I cut out the Truss rod channels in my ususal way with a router, taking about 2m/m cut with each pass. Then I glued in the truss rods using epoxy glue. After a few days curing I tested each rod and they both seem to work nicely. The only problem is that the two rods are a lot heavier and may cause a few balance problems once it's all assembled. On my next bass I will try a lighter pair of rods, maybe a fender style or a dual action. It will certainly need some graphite strengthening rods. Hopefully, the heavy maple body and the long upper horn will offset the heavy truss rods and the Hipshot tuners (although they are lighter than normal tuners, there is 5 of them!). My next headache was gluing on the Cocobolo fingerboard. I used my normal wood glue and clamped it my usual way and I was very pleased with the results. I trimmed and sanded down the fingerboard edges so that the neck and fingerboard became one. I also contoured the neck profile and sanded up to 180 grit. Then I noticed a few cracks had formed between the neck and fingerboard. A few days later the fingerboard fell of the neck as if it wasn't even glued on! The Cocobolo had reacted with the glue and turned it to white powder! So I spent several hours cleaning up the joining surfaces and I epoxied it back on, which was no easy task because the neck profile was now rounded and difficult to clamp. Also the neck had to be aligned very precisely because it had been trimmed to the same taper width as the neck and there was no room for movement. |
||
 |
||
|
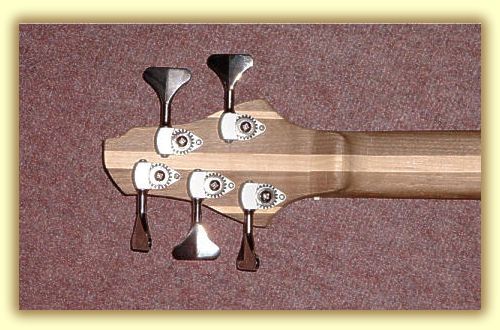
I then drilled out the holes for the tuners and tried them up for size. I chose a 2+3 style headstock, this will keep the strings straight across the nut to the tuners. I also allows a nice long string length past the nut on the B string which should help with the down force and percived string tightness. |
||
 |
I then fitted the zero
fret. This wire was files down so that it could be pushed into the slot
using finger pressure. Then I curved it to the same radius as the fingerboard
and epoxied it in. If it was pressure fitted it would crack the end of
the fingerboard off because it is so close to the end (the bitter voice
of experience!).
|
 |
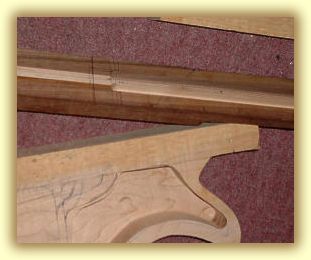
I then glued in the neck
to the body. Once the glue had dried I then plained down the neck to same
height as the body ready for the maple top cap. the plaining was very
labourious but had to be very precise. I had about 10m/m to take down
to a level surface.
|
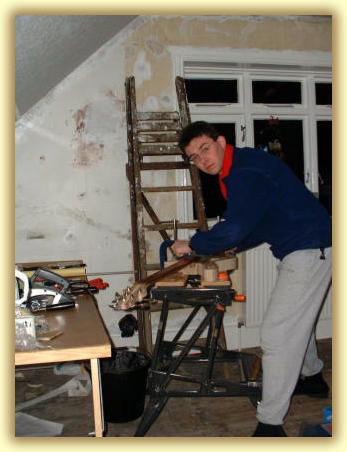 |
Gotcha! Should n't you be doing the decorating Gareth??? Erm yes.... |
 |
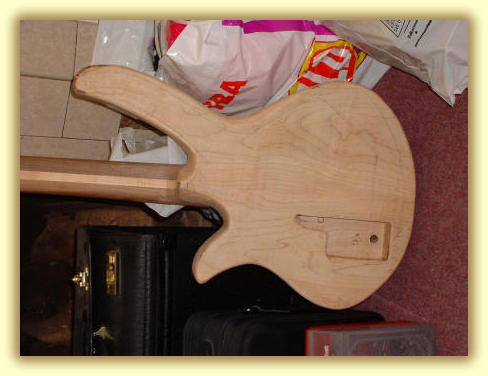
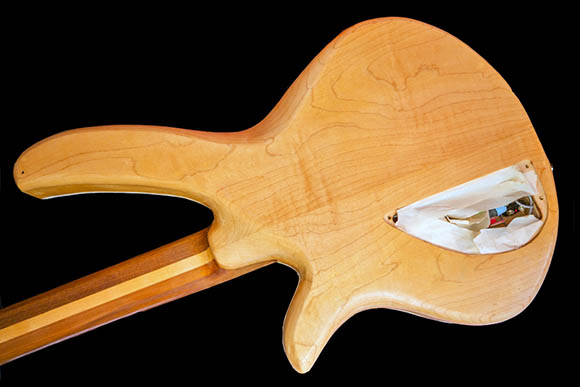
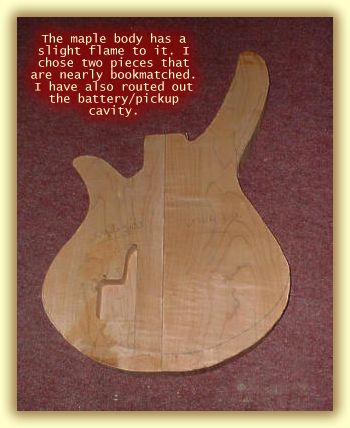
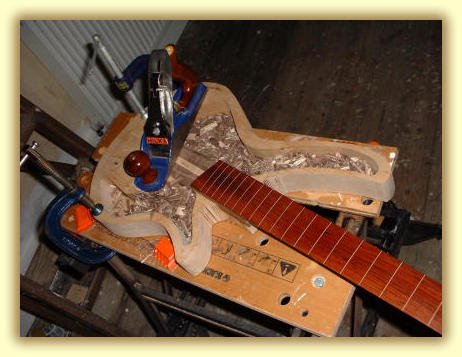
This what the bass looked like before I fitted the top cap. The routed out chambers are quite clear in this photo. when the top is glued in place these chambers will be sealed and not visable. The large bulky un-routed bit on the lower part of the upper wing was deliberate because I was toying with the idea of carving a chamfer to make an arm rest. this would have looked good but I wouldn't have been able to bind the edge. I would have rounded the edges over with a 1/4" roundover bit. The un-routed bulk next to the neck on the lower wing is routed out on the underside for the control cavity. I could ahve made my life a lot easier by routing out one big cavity and put a cover over the back, but I wanted the acoustic chambers to be completely sealed, so a seperate one was needed for the electrical bits. You can see how far the glued-in neck goes into the body. It's about 3" from the bridge centre line. |
|
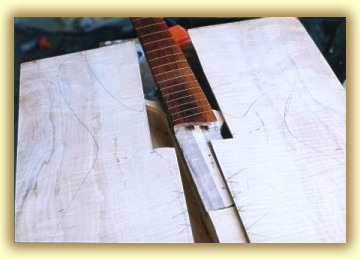
This bit was really tricky.
I had to offer up the top two halves and hand saw out the neck hole. What
made this particularly hard was the fancy fingerboard end shape I had
chosen. There was little room for error. With a lot of patience and slow
careful working I did a pretty good job.
|
 |
|
The two halves were then
glued down the centre. I Put a row of nails down each side of the work
surface beneath. These were about 2 m/m narrower than the width of the
top. This would provied enough side pressure and ensure a nice tight glue
line. I used that big pile of books to weigh down the centre and stop
it bowing. Once this was dry, I sanded the lop and underside flat.
|
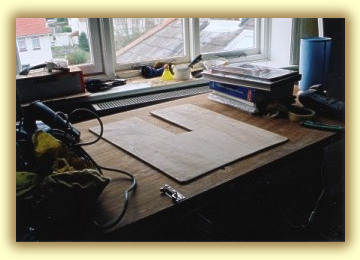
I used and old door as a work surface. |
|
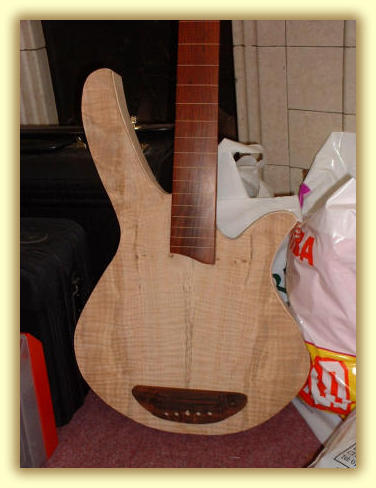
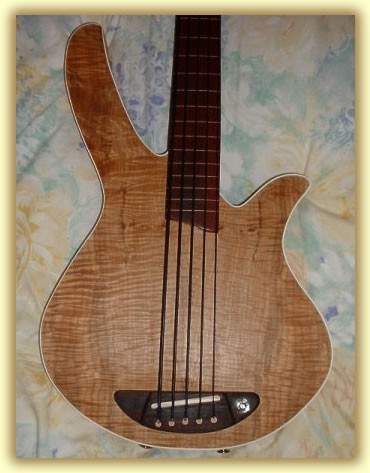
Now that is what I call a maple flame! I carved out the bridge from a flat block of Cocobolo (quartersawn) I drilled out the holes for the string retainers. I hollowed out the underside so that the ball ends have clearance. I then drilled out a hole for the volume pot to sit on the bridge (sorry Rob Allen, but it's such a cool idea!) |
|
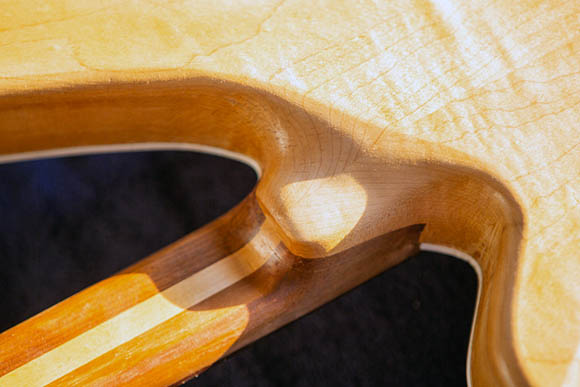
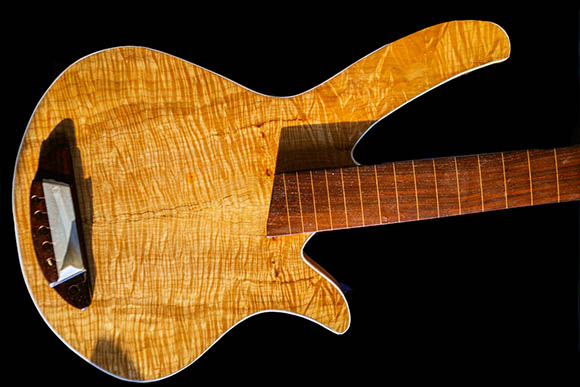
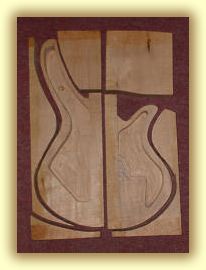
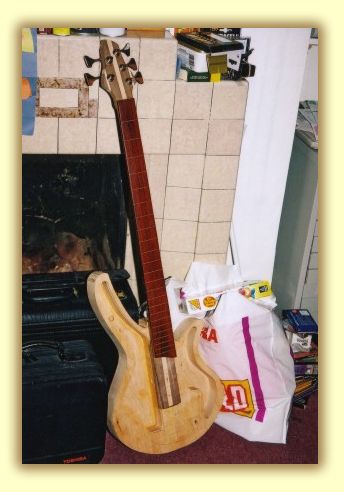
The 1/4" maple top has been fixed and the edges routed flush to the body sides. The top was hand cut around the fingerboard and the two halves joined together this was then attached as a single plate to the top of the body.
Then I routed out the binding recess around the top of the body. Then I used a rounding over bit to curve the edges of the underside. Next, I enlarged the control cavity and cut a lip for the cover to sit in. Then I carved the neck to body joint, again this was very tedious. It was hand carved using a surform and a rasp and I had a lot of material to remove. |
|
I really like the design of the Hipshot Ultra lite Tuners |
|
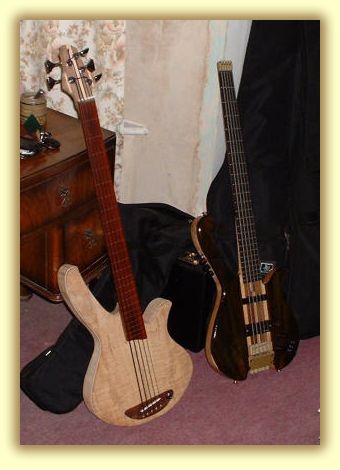 |
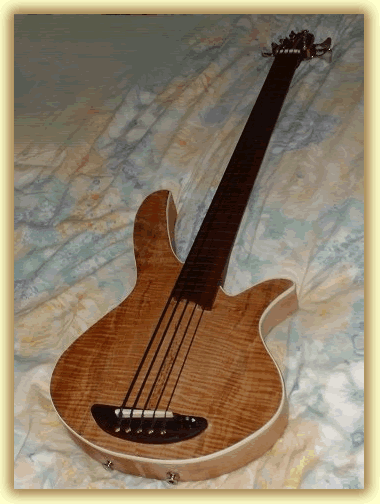
These two basses really look nice together. They are total opposites in terms of sound, although both are hollow and have the same number of strings. I couldn't wait to string it up, even though it needs a final sand, top binding and a finish, I just had to hear what it sounded like. Initially I fitted a set of round wounds (which are a spare set I use for emergencies) and I was amazed just how good this bass sounds. But I don't like the idea of the ruining the fine finish I put on the fingerboard with the abrasive roundwounds, also they sound a little too bright (I have been told that the Highlander pickup is very string sensitive) so I replaced them with a set of Tapewounds which I bought from the new Status-Graphite range and what a huge differance it made. This Bass sounds fabulous: very warm, woody and EUB sounding. It'll be great for Swing or Jazz. But I must stop playing it and get around to finishing this bass project! |
|
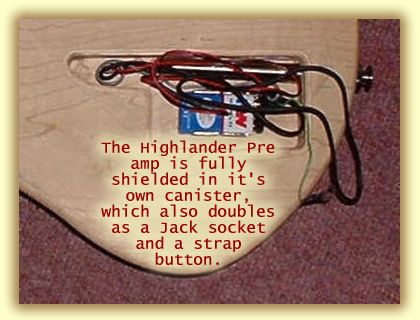
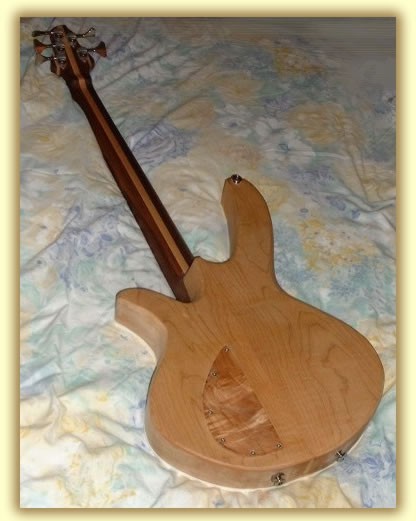
I used an off cut from the top facing to cover the electronics cavity. It stands out very well, especially in photographs. I oiled the back with Finishing Oil and it has darkened the maple and walnut considerably. The balance is spot on when standing but a little head heavy when sitting, although not intolerably. I guess it is a symptom of using 2 truss rods and 5 tuners. This is the first time I have used Hipshot "Ultra Lite" tuners and I have mixed feelings about them. They aren't particularly light, infact they weigh more than the Schaller 2000 I used on my previous 4 string basses (but the Shaller's achieve this by making them more compact and using less material). But they do look nice, not better, just differant. I think they would look better if they didn't stick out so far and would make the bass less clumsy, but I think that's something I'll have to live with. They have one distinct advantage over the Schallers: the action is a lot smoother and they are higher geared too, so I turn them less when tuning and they feel very nice. Another feature is that they are reversible, so I don't have to order a left and a right set. |
 |
|
The flamed top looks very stunning and I have taken lots of photo's and none of them seem to do it any justice. The black tapewound strings have subdued the brightness of it's tone considerably and has made the bass sound much more like an EUB. It has a nice plummy thump, bounce and mwahhh sound. I chose a high action at the bridge and a medium action at the fingerboard (I did this by raising the fingerboard with no neck angle, unlike all the rest of my basses). I did this so that I could really dig into the strings when I play, producing a thumpier, EUB sound. Currently I am not sure if I like the colour of the oiled finish, it might grow on me or I may descide to sand it down and use a plastic gloss coating instead. It may be that I got used to seeing the pale unfinished wood and got used to it. The white plastic binding stands out well against the maple and gives the bass a more "professional" look, although my "binding" technique isn't very good. |
 |
|
Technically, this bass has been quite a departure from my previous work. This bass has a deep set neck (almost down to the bridge), it has a raised fingerboard instead of my usual neck angle. The body hollows were routed from a solid block and not in my usual way (I perfer to laminate around a hollow core). It has a hand carved wooden bridge with a fixed saddles and top loading. It has a sole piezo pick up, with out a magnet in sight. One thing I will change on "hind-sight" is to add a pair of string ferrules on the B and E strings to add to the distance between the bridge and the ball retainer. I may even carve a new bridge to replace this one. Of all the projects I have built, I think this one has been the most rewarding. It was quite a challenge to fit the top around the neck and the long neck joint fixed deeply into the body proved to be tricky but it worked and I have a splendid Bass. And the volume knob...it goes upto 11!
|
 |
|
Summer 2022 re-work / overhaul It;s now playing and looking a lot better and the crazy figured maple top is now super glossy and looks great.
|
|