|
My first "Bolt-on" constructed Bass. A sweet 6 stringer with Bartolini Pickups with a new body shape and headstock. |
|
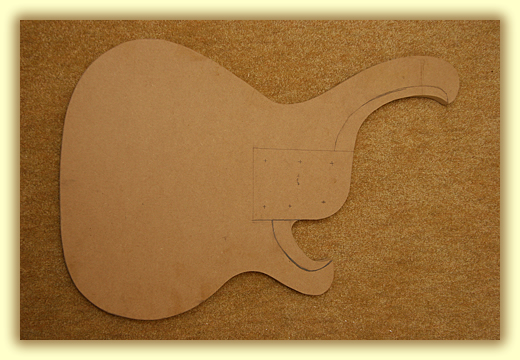
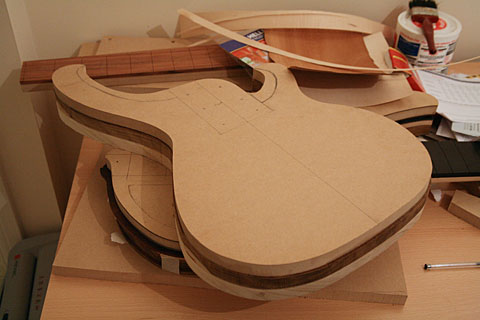
This is a 19mm thick MDF Template that I have created from the working drawing. This is used as a routing and cutting guide.
This is my new headstock design, first I draw an exact copy, then I cut a precise 19mm thick MDF Template. It's a more traditionally influenced headstock design.
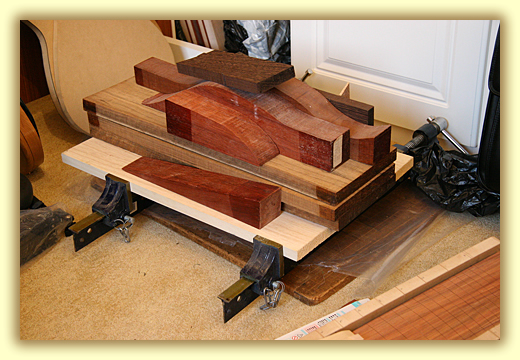
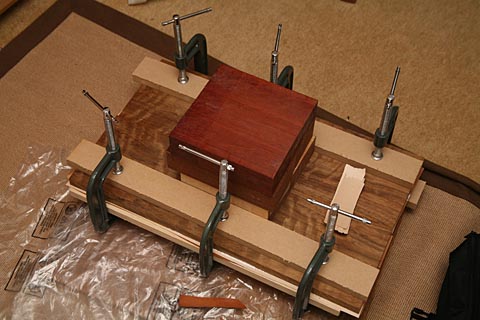
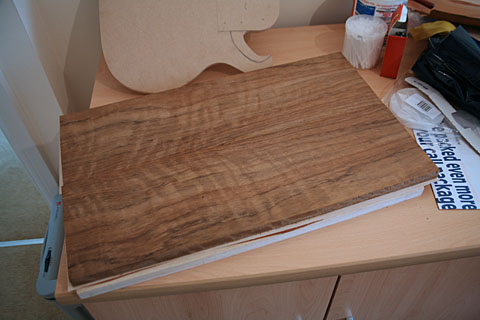
Here I am clamping the two glued Swamp Ash body halves together. I am using lots of off cuts and other body blanks to weigh down on the setting pair.
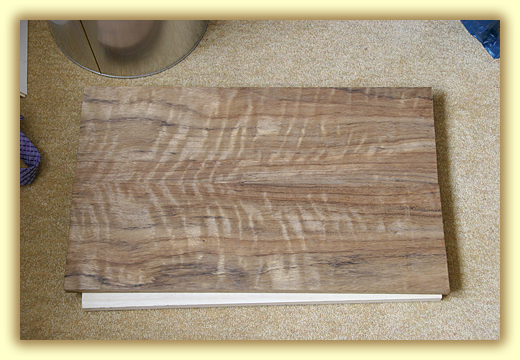
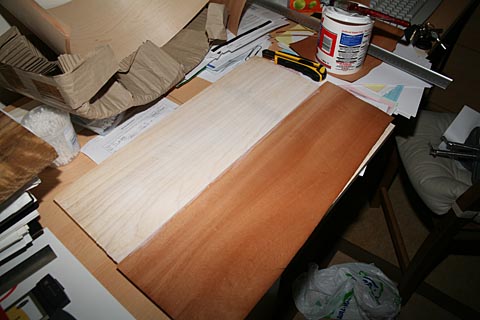
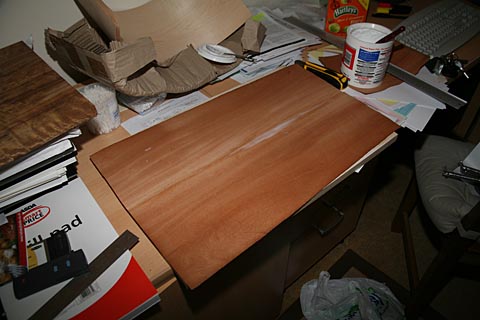
This bookmatched set of Ovankol will make the body blank top cap. This has been glued and is lying on top of the Swamp ash base that I glued earlier. It's from the same tree as the Ovankol that wen't into Mike's bass but not as spectacular (although still very stunning).
|
Bass 8 Diary Of Construction: Project "Bolt-on" This bass is going to be quite a departure from my other basses. This is because it will be a "bolt on" design. the neck pocket will be very deep though and travell a long way into the bass' body and use a 6 bolt construction. The Pickups will be Bartolini and the Bridge and tuners will be Hipshot Ultra-lites in black.. This is a completely new bass shape, a new body and headstock design. Over the last frustrating year, I've had plenty of time to dream up and design quite a few new instuments. This is the first of quite a few new designs that Ihave, but I doubt that I'll make them all! I hope that you like the new design and the new headstock is my take on a classic style, updated to accomodate six tuners, whilst still looking traditional and in proportion. This bass was been hugely influenced by Wal basses, who's style I absolutly love. When I descided to make a bolt on bass, Wal was at the top of my list in terms of construction, looks and sound. In my humble opinion, Wal make some of the finest bolt on basses currently available. Wal's design is very pure and yet very stylised. I wanted to carry this ethos over to my new design but make it my own design. I wanted a look that would shout both Funk, Soul and Rock all at the same time. Edgy, pointy and curvey all at once.
Construction: The first thing that I have done is create a 19mm MDF Body template from the original working drawing. This allows a far greater degree of accuracy when working on the bass than I have used on earlier basses. Then i did the same for a new headstock design that I have been working on for some time. Then I started work on the body woods. First I selected a very nice pair of matched 1" thick Swamp Ash plates for the underside or bottom of the body. This was thicknessed using my new Perform Thicknesser and the edges made true. Then Glued together using my trusty Sash clamps and a lot of weight to prevent bowing.
The important thing when clamping 2 thin (just under 1") pieces of wood like these is that it's kept flat as it dries. this is because the drying process can cause the wood to bow because it's slightly damp and the clamps apply a lot of pressure on the wood. So i place very carefully a lot of weight on top of the glued pair (with a sheet of polythene between them) and the whole lot is placed on top of a flat object too. This is left to dry for a bout 24 hours before I remove the clamps. Then I put the weight back on top and leave the setting pair for a further week, untouched. This allows the moisture to leave the set joint and out of the wood, preventing any warping or gluing distortion to kreep in. Then I did the same for a set of Flamed Ovankol plates. And glued as per the Ash plates. These plates will get some veneers between them before I glue them together. Probably something simple like a Magonany, maple, mahoganny sandwich. |
|
|
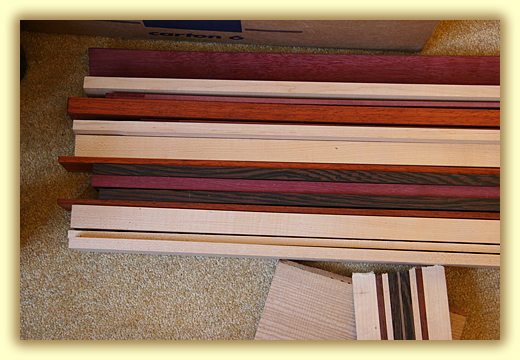
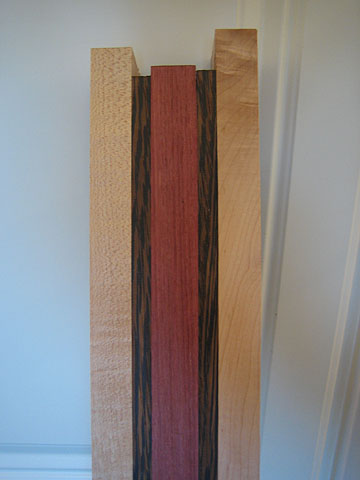
This is a compliation of woods that I've thicknessed with a view to make the neck laminates for 2 basses. because this bass is a bold on, I should be able to yield 2 necks from this "all through" neck billet. In a simular way that I did with my 5 string headless and my 5 string Piezo bass. I'm hoping that this billet will yield a neck for this bass and another neck for my next bass. Hmmmm Bass No 9. I am thinking of using a 1" Paduak central core, with 1/4" of Purple Heart either side and then 1" of Maple either side to finish off with. Or I might go for a Purple heart 1" core and 1/4" Wenge either side. With 1" od maple either side to finish off with. This would be less fussy and more simple. I'll be using a Purplehear fingerboard on this bass, so it would be nice to use a purple heart central neck core too. It'll all match then, tonally and in looks. |
|
|
My next task was to glue the upper body cap (Ovankol) to the lower body cap (Swamp Ash). But I also wanted a few veneers between them. Once upon a time, I would have just glued these two together for speed. but these days, there's no rush and I really enjoy the more complex aproach. I am finding more and more that I like the fussy attention to detail (I guess it keeps me interested) and trying to push my abilities. The down side to this, is it's getting longer and longer to finish them!
Anyway, basically a Maple and Mahoganny veneer sit between the two caps. So this is how the body laminates are layered; Ovankol, maple veneer, Mahoganny Veneer and Swamp Ash underneath.
I can no longer get veneers in the body widths that I used to, so I have to glue the veneers in two halves. I layed PVA across the top surface of the Ash (being really carefull to select the correct side, the non-show side is needed) and I scored the surfact lightly before I applied the glue. Then I layed each leaf of the mahogany veneer next to each other (I had also made a staight edge to the veneers joining line). I placed asheet of polythene over this and placed a big flat piece of MDF over this to semi dry for about 20 mins. this allowed me time to work on the next two veneers.
I cut the two leaves of Maple in a simular way and I made a straight edge along the gluing/centre line. Maple is such a different wood compared to Mahoganny. It is smooth and has no grain, where as Mahoganny has a deep grain so it tends to glue easier and works better.
I applied a glue layer to the top surface of the mahoganny and layed the two leaves of Maple along side each other. It is much harder to glue maple and it has a mind of it's own in terms of slippage. It took quite a while to get these two layers to stick in the right place.
Then I applied a glue layer to the maple's top surface and carefully placed the Ovankol top cap, making sure that the centre lies all align. I used 6 G Cramps and a set of MDF strips for the clamps to spread their load over and protect the surfaces of the body from the clamps.
Here's the finished body blank. |
|
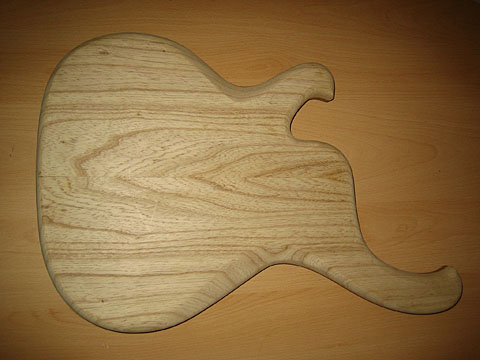
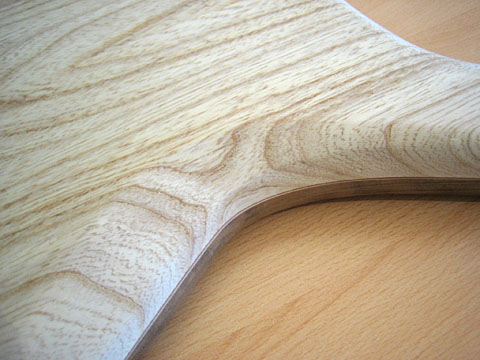
This is the underside which is nearly complete.
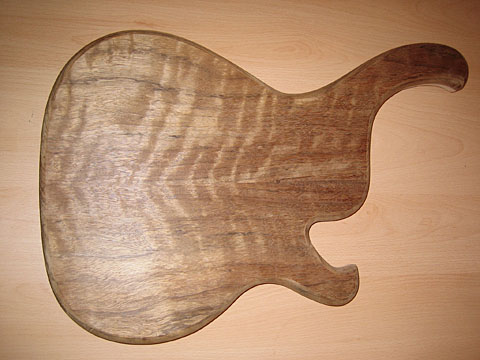
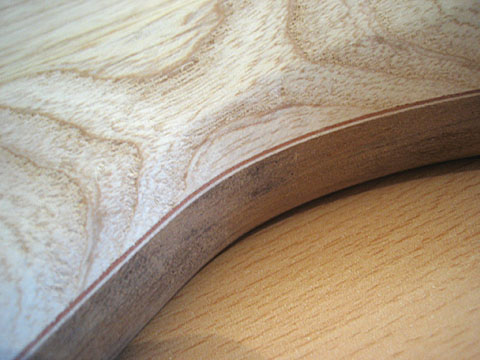
This is the top which I have just recently rounded the edges to 1/2" round over.
Hmmmm Lovely coach line!
Harsh deep contouring to the top horn cavity. I wanted edges here so I carved a deep flat angle I've sanded the top and bottom completely flat now, down to 120 grit. Followed by a Scraping phase. These are nearly ready for filling prior to laquering. I had best wait until I've routed the neck pocket and the Pickup / Bridge holes too. I haven't even though of the control cavity yet either. |
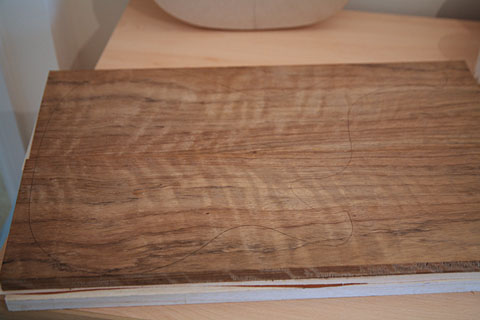
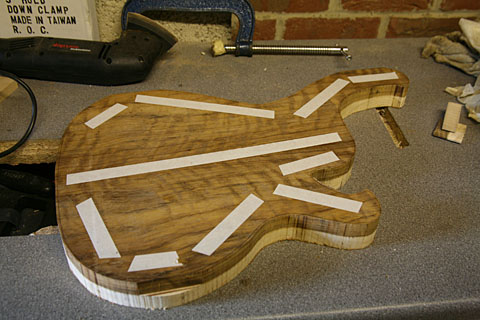
Then I marked the Body shape on to the body blank by drawing around the MDF template using a Black ball point pen. I just fits, with a little part of the top horn and body just clipping over the pen line. This isn't a problem because this will be covered but the rounding over on the edges later.
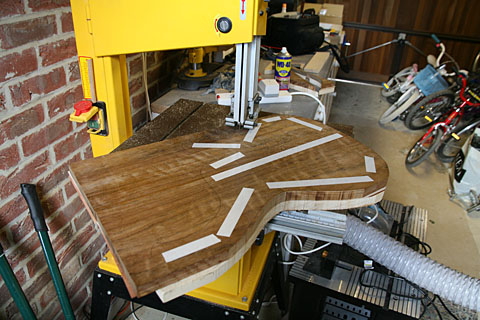
Then I started to Bandsaw the body. As usual with the cut from a bandsaw, the edges are quite rough and require a fair amount of sanding to smooth. But the joy of a powerfull and well set up bandsaw is that the edges are square and the cut takes no time at all. Thinner and softer woods can be cut on a fret saw but with Ovankol...a bandsaw is definatly needed. Ash is very very soft compared to Ovankol and I'm glad that I decsided to use Ovankol for the top. I don't think that Ash should every be oiled and waxed as a finish because it's just too soft. It knocks and dings far too easily. A hard laquer is certainly needed to protect this wood. It would also explain why ash bodied Fender Jazz basses can look so beaten up.
In the past I would smooth the edges of the bandsaw cut in either two ways, the larger curves and flat edges would be smoothed using the large sanding disc on my Perform sanding machine. The tighter radius curves would then be smoothed by using a drum sander barrel fitted to my Pillar Drill. But I wanted to try another method that was suggest to me by another luthier. The idea is to use a Router to smooth cut the edges and get a good finish.
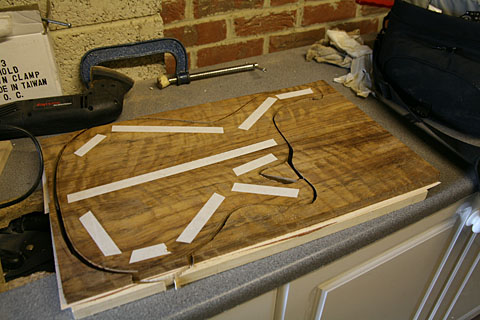
So I attached the MDF template to the top of the body using Double sided tape. And neatened the edges by using a Template follower router bit on my router. The router was mounted upside down in my Router table. I'm not too happy with the results using this method. When using a hand router, the router machine will pull away from the work if the bit skips. This can occurr if the bit hits notty piece of wood, causing a small blemish which can be sanded out later. But using the router when it's fitted to a router table prevents the router from moving. The bass body is quite heavy and has a lot of surface friction and will not kick much. Because the router is bolted to the table, it isn't going to move either. Basically I have some quite deep damage to the outside of the upper horn that I need to work out how I am going to repair. I am very dissapointed with this method and I am certainly not going to use it again! Ovankol is a very tricky hard wood to use. It burns easily and spliters easily even though it is stunningly hard. Every hardwood has it's own distinct properties. Good and bad. The most neutral to work with is Mahoganny.
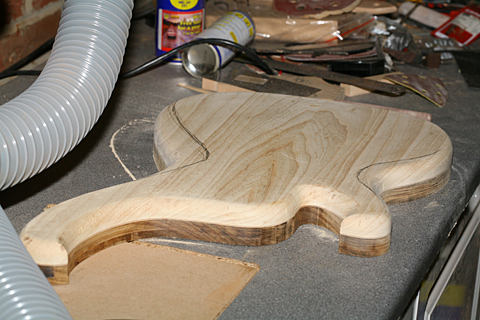
While I had the template fitted, I took the liberty of fitting a 1/2" round over bit in to my Router table and rounded off the edges on the under side of the body. The light Ash that I used for the underside of the body is very light in both colour and weight. Far lighter than Maple. But it's also quite fragile and the router round over bit left quite a few burn and chaffing marks. It's the wood not the bit that is as fault (although I think that this bit is getting quite old and blunt). The Grain is so pronounced on this species of wood, cutters have a tendency to dig in and tear the grain out. It's not too bad but it means that I have a LOT of sanding to do. I marked the countouring with a pencil and set about hand carving the recessed areas. Blood sweat and tears later...it's getting there. I put the top and back through a rigourous sanding pahse to get the dings and knocks out of them. I then tested the ash back by appliying some clear grain filler to it and letting it dry and sanding it back. This Ash absorbs so much liquid, I think it will need 3 applications. The grain is deep and it's gonna be tough to fill. I still haven't bought the pickups or a bridge. Come to think about it, i haven't got any hardware for it yet...hmmm, where's my catalogues?
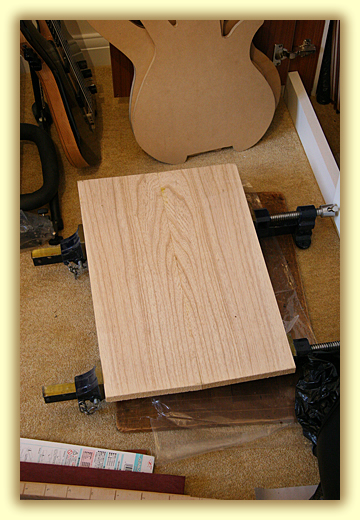
This is the newly plained neck blank. I selected the neck woods from my stock of laminates. I chose Purple heart as the central core. It's a wood that I've been meaning to use for a while. This is a 1" wide and I placed a 1/3" Wenge laminate either side followed by my usual 1" Maple laminates. The maple help the tone to stay bright and balanced, too many dark woods and the tone will get muddy and indistinct. After a few week's of settling after gluing I ran it through my thicknesser on both sides. I used my normal "all through" neck laminate stock, so I'm hoping to get 2 bolt on necks out of this billet. I could yeild 3-4 necks if I was prepared to splice the headstock on, but I'm not sure that I want to do that. Also I don't know what I'd do with all those neck blanks!
I then carried on the work on the Body. I rounded over the edges of the top Ovankol with my usual 1/2" round over bit. This bit is getting blunt so I needed to sand alot of the burn marks off. I really need to get a new router bit to replace this old one. I've had it a long time and it was a cheapie to start with. It's far easier and cost efficient to buy a new clean and crisp cutting cutter than us a dull old one and spends days sanding the burn marks out. Ever tried sanding a radius?
I used my trusty files and rasps to contour some of the rear body hollows. One on the upper edge, the largest carving on a bass and a smaller one on the lower horn curve. These are to make the bass more comfortable when playing on a strap and when sitting down. In these two photo's, the two veneers really stand out and give a nice classy air. It's just a mahoganny and maple veneer but it sets this bass off nicely.
|