|
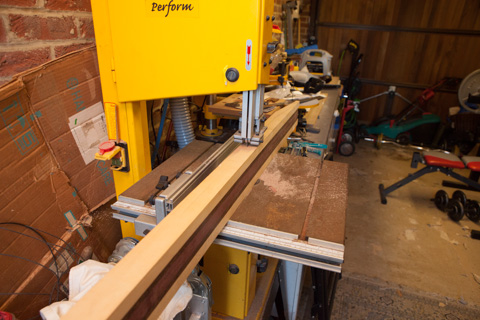
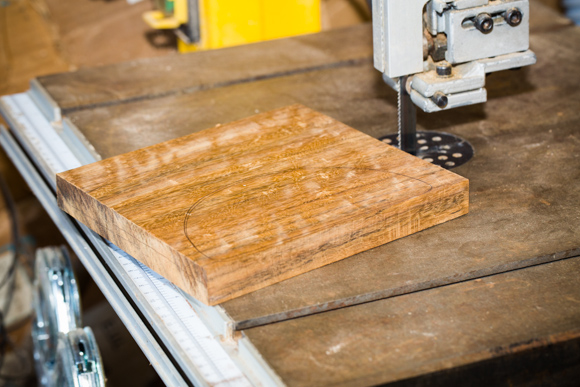
My first cut using my Bandsaw in nearly 7 years. The top headstock taper was first to be cut.
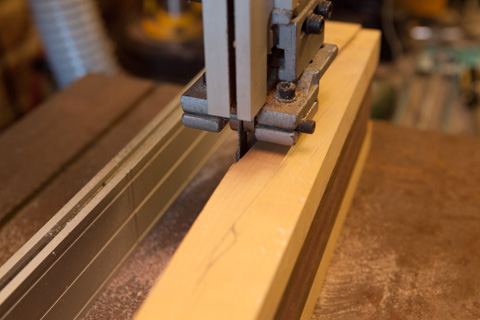
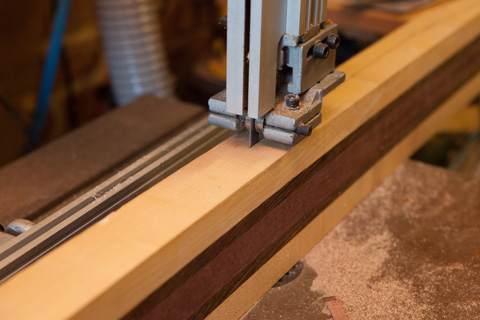
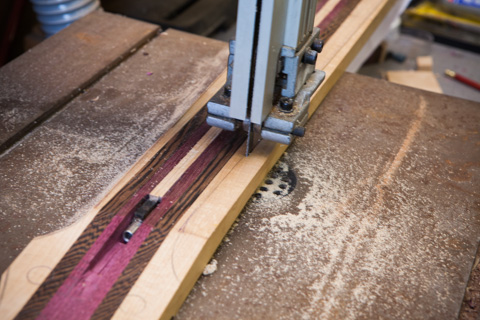
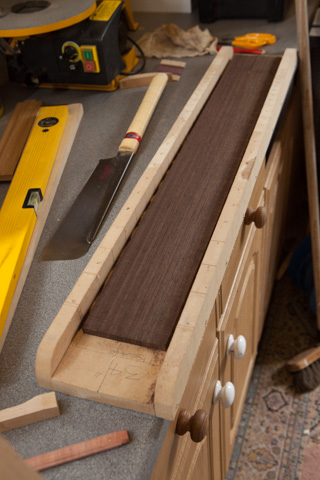
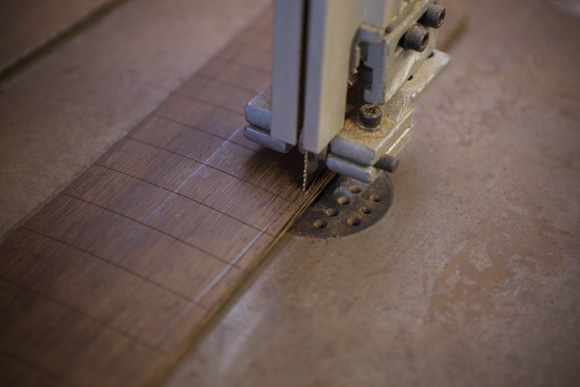
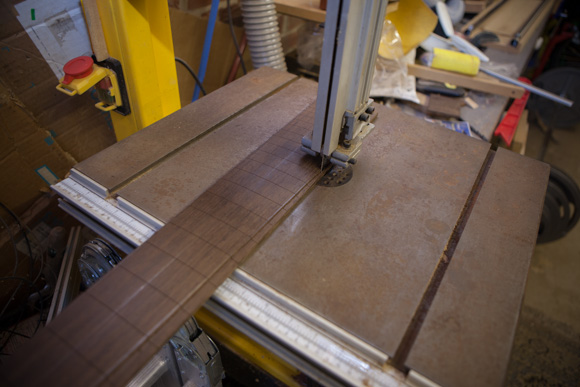
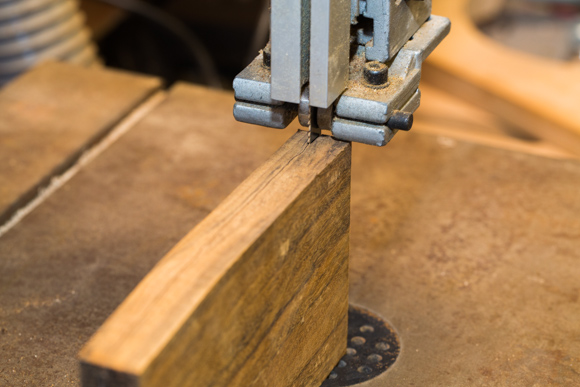
The next cut was the neck thickness, which is the longest cut on the neck and the heaviest load on the saw. It's the full thickness of the neck billet, cut across it's widest point and along the full length.
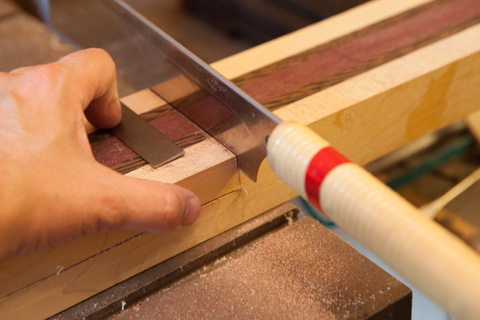
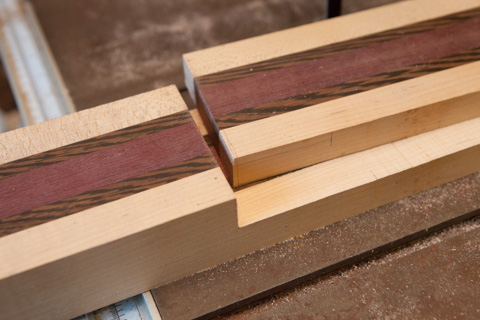
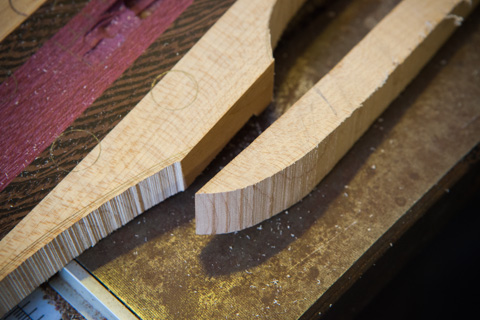
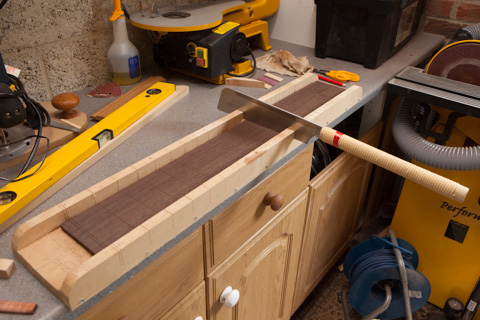
The end of the neck needs to be manually cut, so my trusty Japanese backsaw comes in really handy here. No effort and a crisp and clean cut. Love these Japanese back saws. So easy and such a nice finish to the cut.
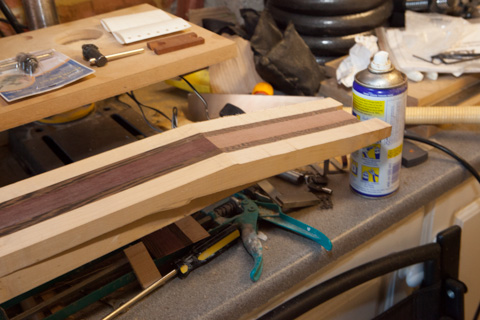
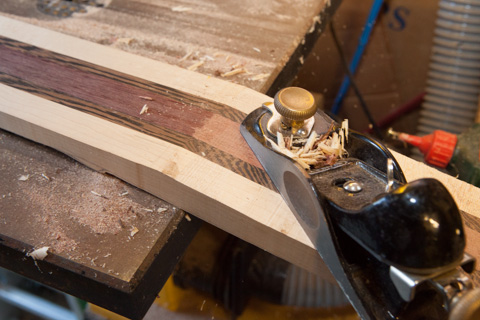
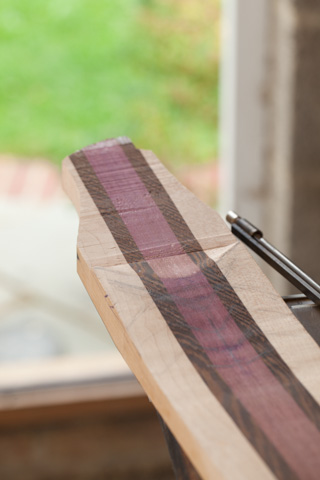
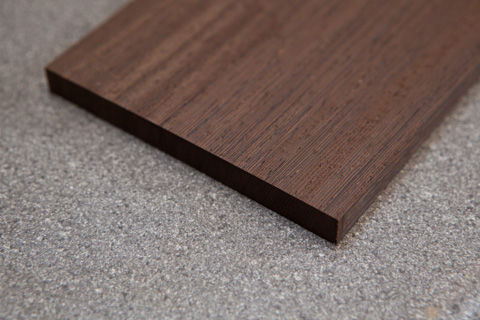
The top of the headstock needed a lot of planing and scraping to smooth out the bandsaw marks.
The underside of the headstock was really bad, I think my feeding into the bandsaw was a little poor today.
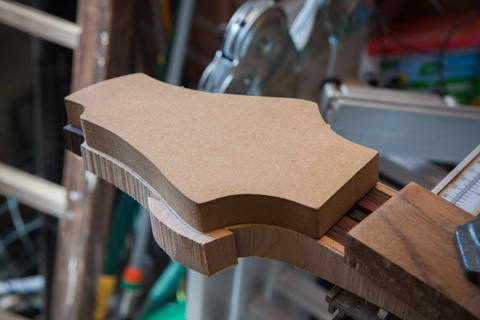
OK, I've settled on my typical 6 string headstock...I just prefer it and it's a little smaller and less clumsy looking.
|
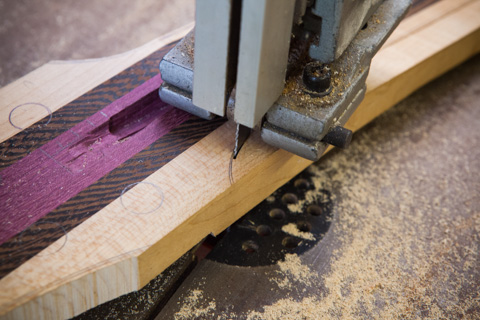
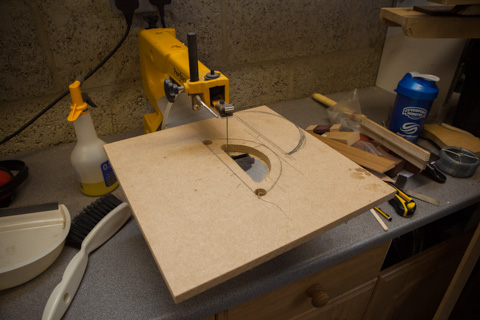
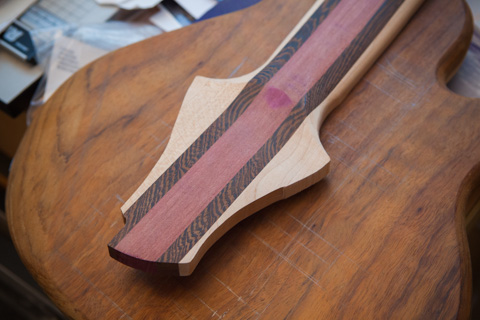
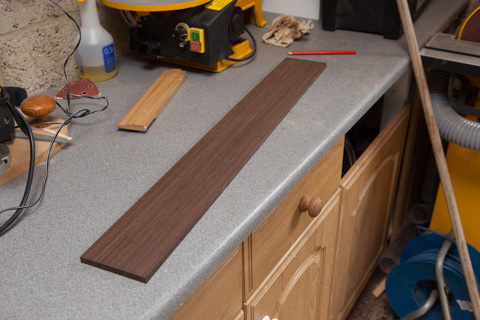
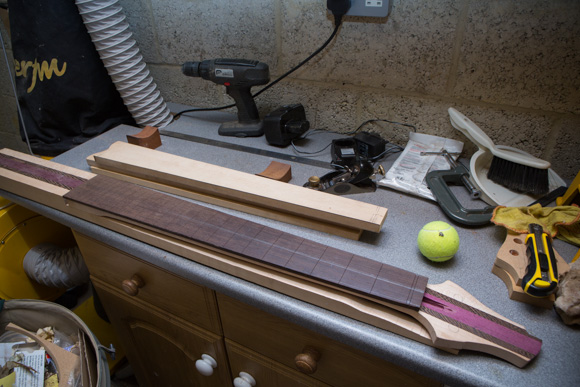
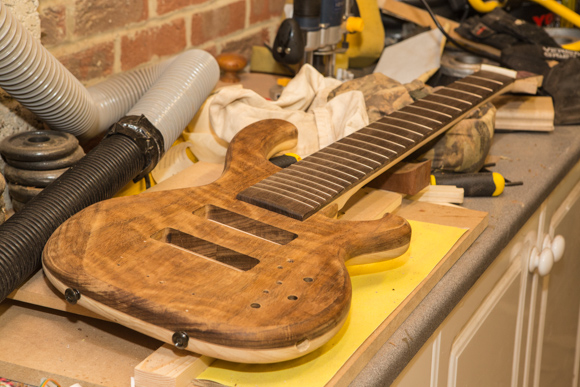
Bass 8 Diary Of Construction: Back after 7 years!!! I'm back after a 7 year absence from bass making and I'm really looking forwards to progessing with this bass. I've been looking at the blank billets and body blank in my office for waht seems like an eternity. I fitted a fresh new ripping bandsaw blade and cut the neck blank out of the billet. It went well and the new blade made easy work of it...although all the barings on my bandsaw are old and rusty...and made a real noise.
This went well, but the new blade leaves a lot of marks on the wood. So I later spent about several hours smoothing, scraping and planing the back and top of the headstock area smooth. It's not quite finished but it's nearly done.
I carefully cut out the volute area and the new blade is a little ticker than my last one. Less fine but better at ripping, which is what I'll be using this blade to do more of. Finer work will be done with my router.
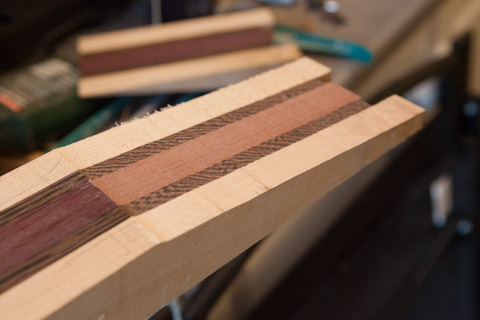
A nice crisp end of the neck, leaving a nice sized billet for my next project...maybe a 6 string headless which I've had on my mind for the past few months.
The other question is which head stock design shall I use? My standard 6 string head stock works really well and has plenty of room with it's 3 a side tuners. But, this bass was originally designed with a 4 over 2 design using a fairly traditional headstock design...I just don't know if I can bring myself to be THAT traditional"...ok I know it's sixer and not a normal 4...but I don't know. |
|
I've recently been researching fingerboard illumination again. I'm thinking fibre optics this time....
So my Bartolini pickup choices are limited for a six string bass. So I'm seriously considering Nordstrong. They make some really interesting pickups. I'm thinking of the dual coil blade style with single coil and humbucker switching for both pups.
Fo my next bass, a six string headless, I will have a Jazz and humbucker. Wired for a matched single coil pair.
But I need to finish this bass first!
I really need a routing table soon. I'm hitting the limits of routing without one.
|
|
|
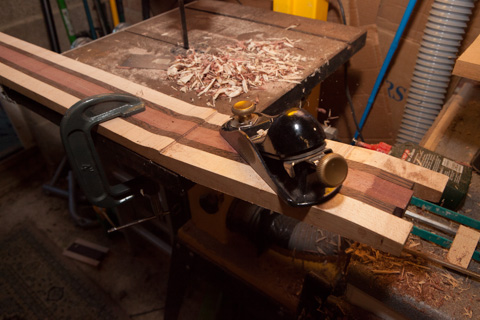
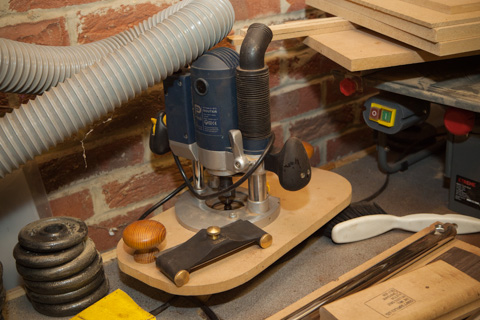
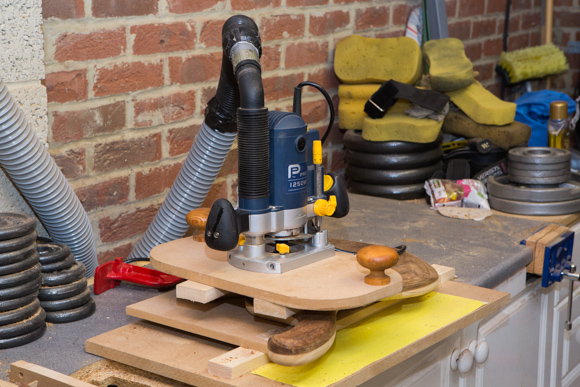
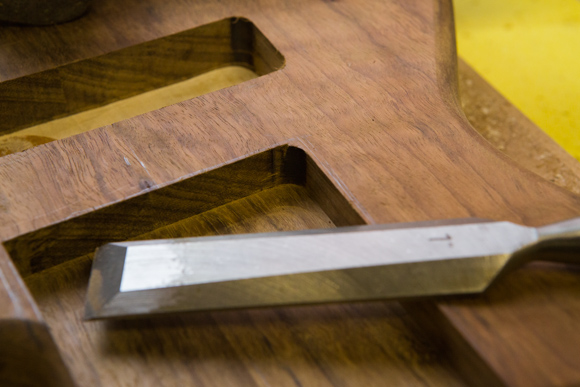
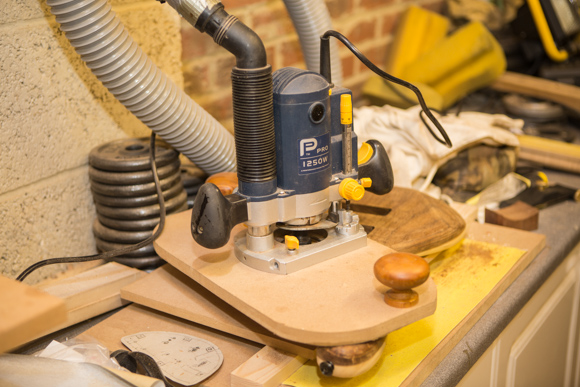
This is my old router, it's stil giving excellent service although the fence is in a bad way.
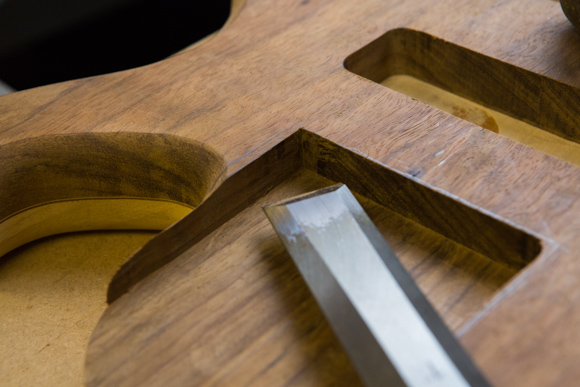
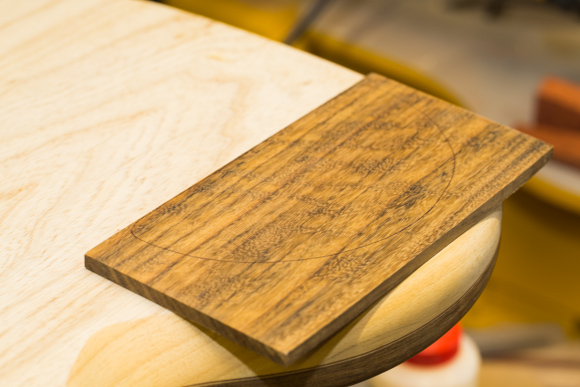
The end of the fillet
|
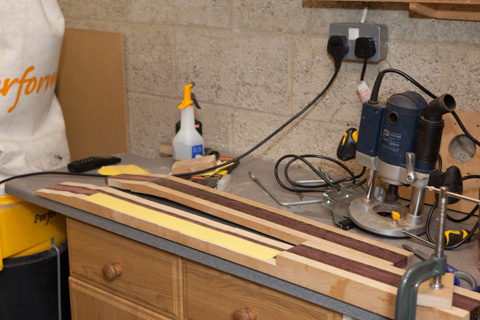
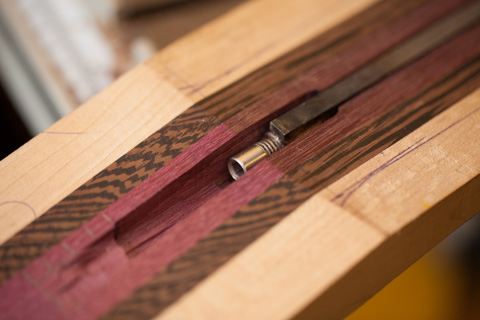
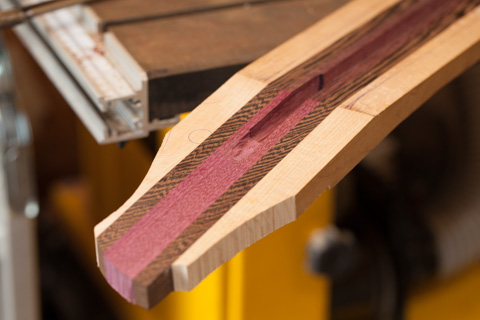
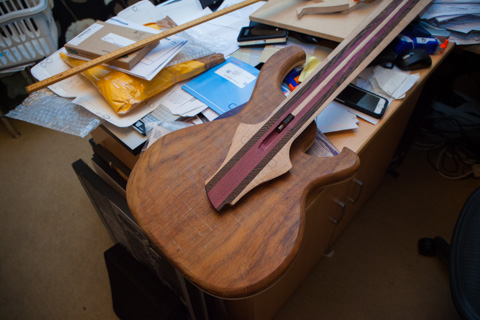
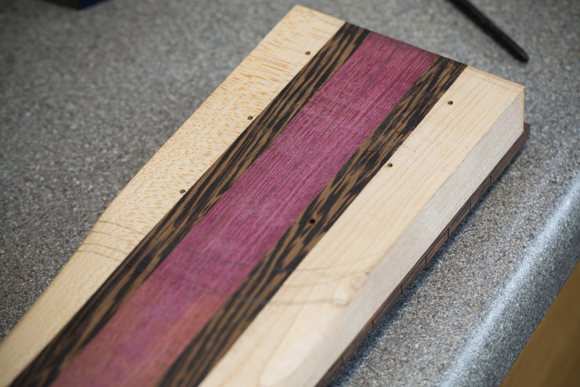
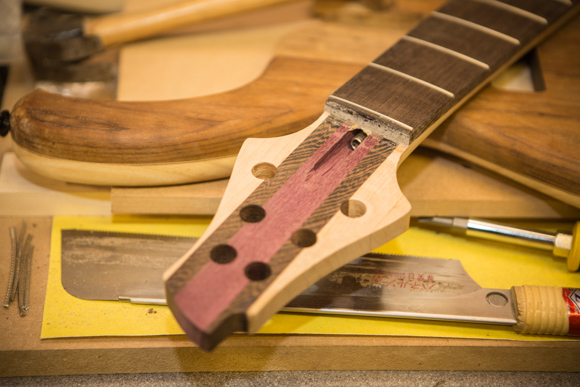
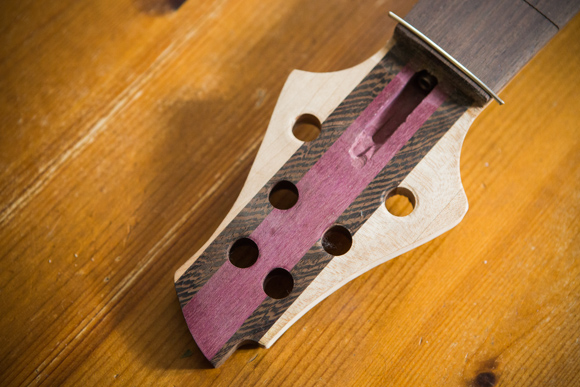
Next job is to re-mark the centre line and head stock. Mark out the truss rod and then rout it out. Easier said than done! I'm not going to bother with carbon rods in this bass. I'm not convinced the neck will need it with a 1" core of purple heart...it's a very stiff neck already. Although I have just found a great source in the USA who sells carbon fibre rods very cheaply...well, cheaper than Stewmac!
Here's a list of things I need to purchase to push this bass forwards: 6x Hipshot ultra-lite tuners in black Hipshot A style 6 string bridge in black .750" / 19mm spacing Bartolini 69 J1 Hum cancelling Jazz pickups
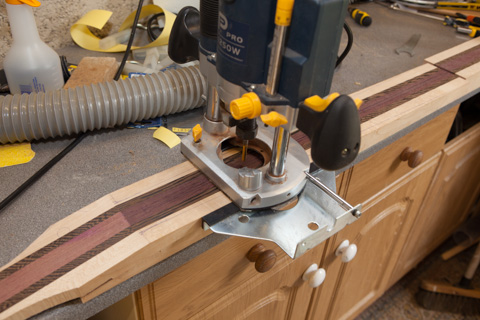
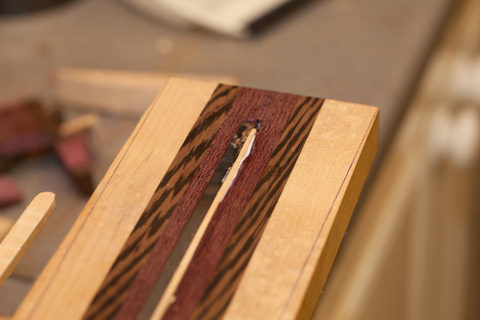
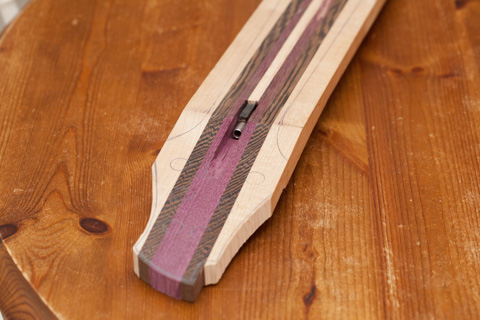
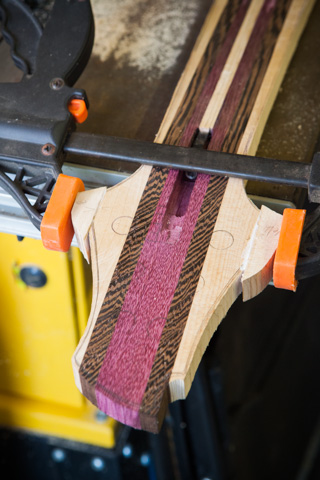
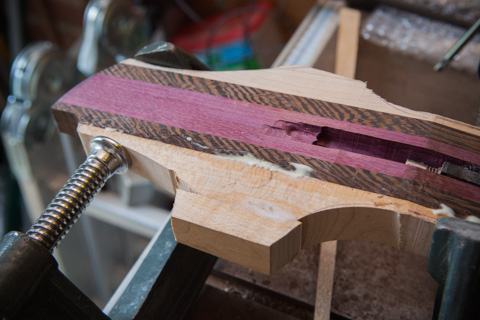
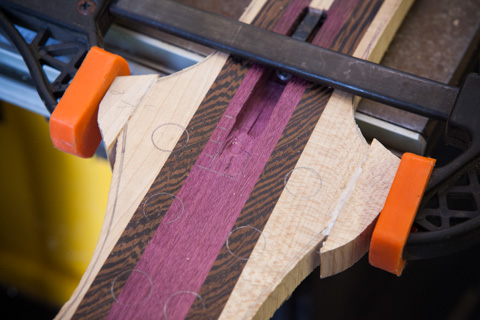
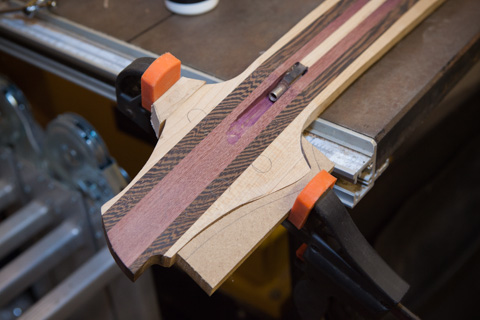
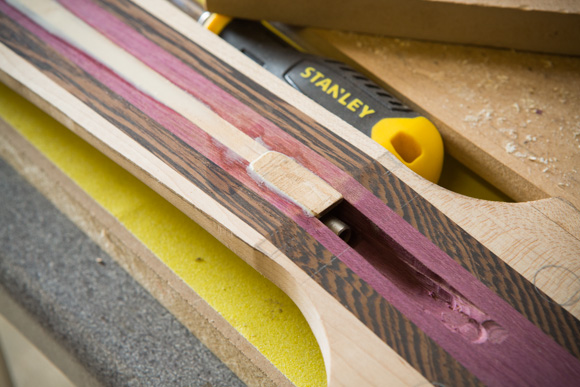
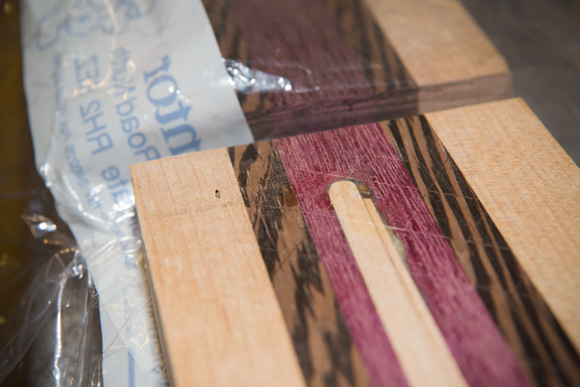
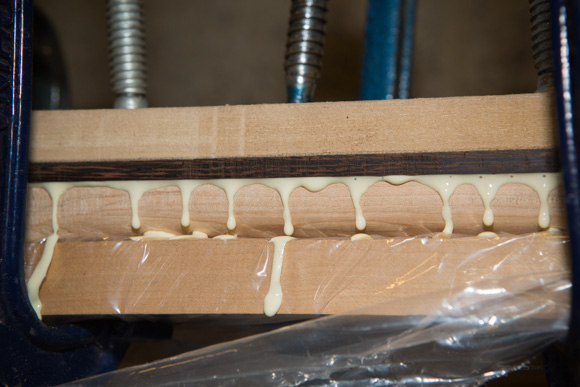
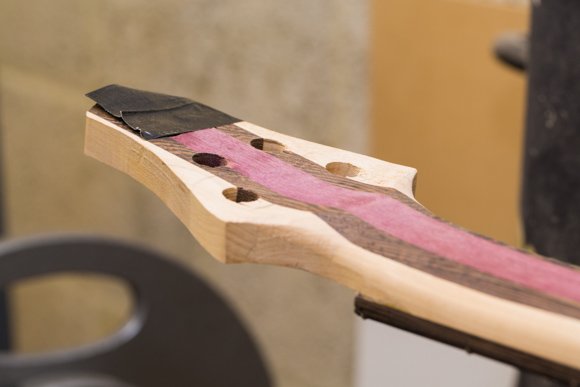
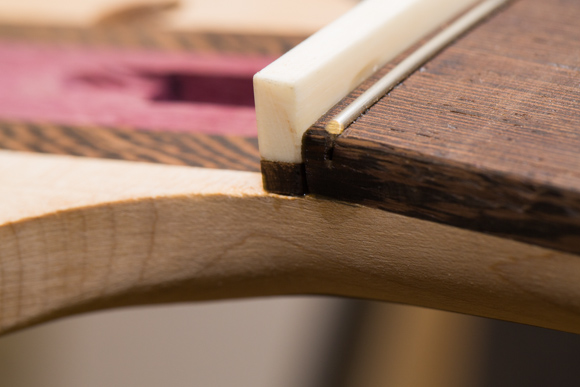
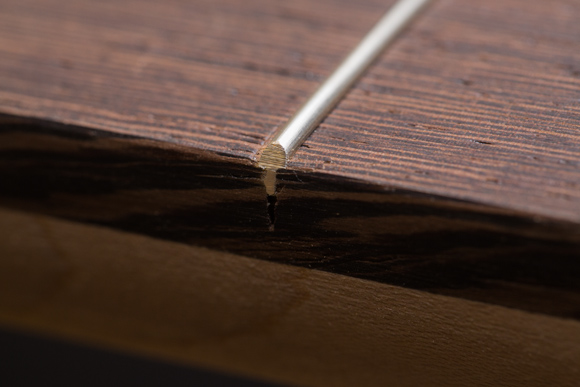
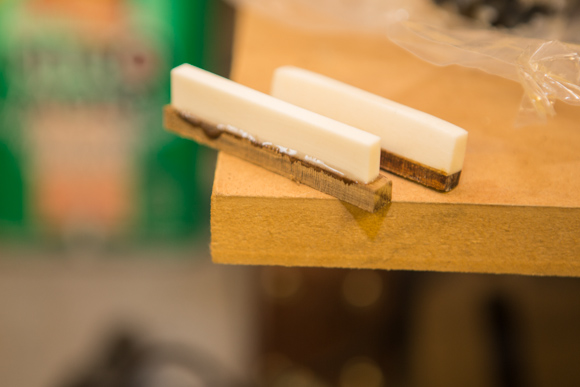
I've showed the truss rod in place and a gap can be seen clearly. This will need a fillet to take up that space or the truss rod will be loose and will probably rattle at certain frequencies. It could also effect the ability of the truss rod too.
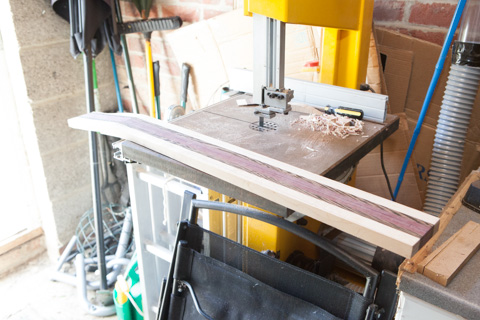
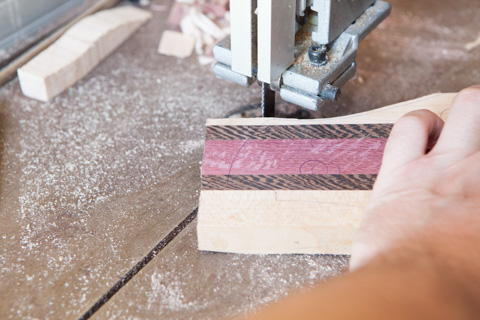
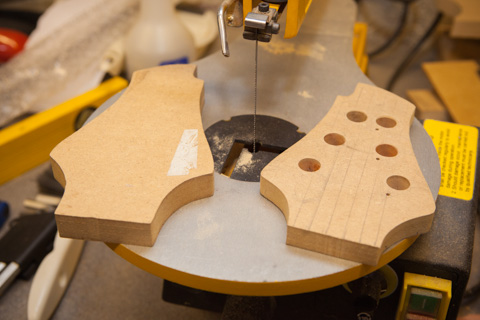
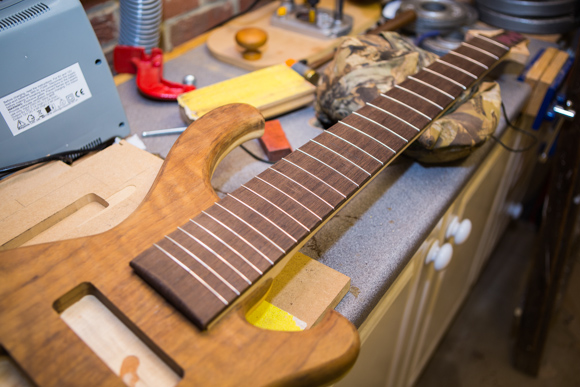
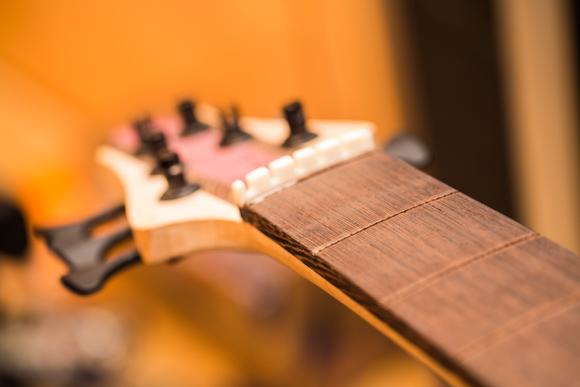
The head stock profile was roughly cut on the bandsaw and will be neatened up later using a template and a router.
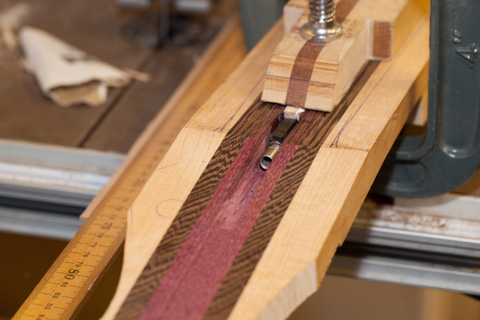
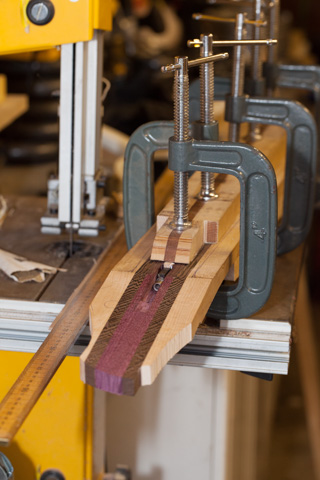
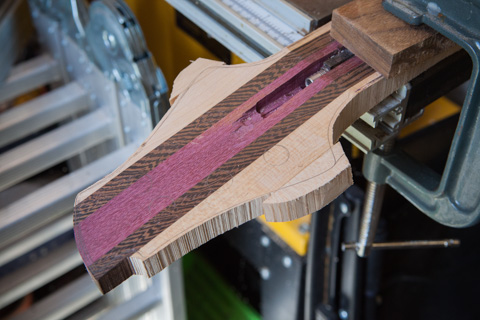
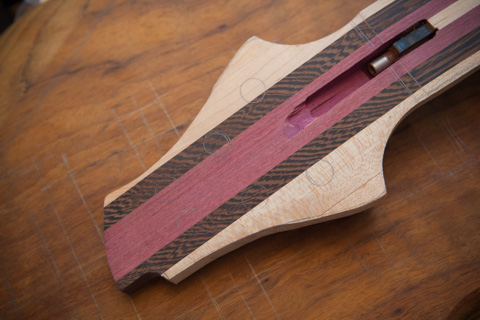
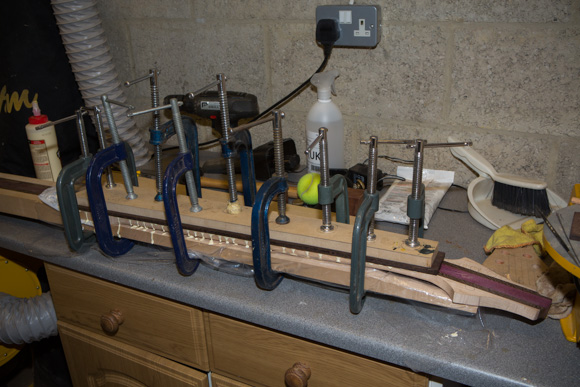
The 2 way truss rod is glued at the non adjusting end with a big lump of epoxy and a small dab under the adjusting surround. The top fillet was then cut and sanded to a precise fit. This was then glued wood to wood only using PVA glue and clamped in place to dry over night. Once dry, I planed the fillet flat to the top surface of the neck. It was only then that I realised I'd used on the extended length truss rod, reserved for 35" scale bases. So my choice now is to continue as a 24 fret 34" bass, or make a 22 fret 35" scale bass. I think I'll stick to the 34" scale. I'm not very happy about the truss rod access rout, that will need tidying up at a later date. I have a number of fingerboards I could use for this bass, several Macassan striped ebony boards, a stunning tulip wood board. A santos rosewoob board which has an unusual honey colour. A really nice purple heart board, but I think I will use a wenge board I've had in stock. I think it will suit this bass' tonal charector and look nice. Next, I'll need to start thinking about preparing the Wenge fingerboard. It'll need slotting and then gluing to the neck. Then I can taper the neck on either sides. Then I can finish the headstock and start carving the neck radius. The pickups and bridge unit are on order, 3-4 weeks shipping from the states.
I left around 2mm over the line spare for the router to neated up later. Bandsaws don't give a good finish, they are only rough cuts. I have seen some nice clean cuts from top end saws with certain blades on them, but I need to cut thick stock too.
That's the truss rod cavity cut. I'm not very happy with the results, I'll need to put a fillet along the edge of the rod due to a slight miscalulation on my measuring.
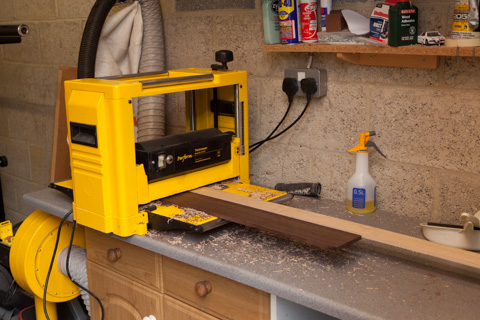
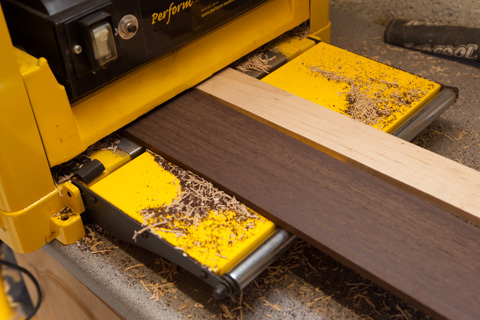
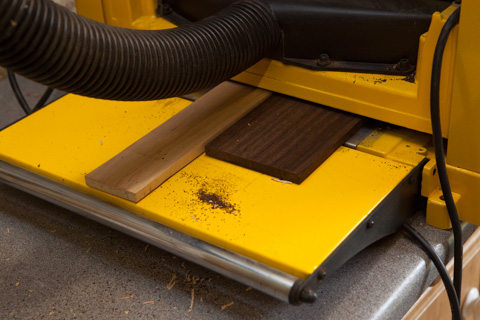
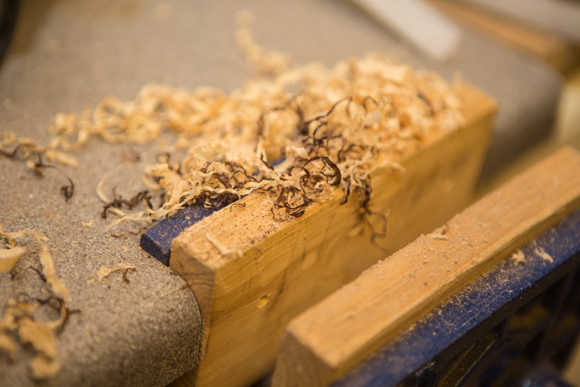
This is the wenge board being thickened using a planer ticknesser. It's not an expensive machine, but one which I hardly use...but it literally saves hours and hours of effort. The piece of long maple is a sacrifcial piece to prevent snipe on the fingerboard. Every thicknesser causes snipe and running another longer board alongside it causes the snipe to occurr on the maple and not the wenge.
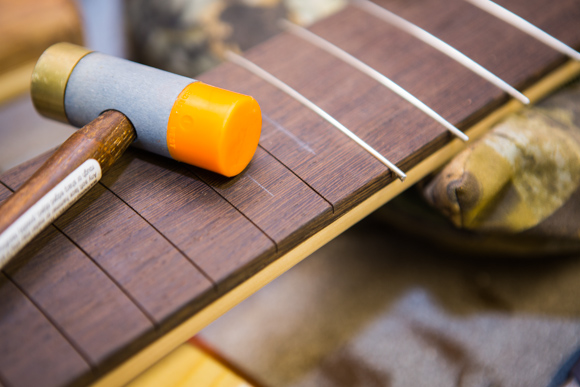
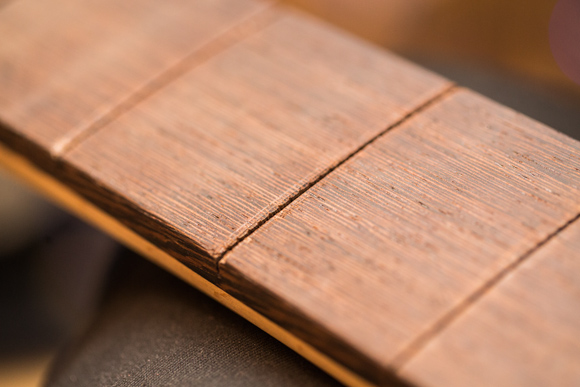
My prefered fret slotting saw of choice...a Japanese backsaw. It's a lot easier than a fret saw and produces a really clean cut. The fret slot cutting went really well and I'm very pleased with the results.
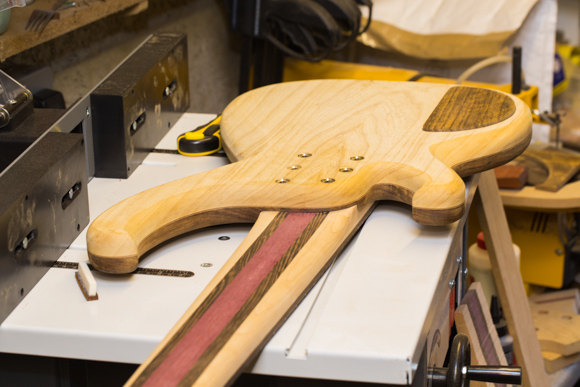
I measured the bridge markings on the body blank, this allowed me to work out the string width and thus the the neck width. I'm using a 19mm spacing, which is wide for a 6 string bass. It's the normal string spacing which is found on a 4 string. O then marked up the neck taper and cut it with a few mm spare on the band saw. It's under cut so I can neaten with a router and a template later.
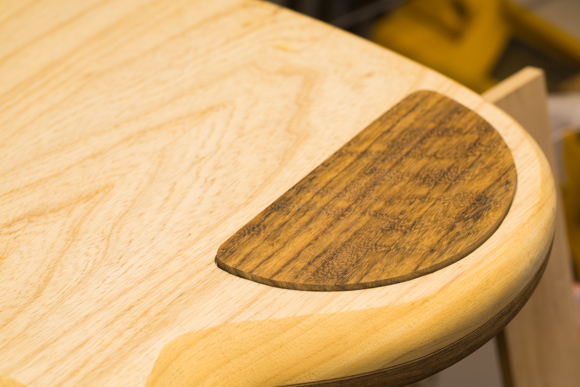
From the off cuts, I trimmed them down and added the extra width to make up the head stock width. The wood matches and is already the right thickness.
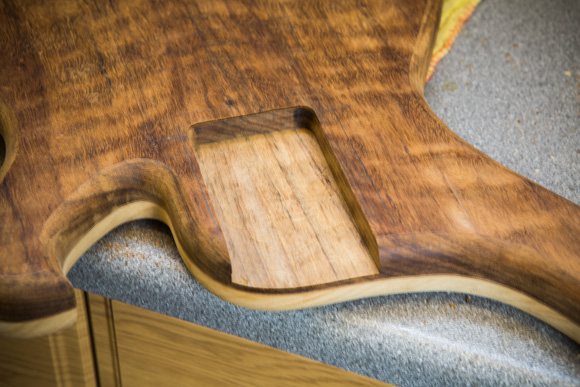
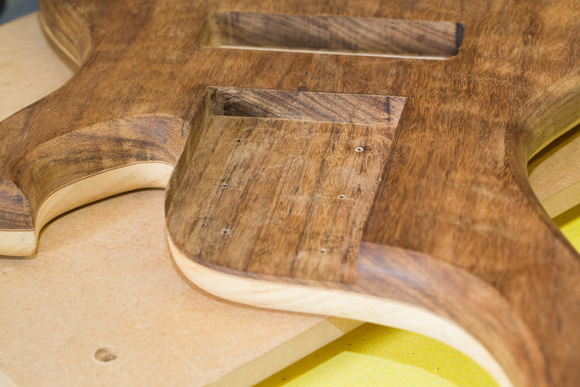
The body needed some more shaving to make the playing experiance better. On this bass I chose to go quite deep with this cut out. The ovankol is very very heavy and any material I can take off will really help with the weight. This was cut using a rasp and a well prepared scraper. My plane just chipped in and sanding wasn't too effective either. It went well and I think it looks about right.
Because this is a new body design, I can't re-use many of my existing templates. So here I am cutting out the new control cavity template on my fret saw.
I measured the bridge markings on the body blank, this allowed me to work out the string width and thus the the neck width. I'm using a 19mm spacing, which is wide for a 6 string bass. It's the normal string spacing which is found on a 4 string. O then marked up the neck taper and cut it with a few mm spare on the band saw. It's under cut so I can neaten with a router and a template later.
The pickups and bridge arrived last week. But unfortunatly, the bridge which arrived was for a five string (not my mistake), although the right spacing. But more of a concearn was the Bartolini 69J pickups...they won't make the string width I'm after. Apparently, they can only just make a 16.5mm spacing...which is way too tight for this bass. So they have to go back and this bass will have to wait a little longer to get finished. I think the only choice I have for this bass are the very wide 141mm single coil pickups. Which will carry the tones I'm after but not necessarily the look. While I wait, I have a number of other projects I can be getting along with...
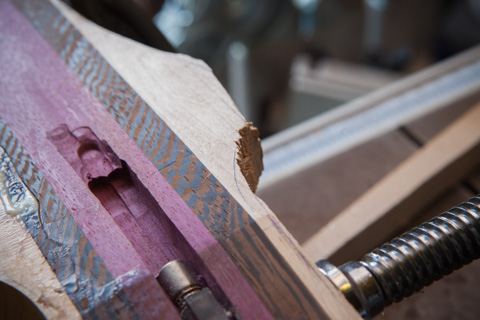
And the moral of this story is...make sure your router bits are new and fresh...and make sure the operator is as well. I has a routing disaster today. The shock caused the wenge to serperate from the maple on one side of the neck. The two new end pieces flew off and I have some material missing which will need working on to sort out. |
|
I've started to carve the volute area where it meets to headstock. This is carefully done with rasps and carving chistles. It takes a long time and is a high calorie burn!
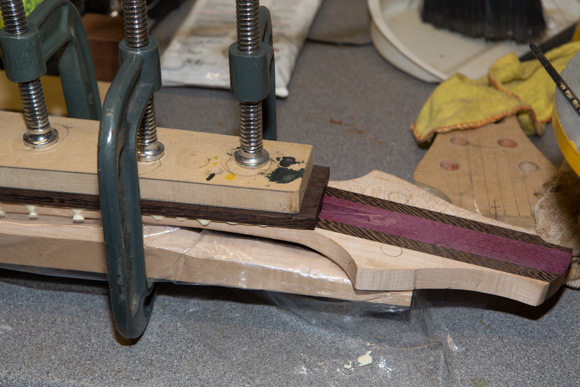
Here's the fillet glued in place. This piece of maple took a long time to bandsaw and sand to the right thickness and height.
Carbon rods are on order...I bought enough for three basses. It's nice to have some in stock.
The G clamps and clamping bars were removed and the fillet was planed flush to the top of the bass neck using my small block plane.
With my fresh new bandsaw blade, this is increadibly easy. It cuts as fast as I want to push the material through the blade.
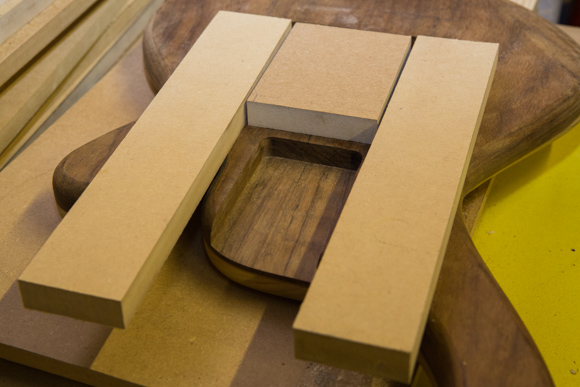
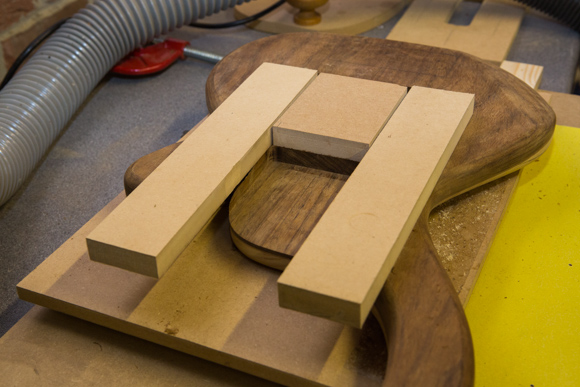
A pair of headstock MDF templates
MDF routing template attached
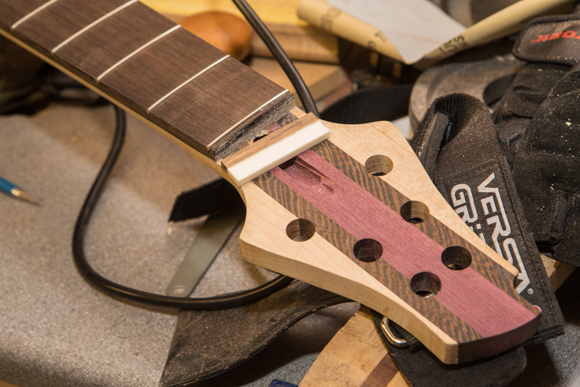
The left side wenge seperated from the maple as a split along the glue line. I suspect that the wenge was quire oily and didn't take the glue very well. It needed to be opened up, re-glued and clamped. Hopefully, it won't slip too much. A new left side headstock extension was crafted and glued on.
Cutting radius curves isn't so good with this new blade, it's a rip blade and itsn't so good for curves.
Gluing them on is quite simple but slippage is the enemy here. The carbon rods arrive tomorrow, so I'll prepare the neck sides for routing.
The head stock is ready for routing, the two addons are planed flat.
The right side peice flew off and took a lot of the neck with it. Thankfully, it's not too deep and I can sand that out.
The new headstock additions went on well athough one of them has a noticable glue line. The headstock flattened well and it's coming along well.
The underside of the headstock is taking shape. The neck radius is progressing too
|
|
|
One very oversized fingerboard...Ready for marking up. It's so big, I could easily get an 8 string 36" scale out of it...let alone a 6 string 34 inch scale!
A very precise and squared plank of freshly planed wenge. The edges were hand planed with my no5 Plane...still sharp after 7 years!
Fully marked out and ready for slotting in my 34" slotting jig.
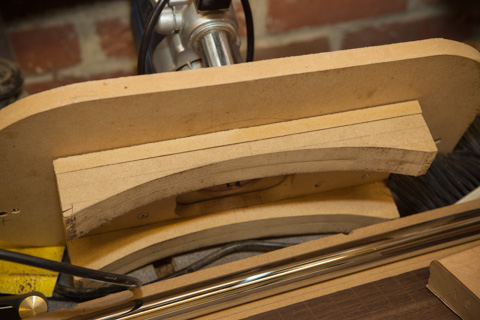
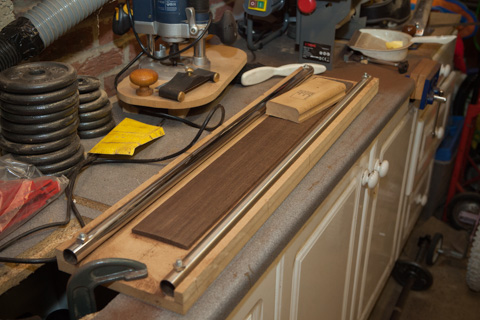
Essentially, it's a pair of rails either side of the fingerboard with a router base which has a 16" radius curve applied to the bottom.
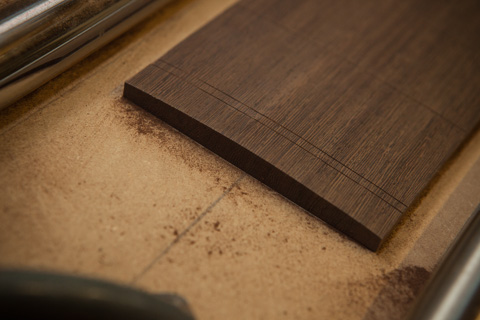
After about 45mins of hard sanding, the fingerboard is approaching a finished state...not bad at all. Wenge is a very hard wood and it is very resistant to sanding. 60 Grit paper hardly touches it!
So...after a LOT of sanding...I have a slotted Wenge 16" radius fingerboard
I carefully marked the fingerboard taper and cut with my bandsaw. I cut over the line so I could trim to it later
|
I have a number of ultra wide fingerboards which need to be radiused over the next few years. On a guitar, this takes about 2 hours with a sanding blobk. With a 4" wide bass fingerboard....that will quadruple and the chance of sanding errors is huge. So I desided that it was time I made a simple radiusing jig for my router. It took a whole weekend to design, buy and build. It works well, although I still need about an hour's sanding to remove the roughness of the router bit.
|
|
The fingerboard sanding
takes forever. Even with 60 grit papers, sanding out the lines created
from the router barings takes 2-3 hours of hard graft
|
|
|
The fingerboard Taper is roughly cut using a bandsaw and then plained smooth. The board is slightly oversized and will get neatened after the board is glued to the neck. The fret slots are a little too shallow for my fret wirem so I'll need to deepen them.
The neck needs some fop sanding to the gluing face and I need to fit a small fillet above the truss rod nut. This is a simple piece of maple, sanded and machined to fit snugly. Once the glue has fully cured, I'll sand this down on my linisher and get the top surface absolutly flat.
While this is drying, I can turn my attention to the body. The neck pocket will need cutting soon and the control cavity will need routing.#
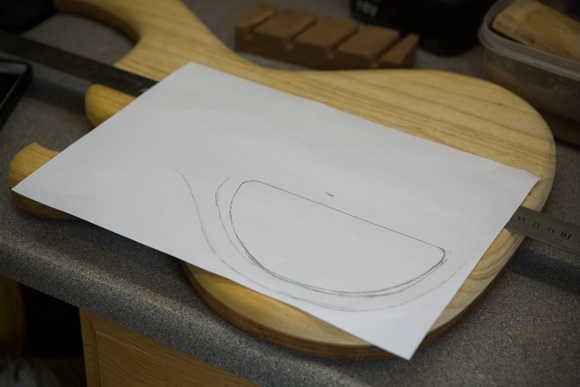
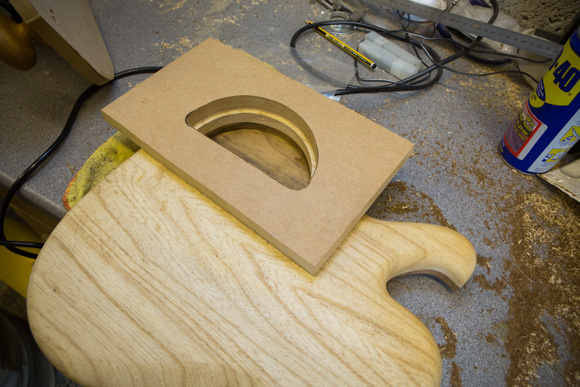
Because this is a new body design, I'll need a new cavity template cutting. Curiously, this will take more time than the routing will...but it needs to be done and done well. The quality of the final routed hole will only be as good as the template which the router followed.
This starts life as a paper drawing, which is then cut out and drawn onto some MDF. This is then very carefully cut out on a scroll saw and neatened on a drum sander (or one fitted to a drill press).
Once made, a second template is routed using the original, so I can have a variation to the depth of the template to suit my choice of router bit and bearing.
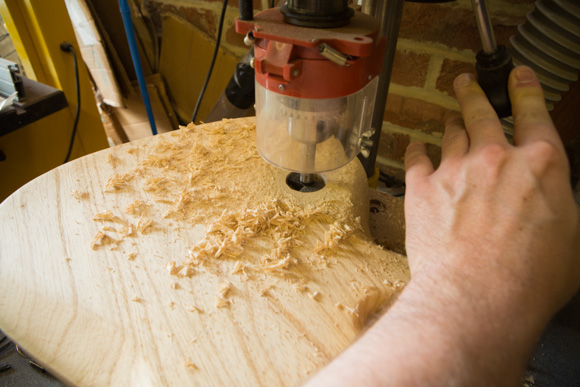
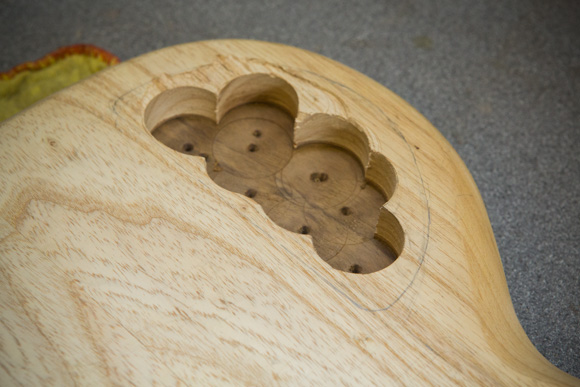
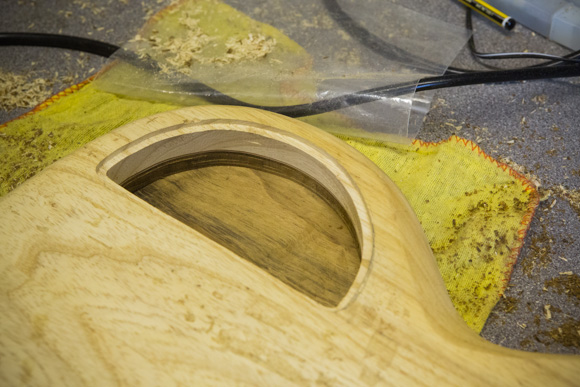
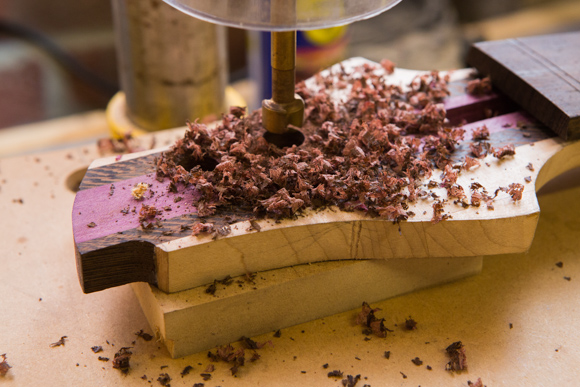
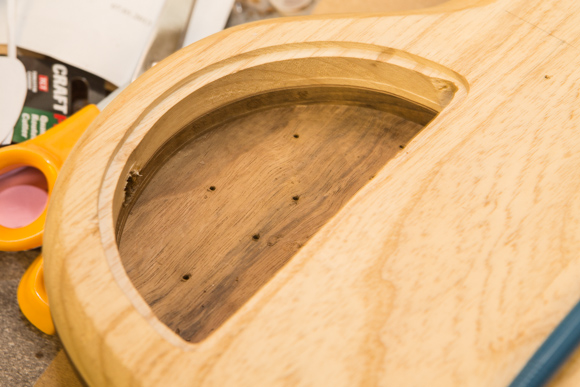
Guitar body wood is really harsh on the router bits, so I remove as much as I dare using a large forsener bit in my drill press. This produces a lot of mess and turns most of the cavity into fluffy chippings.
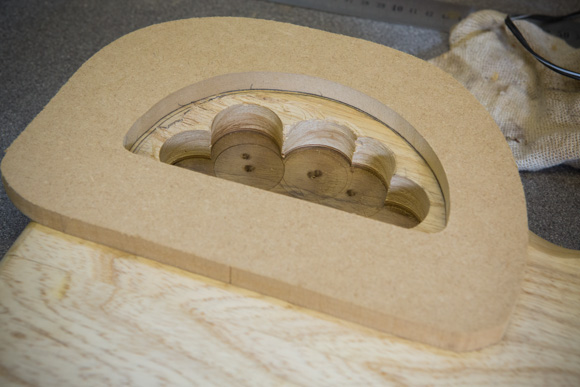
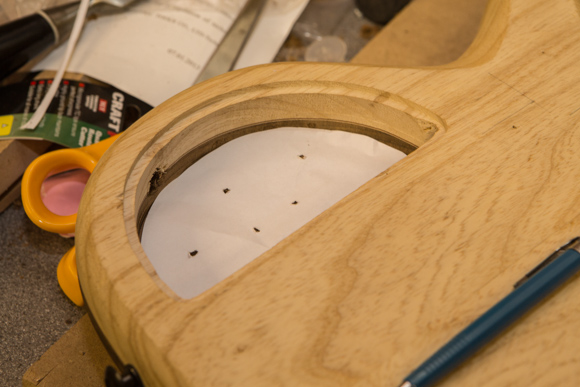
Once most of the excess material is removed, I then attach the router tempate to the guitar body using double sided carpet tape and cut the first 5mm. This will serve as the outer lip for the cover to settle against.
I then use a different sized baring to shunt the template to a smaller hole. The hole in this case will be 6mm smaller on each edge than the previous cut. This cut goes down as far as I dare to take it into the control cavity.
Once done, the template is removed and the top surface of the body is cleaned. It's a nice cut and looks very professional. The walls of the cavity will eventually be covered in copper adhesive tape, but the neatness of the routing is always evident though the copper tape.
The neck pocket rout went well, but it's just a dry run, 1cm smaller than the neck width. I'm really happy with the results and I'm looking forwards to the final rout.
I need to order up the pickups, bridge and tuners soon. This bass will hit a wall in terms of it's progress until I do!
|
|
|
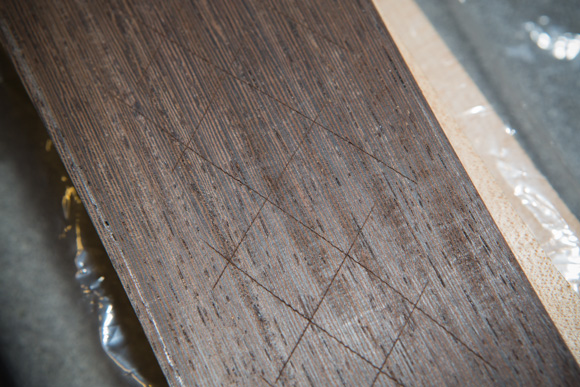
Gluing on the fingerboard is a tense moment in the progress of the guitar. Having had a few problems over the years, I was taking no chances. The oils in Cocobolo can react with cured glue. I had a fingerboard literally jump off the neck about a week after gluing. So now I run a liberal coating of isopropanol over both gluing surfaces before I put any glue on.
Exotic hardwoods like wenge can have an oil in the hardened sap wood, so the isopropanol cleans all that off and prepares the wood for gluing. I then do a dry run. I get the clamps to the right openings. So that my clamping is fast and quick.
I score both surfaces with a sharp knife so that the glue can key into the wood. I also hammer a small panel pin at either end of the neck top. I then cut off the nail head, about 2mm above the surface of the neck.
I then get the fingerboard into position and press it on the neck facing using the dry run clamps. This causes the nail to punch into the underside of the fingerboard. Why? Well, once the glue is applied the clamps cause turning forces in the wood and slippage is always a concearn.
If you notice, I've applied a healthy flood of glue. I'd rather have too much than not enough, it's a time to be lavish with the glue...and it's cheaper to spend at this point and have it done right than it is trying to correct mistakes later. Lots of glue seeping out with good coverage...perfect.
Notice the amount of polythene is under the neck. Glue goes everywhere and this stops it hitting my garage carpet and the worktops!
10 camps does the trick and I have a MDF 6 string fingerboard clamping caul which I built for Mike's bass. This is concaved to a 16" radius on the underside. So that it sits on a fingerboard and provides a flat surface for the clamps to press down on.
With this much glue, it'll take about 5-6 days to fully cure, which gives me time to order up some bass bits for it :D
Nordstand pickups...here we come!
after taking off the clamps, everything is looking fine. No bows or twists and zero slippage. There's a lot of glue seepage to clear up...I'd rather have too much than too little!
|
|
|
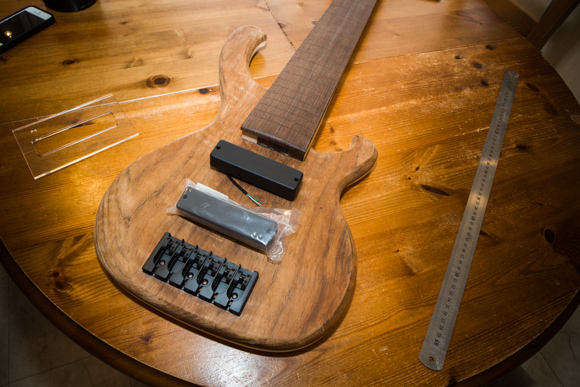
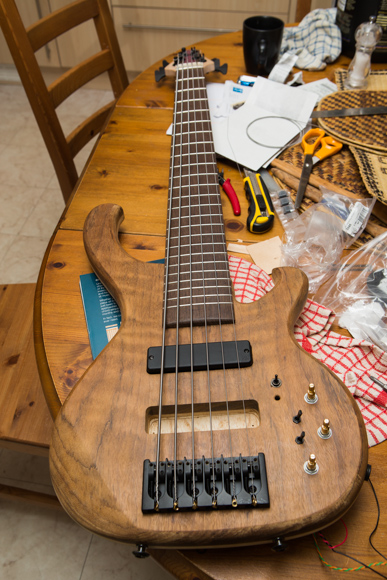
The parts have arrived and I'm thrilled! Time to mark out the parts on the body! It's going to be exciting seeing all the parts layed out on the bass!
Now that I have the bridge, I can work out the string spacing. This then allows me to work out the neck width. This will allow me to trim down the neck to a finished state. This will allow me to cut the neck pocket to the exact size.
Having the pickups will allow me to mark out their spacing accurately. Make a template and rout out the holes neatly. I can also make a bridge template if I need to lower it more, but for the moment I shouldn't need to. |
|
|
Using the bridge dimensions, I calculated the neck width at the 24th fret. I then hand plained both sides down to match that dimension exactly. I was suprised to find that they weren't very square to the heel underside...now corrected and plained flat and true. Well...as flat and true as I can with hand tools and a sharp eye.
I then worked on the neck radius carving a lot...this takes a lot of time and effort. Each pass with my scrapers takes a 1/2 mm shave from the target area and it's a slow and laborious task...but one which needs to be done right. This neck profile is really starting to feel nice. It's easily the best neck profile to date!
I carefully re-sawed the fret slots to the right depth. This is to make up the losses from the radiusing. When I slotted the fingerboard, I was worried about going too deep and weakening the board. Now that it's radiused and glued...there's no such problems and I can take each slot down to the required depth for the fret wire tang.
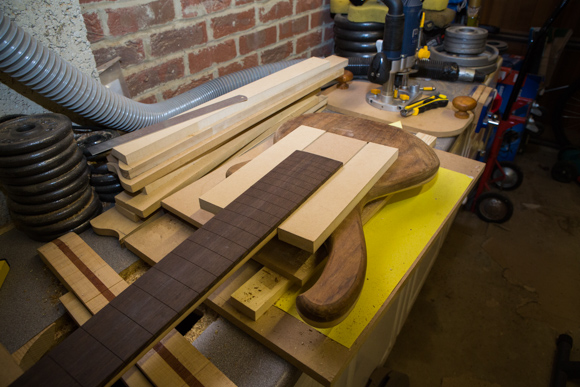
Amazingly, there's not much to show in the photos. Which is country to the amount of wood shavings are on my workshop's floor!
I bought a clear perspex pickup template from Bestbassgear.com in the states. It's great and allows me to see where I'm putting the pickups...I think I'll do this more in the future. For $9 it was a no-brainer and saves me a few hours making one out of MDF myself. Routng the pickup holes went well. The neck pickup hole became a little looser than I'd like. it looks ok, but the bridge pickups is very clean and tight. It won't show...but I'll know it's there. It was caused by pushing the router too hard against the template, causing the router bearings to flex and strain. I keep meaning to buy a Dewalt or Trend router for the better build quality...my router is very faithful, but it was quite cheap!
I went deeper with these cavities than I wanted to. I only had one template follower router bit with the baring in the right spot, so I had to cut the hole quite deep to catch thare baring. Ideally, I would have waited for a better bit to arrive but I just couldn;t wait any longer. It's ok, I can add some foam spacers under them. But I need to remember to order a few new bits up...these are a little worn.
The neck pocket is a really simple task, get the neck how you want it...surround it with straight bits of wood...double sided sticky tape them down and use it as a routing template...Violla! Slow and gentle routing is needed...there's no room for mistakes here. It's GOT to be right first time.
After the router has done it's job with a template follower router bit, the corners need to be squared up. I did think about making the corners of the neck rounded to match...which would have looked very nice and professional...but I don't currently have a router table and that's the only accurate and safe way of doing that, except mayabe a sweet CAD CAM CNC. Which is a little outside of my budget at the moment.
The corners are neatened with a very sharp chistle and a flipping big hammer....somethings in life need a sharp edge and big wallop! The ovankol top is very hard to chistle, hence the large hammer. Wood like this needs a lot of force and a sharp edge.
The fit is very very good and I'm really pleased with it. The neck fits in there like a glove and there is no wobble at all.
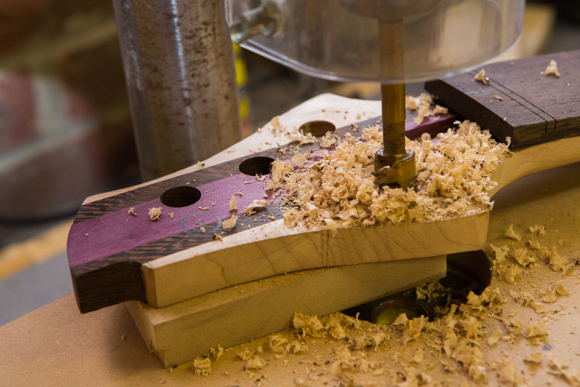
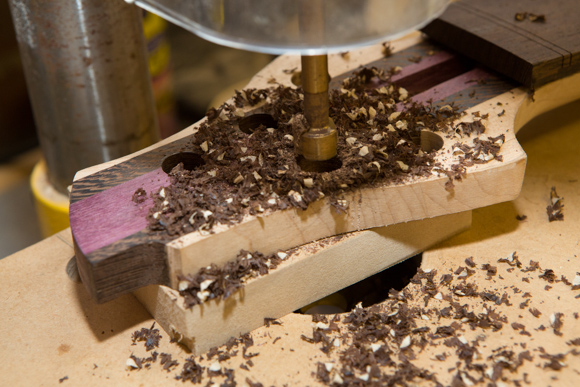
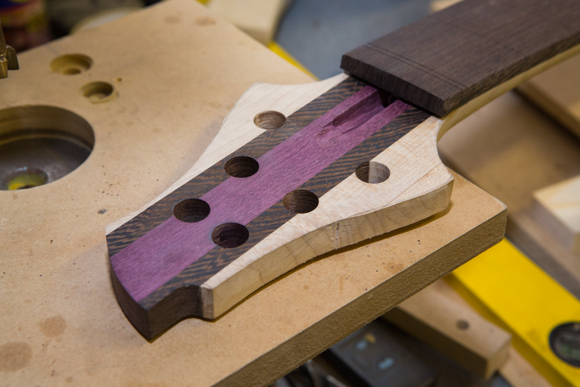
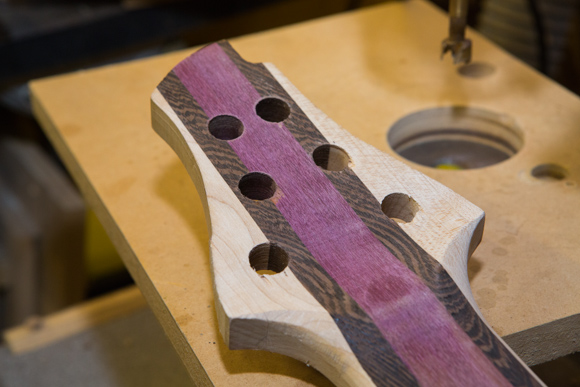
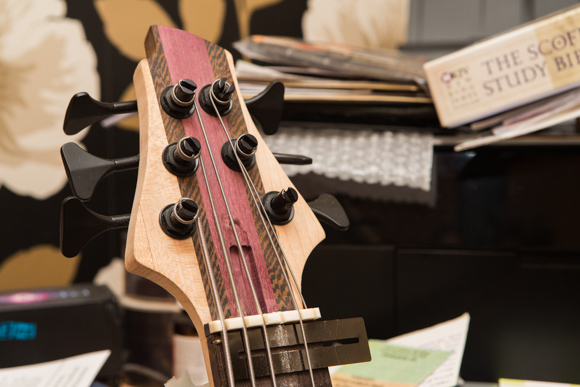
The headstock tuner holes were drilled with a forsner bit in my drill press...which are just great. Really accurate and very clean...I love these bits for guitar work. Some tools are indespensible for guitar makking and my drill press is one of those. I loved watching all the different coloured chaff spinning out of each hole!
A block of MDF on the underside of the headstock helps reduce tearout. It's held in place by strong double sided sticky tape...it's a luthiers best friend. There's a little tear out on the underside, it's quite mild and it'll be hidden by the tuners. I just wished I'd been more careful. I'm still re-learning some of my old skills again. All in all...it's been a very successful day! |
|
|
|
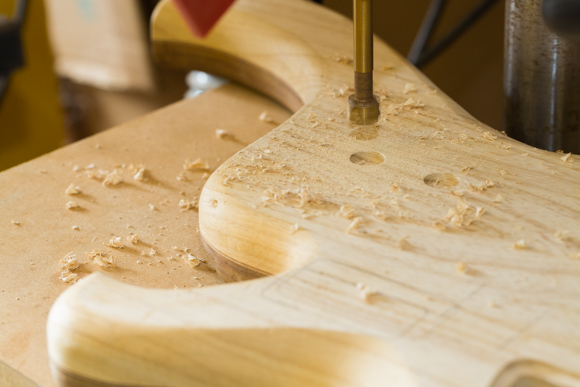
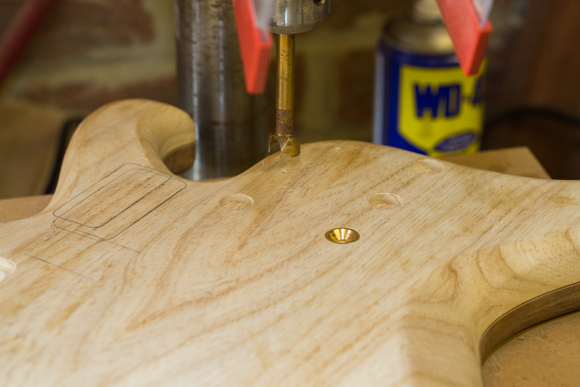
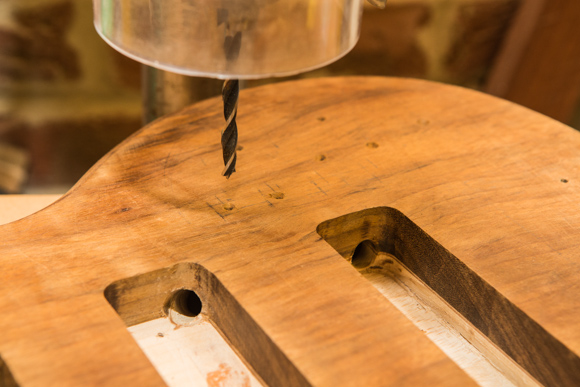
I drilled out the neck pocket holes with a pilot drill. I drilled using my drill press and I drilled using the pocket side up so that any break out would be on the underside. If I drilled the other way around, the breakout could spoil the flat surface.
I then used a counter sink bit on the underside just to widen the mouth of the holes a little. This gave the thicker drill bit a locator to centre on.
Once drilled, I then drilled through these holes with a wider drill bit to make the final sized hole. I fitted the neck into the pocket and drilled the holes in the neck.
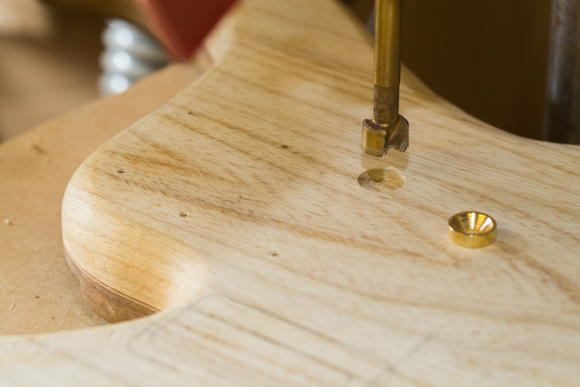
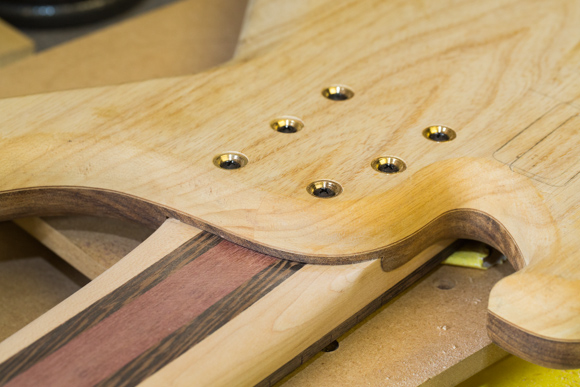
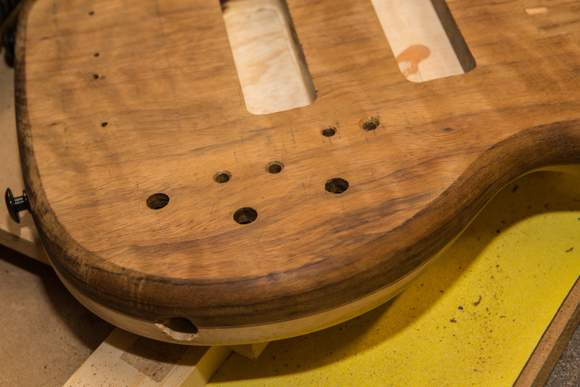
Once dilled though, I used a Forsner bit to cut the larger flat bottomed holes into which the bolt on screws will butt against. I like these instead of the traditonal plate design. Although both do the same function and these indivdual units are more work. But they just look so nice! I chose gold ones which will look great against the ash body and black screws.
After all six holes have been drilled, a little patience is needed as I don't have any depth stop on my drill press, so the depth was judged by eye and not measured.
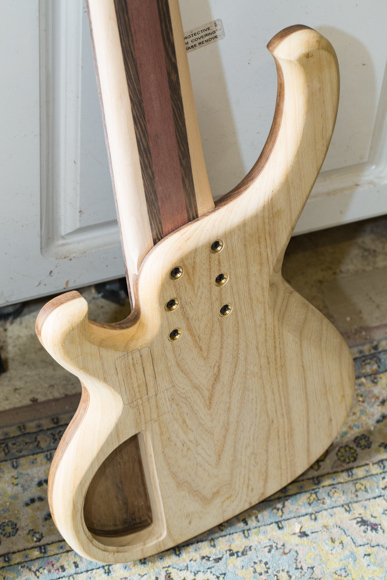
I then fitted the neck to the pocket, fitted the cups and slowly but carefully tightened the screws to securely fit the neck to the body.
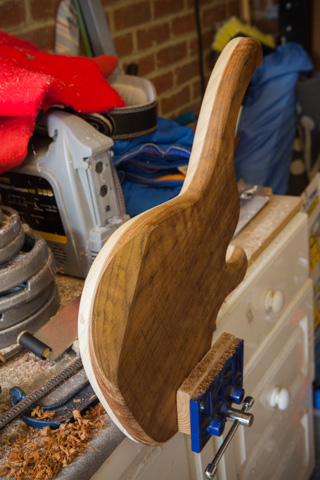
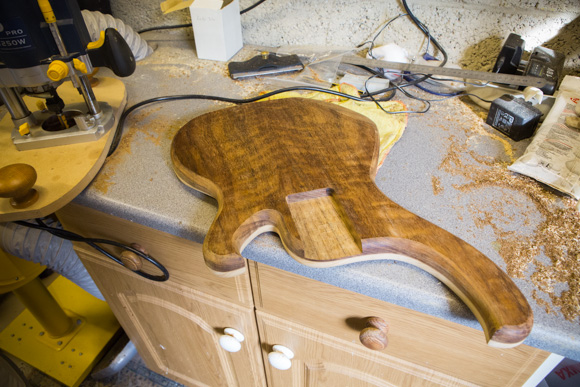
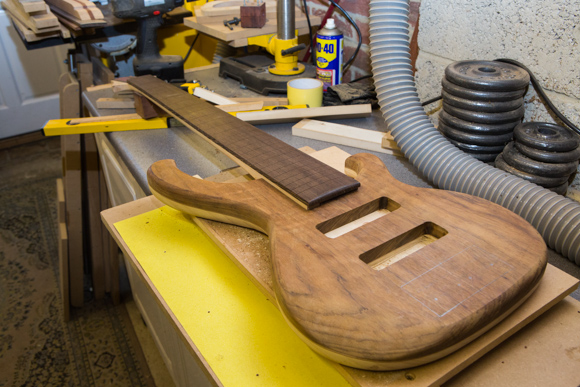
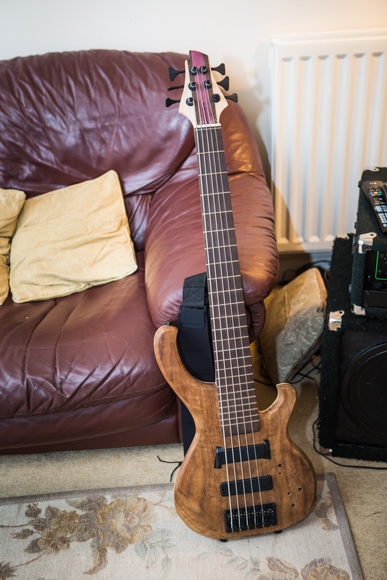
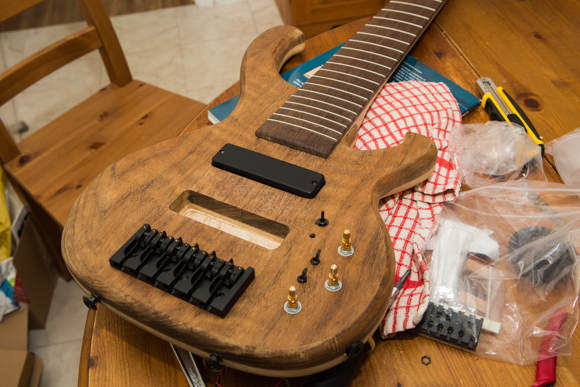
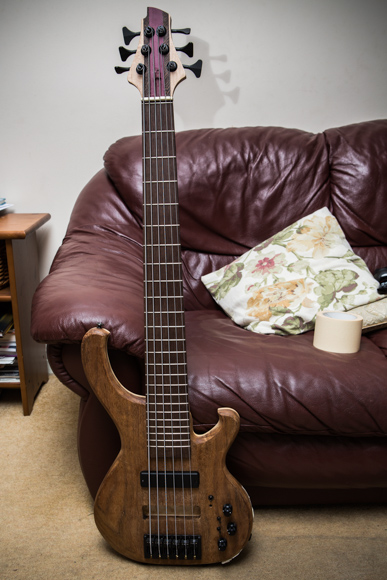
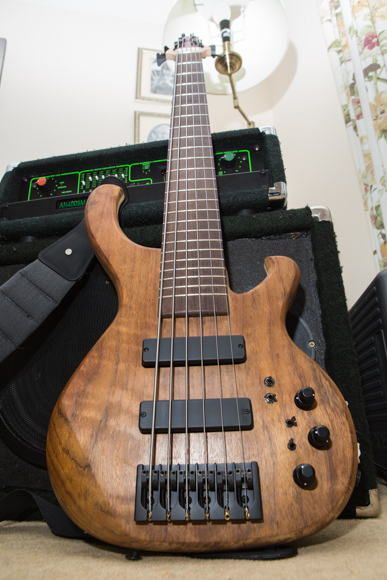
The final result is very fetching and looks great. The body shape is best seen from the rear. From the front, the fingerboard and pickup routes detract from the purity of the design. It wa heavily influenced by Lakland, Wal and G&L. Even a little Rickky in the upper horn.
I'm thinking of using some ovankol as the cavity cover. It'll contrast nicely and look great against the ash.
The body design is a little tight for a battery box, so I might fit into the control cavity.
My next task is to fit the frets to the fingerboard.
|
|
|
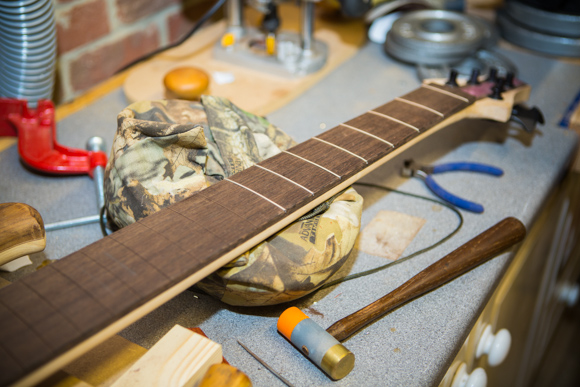
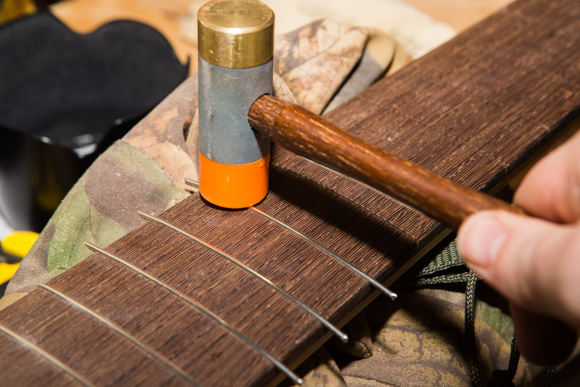
The frets wouldn;t initially hammer in even with a heavy hammer...so something wasn't right. I haven't fretted a bass for a very long time...only two of my early basses were fretted and all the rest were fretless. So I looked at the fret slots and realised they were a little thinner than normal. I used a japanese backsaw, which i've used on a numberof basses (all fretless), so i didn't realise how much thinner the blade was. I widened the slots using my old gents saw which I bought specifically for fret slotting and then I used a V file to add a slight bevel to the inside of the fret slot. This allows the fret tang to locate the groove a bit easier.
This time the frets went in with a few firm taps...much more how I remember fretting! It's not supposed to be very hard, just a firm hammer.
I like to use a plastic fret hammer, it's got a tough ABS head on it, but it works great and doesn't mark the frets...which is nice!
There's a few frets with a few high spots, so I'll re-dress those in a few days once the fingerboard and frets have had a chance to settle a little.
|
|
|
The control cavity cover needed to be cut. I had a template which I used for the hole...but not one for the actual plate. I don't have a pin router (used to follow a hole to create an inverse template) so I had to mark it and cut it free hand using my fret saw.
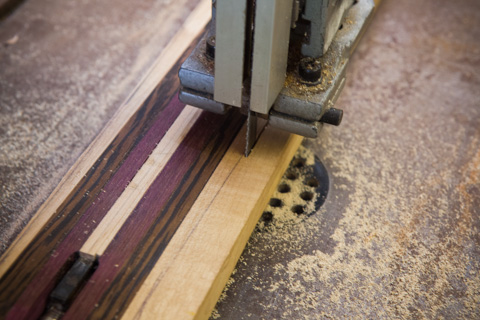
I used a part of the body off cut billet, which was way too thick. So I re-sawed it down using my bandsaw to just over the thickness I needed.
I then sanded it flat on my sanding linisher...what a mess that thing makes....even with dust extraction. The finish is really quite good off the belt. Then I marked out the cover using the hole template I used to make the cavity.
Then I cut it out on my fret saw. I slightly went under the line, allowing me to finish sand the edge on my Sander belt. Not a bad fit at all! Pretty good in fact! It's not quite machined quality fit but it's very close and I'm happy with it.
I then finished the headstock profile shape using my router table and followed the headstock template which I showed in a photo earlier on this page.
I then machined the bone nut, which needed extrended due to the very thick fingerboard. I seated it on a piece of Cocobolo to raise it ot the hight needed.
I then filed the fret tang edges so they were smooth to the touch. Not bad progress for a morning's work!
|
|
|
The first job today was to remove the neck pickups and bridge. Then I wanted to take a 1.5mm off the underside of the neck and 2mm out of the neck pocket.
While I had the neck removed, I took the opportunity to re-carve the neck radius and get the feel a little more mature.
This isn't something which can be shown in a photograph but something which is felt rather than seen. The only evidence of this activity are the copius wood shavings all over my workshop! In the photos, the neck looks pretty much the same!
I then removed the nut which was slightly too short. I then re-sanded the surfaces smooth and cut a new bone nut. Due to the height of the fingerboard, I mounted it on an Okankol shim to raise it to the correct height. I first rough cut the shim using my bandsaw, then I epoxied the nut to it. Then after a few hours drying time, I used my sander / linisher to sand it to the exact size. The smell of bone being sanded smells just like being in a dentist! |
|
|
The next task was to deepen the neck pocket by 1.5 mm. I used a shallow template router bit for this and it worked like a treat. The new pocket is only .5 mm above the veneer glue line. It's amazing how much wood chippings go every where with a router...even with the extractor going full on! |
|
|
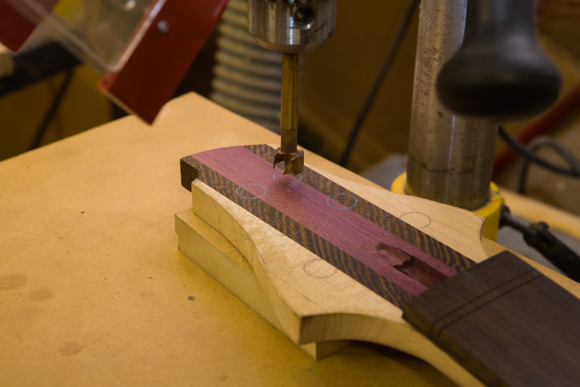
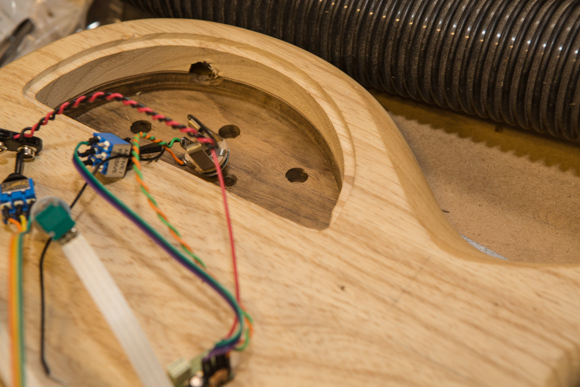
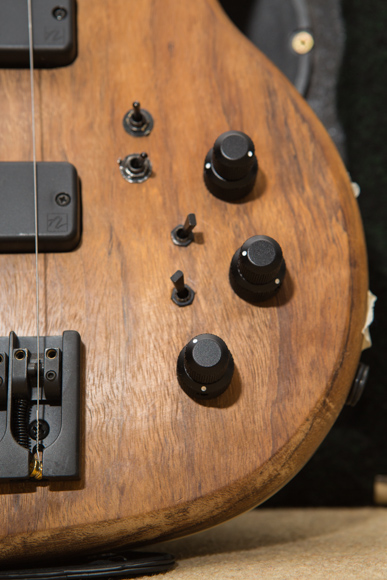
Then I needed to drill the control cavity holes. I prepared my design on a piece of paper, which I then used to drill pilot holes.
The layout of the components is quite unusual for me, I'm using a John East U retro circuit which has two switches and three stacked knobs. This circuit was ideally suited to a Jazz bass replacement, so the Nordstrand pickups should work well with this circuit.
I'm fitting a parallel / series / single coil three way switch to each of the pickups. This will greatly expand on the available tones and really add to the versatiltiy of this bass. I should be able to coax jazz bass, Music Man and many other tones from it quite easily.
But this adds complexity and two more switches to consider. These two switches need to be close to the pickups and are the primary switches. The other two are for active on /off and passive blend, so they are secondary. The output jack is a stereo unit, so I'll use it to wire up a circuit break when the jack isn't inserted. This will extend my battery life considerably and mean that I'll be using it active for most of the time.
The thee stack pots are easily drilled, but space is tight in this cavity hole. These posts need to clear the jack body and this cavity needs to house 4 switched, three stack pots, a 9v battery on it's side and a rather large circuit board.
A really large board and due to the size of the pickups...I don't have any space for a 9v battery box on the lower horn space. So it has to go into the control cavity. If I was going to make another one of these basses, I would add an extra 10mm to the body width. It's a little tight for a Sixer, although it would be perfect for a five.
The last job for the day was to re-fit the neck to the body and glue the nut into place. An easy job, but I think I'll replace the neck bolt screws, they are starting to look a little tired.
Once the nut glue has cured, I can re-fit the bridge. I can re-fit the pickups and jack socket. I can then solder the two pickup switches and fit the Active circuit in and solder it to the jack. I'll then need to cut the nut slots for the strings to fit. I could then properly secure the tuners and then string her up and hear what she sounds like!
Then I can dissasemble again, shield the cavity and then it's time for the final finish sanding before I apply the laquer! Exciting times! |
|
|
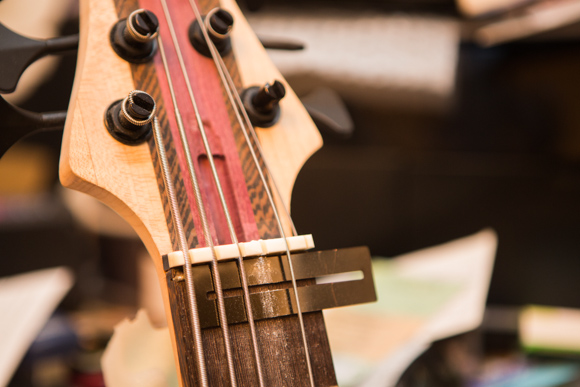
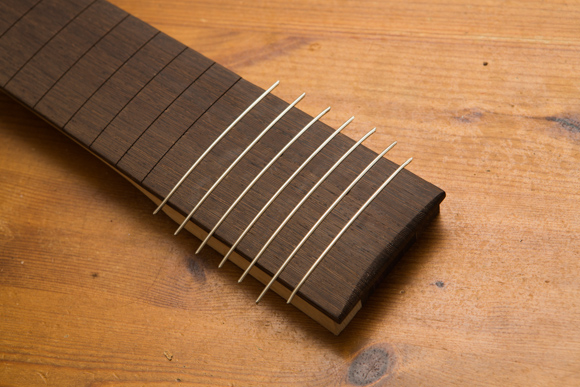
I re-fitted the new nut and cut the nut slots, it's worthwhile taking some time here because each of the nut slots needs to be the right depth, the right angle with smooth edges. Each slot must also be slighty wider than the string so as not to clamp it and cause increased tension, which leads to premature string breakages.
Once slotted and I was happy with them, I fitted the strings. I had a lot of trouble with the high C Hipshot tuner. It was loose and wouldn't turn preoperly and hold tension. I took it apart a few times and re-assembled it. It was goo for a while but after about 1/2 hr the string snapped at the tuner and left a mark on the finish....and again the tuner wasn't holding it's tension any more....so it was time to send that back.
Also, I noticed that the top three frets were a lot lower than the rest of the fongerboard fret wire. This was choking the strings....I turned to truss rod as far as I dare but t wouldn't correct it at all. Looking back at the fingerboard gluing, it looks like the clamps wheren't as even as they could have been and the neck may have glued a slight curve at the end...I trued to file the frets down to compensate, but it's too much for the frets to handle. The only two options are to steam the neck and reset or pull out the frets, sand the neck level along it's length and then re-fret it again. I suspect the fret wire has caused some of the issues. It was tough to hammer in and I think that it was a little thick for the slots I cut...I also think the wenge is such a hard wood, the fret tangs bent the neck rather than compressed their studs / tangs into the wenge cross grain.
It's certainly dissapointing but hey that's the joy of hand made instruments! It was nice to hear what she sounded like, very nice indeed. I particularly liked the single coil tone. The 2nd re-fret should be a neater job anyhow and I can spend some more time on the back of the neck heel too.
OK, the frets came out quite easily with minimal tear out. I used a soldering iron to lossen the tighter frets but they lifted out with a pair of really sharp wire cutters gently easing them up out of their seat a little at a time.
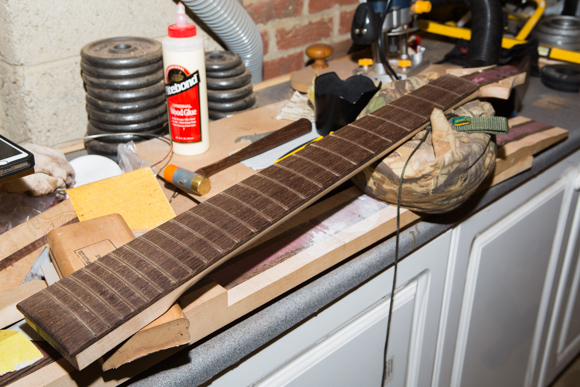
Once out, the fret board is nearly true except for the three frets at the head stock end. There's a noticable curve there. That'll need a lot of sanding with 40 grit to even out.
Looking at the frets and the slots, I'm pretty sure this is a combination of issues here, the fret wire was a little wide for the slots. Which I belive is due to Wenge's resistance to longditudanal compression...ie the wood is very stiff. Certainly stiffer than rosewood or Ebony.
There is a slight curve or backbow to the neck. Not much not it's there and I think it was introduced when gluing the fingerboard. There's also the previously mentioned three fret drop and the back of the neck heel isn't quite as parallel to the top surface as I'd like.
The good news is that when I fix all these, this bass should be able to enjoy really low action if I want to.
I used my plane, with the a very finely honed blade and shallow blade to remove the centre bow on the fingerboard. I used my sanding block to re-profile the radius between several passes with the No 5 plane. I think it took around three hours in two sessions to get it right. There's still a .5 drop to the nut, but that's correctable with the truss rod and fret levelling.
I bought a fret tang file / arbour from Stewmac so I could tailor the fret tang to an exact thickness, thus reducing the back bow of the neck once the frets are in. It's astonishing how much tang I have to remove to get a neat fit. The back bow is now minimal and easy to correct with the truss rod tension. The frets are going into the slots so much easier too. A few mild hits from my fret hammer and they are seating really well.
It leads me o think that the fret wire tang was well over the stated amount and maybe my slots were a little less than the .25 stated on the saw. By my reconing, .45 on the tang and .22 on the slot. With Wenge being such a hard wood and one which doesn't like to compress much....it's no wonder I had problems. I recon that rosewood or maple, which are alot softer would just compress and accept the wire. Very happy with the way it's gone this time around, although it's been very hard work re-leveling the fingerboard.
The back of the neck heel will need a re-gind and maybe a shim. It's amusing to me that neck through basses don't tend to have these problems.
I sanded the neck down to 1000 grit, so it's really shiney and smooth. I find that when I do this, I can laquer a lot thinner and it goes on easier and needs less buffing.
The body was sanded to simular grits and it's also feeling really nice. |
|
|
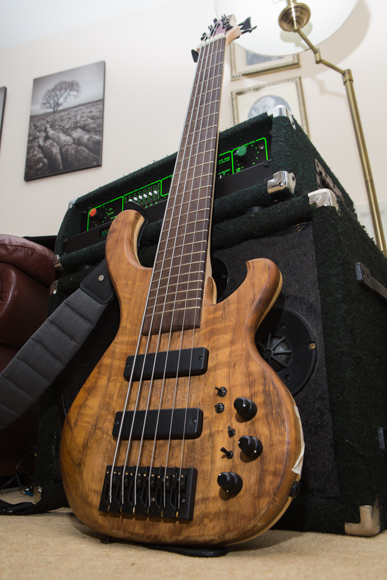
After bolting the neck back to the body...my forearms feel swollen from the activity! I feel like Popeye! Putting it all back together was a slow but fun process. Putting the strings back on is always exciting!
The bridge action is a little high at the moment and the Nut needs the high C string slot deepening, at the moment it's not touching the zero fret. The first three frets are depressingly buzzing, although it's a lot better than before. Last time it was un-workable. This time a truss rod tweek and a fret re-stone and level should sort it out finally.
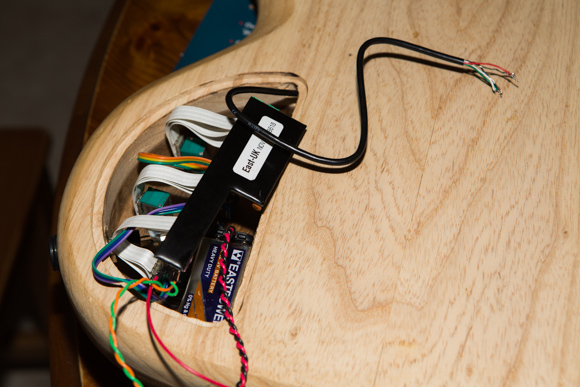
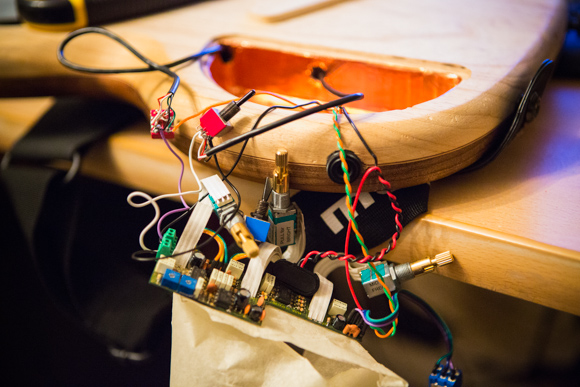
The John East pre amp is astonishingly easy to fit, even in this tiny control cavity (not helped by the need to include the 9v battery in the cavity). The three way switch is a doddle to wire up, but I may swap it out for a simpler 2 way.
I wired only the one pickup today. I didn't see any point in spending the time to wire them both because I'll need to de-solder everything and dissasemble the components for laquering. Laquering will take time and a lot of effort. I'll probably need around 8-10 coats of laquer and it takes several days between coats to dry properly. Then it takes about 2 months for the laquer to fully harden ready for sanding back, buffing and polishing. So, while this is playable for xmas, it's far from ready. I'm probably looking at an Easter completion for this project. Although I'm hoping to start the next project just after xmas.
I plugged it into my amp and it sounded really nice, very much like a Jazz bass in single coil mode. But I have to say that the humbucker option is probably more my style. Buttery, round, fat tone and less spikey and hollowed out.
|
|
|
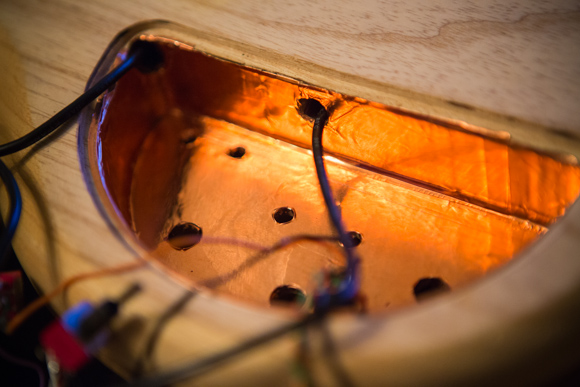
I like to use copper shielding tape...it looks SO neat and the edges can be soldered. If I need another ground point....I just drop a blob of solder and I solder ground wires to that point.
The John East active preamp works well, although it's switching options are a litle odd. My copy seems to be eating batteries at the moment and there's quite a hefty bass boost when the knobs are flat. But It has one of the best mid controls I think I've heared so far. It's got a boost / cut and frequency control. It's Q is just about perfect, it makes a big change to the tone of the instrument without messing with the bass or treble ranges. The Bartolini mid circuits seems to mess with the other frequencies and in my opinion, their Q is too wide in the mids.
Now that I am more familiar with the Nordstrand pickups...they do sound nice. In single coil mode they are very much like a modern Jazz bass and in humbucker mode...they sound very fat and punchy.
|
|
|