|
Epoxy resin filler / sealer...messy but really worth the effort
The Epoxy resin brings out the nature colour of the various woods I'm using.
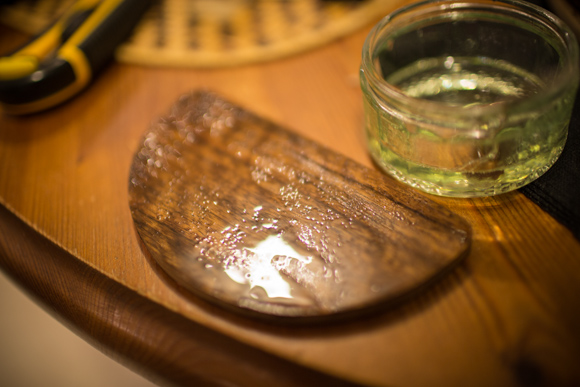
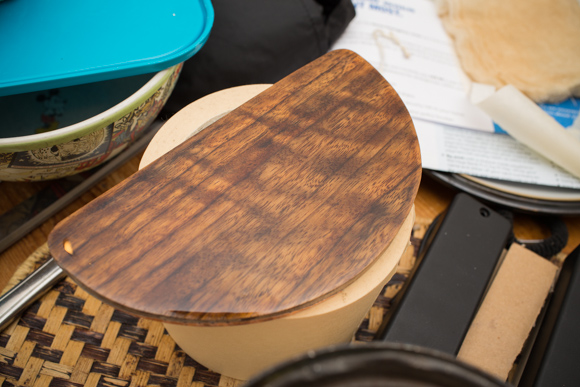
This is the control cavity cover. You can clearly see how uneaven the epoxy goes on, it tends to pool in some areas and pit in others. This will need sanding flat, another coat applied and sanded until it's completely smooth.
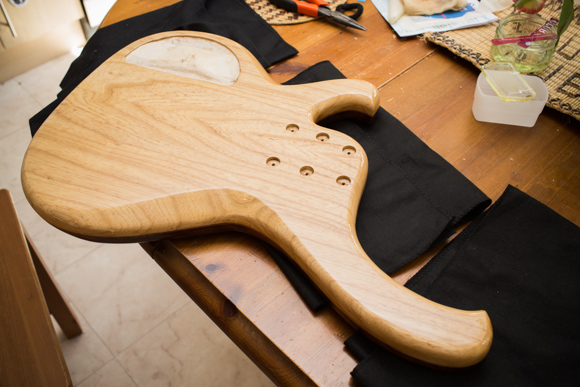
The Ash was pore filled and sanded until it's completely smooth.
A few coats of wet laquer applied after the epoxy was sanded smooth.
|
Bass 8 Diary Of Construction: The Finishing
This is the part of a bass build which I dread the most....the finishing. It's something which has to be done right. It's very tedious, very frustrating and labour intesive. I just don't enjoy it. A good finish is only as good as it's preparation work. If the sub layers aren't flat or smooth then neither will the top coat. The sealer / grain filler is that foundation work. Becuase these are hand crafted instruments and not CNC build items of mathmatical precision...then there are always imperfections.
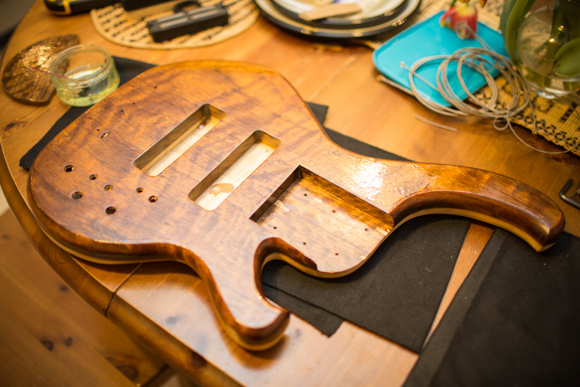
In order to start the finish process, I needed to I dissasemble the bass....really difficult to do as it's such a nice instrument to play. It's going to take a few months to finish this bass...and it'll be unplayable until then. Once the bass was dissasembled and the hardware was back in boxes, I seperated the neck from the body. I sanded both the neck and body using 120 grit through to 400 grit papers. Then I washed down the surfaces with alchahol spirit and removed all traces of saw dust. I do all my sanding and polishing in my garage / workshop while I layer up the finish laquer in the house...usually my kitchen. I have the house to myself a lot these days so I don't have anyone to complain or nag me about the mess...and I can leave stuff out to dry for a few days without much disruption.
I like to use an epoxy filler / sealer which I bought from LMII a few years back. It's horrible stuff to use (like all epoxy). But it does a great job filling pores and as a sealer coat. But it has to be mixed very precisely and it's very easy to sand through. It's not uncommon for me to have to apply ot three or four times (sanding between layers) before I get to a point I am happy with. I measure the mixtures of the resin filler by weight, I find this to be the most accurate and I spend several minutes mixing this goo. If it's not well measured or well mixed, the epoxy can take weeks to fully cure and can't realy be touched until then. It'll stay tacky for weeks. But thankfully, that's a lesson I learnt years ago and one which I haven't forgotten...it's funny what one remembers!
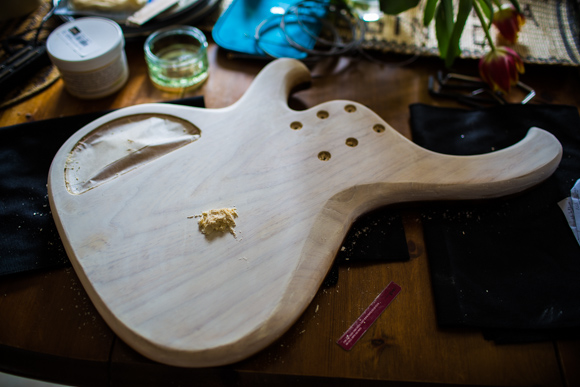
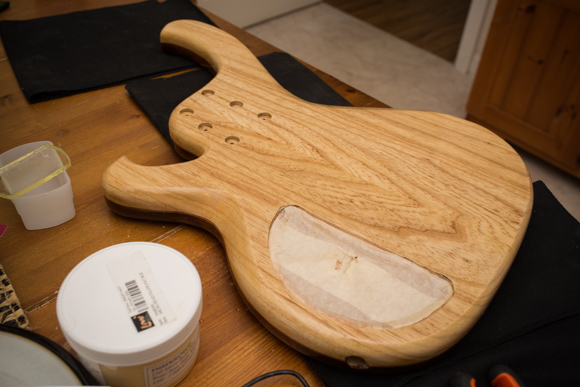
The resin poured on well and I spread it thinly across the surface of the body using an old credit card. I'm only going to cover the top half of the body at the moment. I want to use a coloured pore filler for the ash lower half before I cover it with epoxy resin. The acryllic pore filler slightly bleaches the colour of the ash, which is a nice effect. I lightly coated the neck too, leaving just the fingerboard free.
I left the epoxy over night and it set nice and hard over night. I applied the acrylic micro bead filler using a old credit card (I keep a stash of these) and my fingers. It takes a few hours for this to dry and there's always some extra tocuh up work needed. I left it for a few more hours to dry cure and then scraped it back using...an old credt card. I sanded the top using 320 grit paper on my orbital sander. I then hand sanded the edge radius and sides using 400 grit papers. I sanded the back using 400 through to 600 grit papers. There's a few spots on the back which will need re-filling and the front epoxy coat has gone through to the wood in a few places and is a bit uneven in a few others...it'll need at least a few more coats before I can apply any laquer.
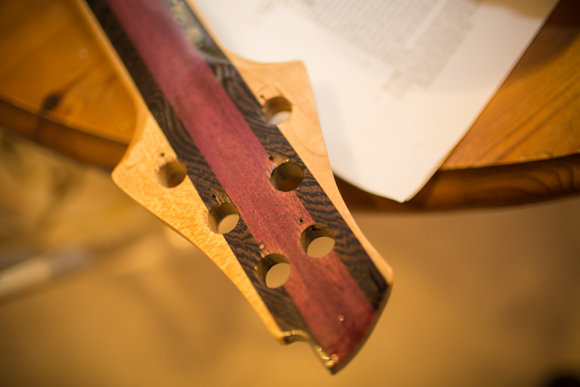
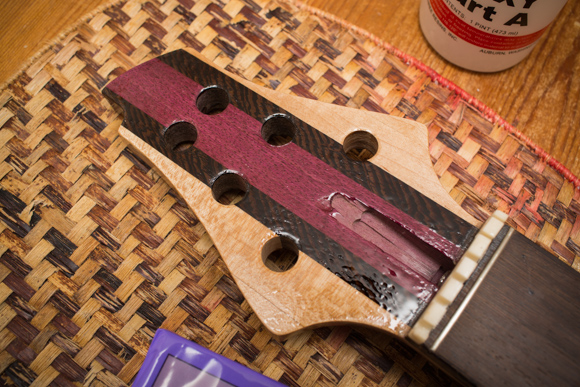
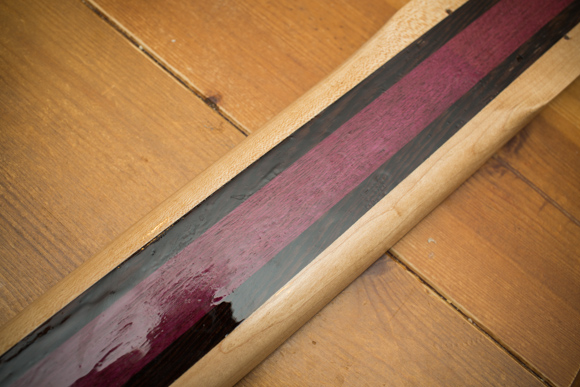
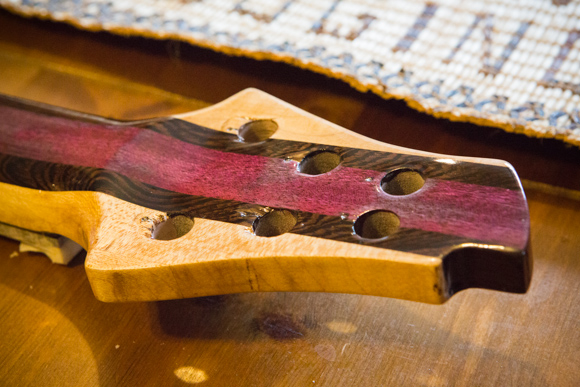
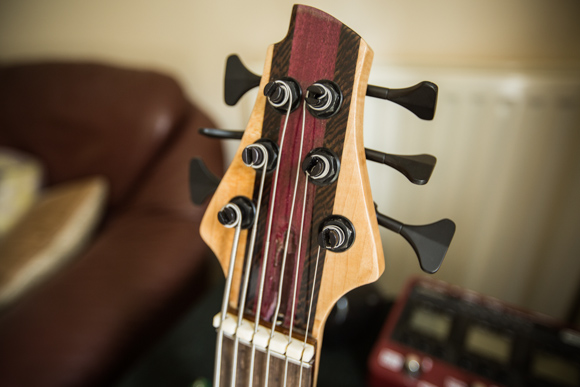
The neck had two coats of epoxy and it's quite uneven. So I have a lot of sanding to do. It's nice to see the wood colours coming out so vibrant. The Purpleheart is particaulrly rich looking and sits really well asthetically with the Wenge on either side.
I'm thinking of making the finish a satin style of sheen. It'll look really nice and it'll make the neck feel really smooth and nice to play.
The cavity cover has had three coats of laquer so far. I'll let the set over night and apply three more tomorrow.
The Ash underside is really looking nice. I applied 4 coats of laquer, the first was a thin sealer coat, the next three are base coats. I'll probably go for about 9-10 coats in total. I'll apply three coats per day and then let it cure for about 3-4 weeks. It needs to fully harden before I can finish sand it through the grits from 400 through to 2000. The last stage is the buffing stage and that's best done with car polish and a lot of effort.
|
|
Four coats of laquer. I'm really pleased that the laquer hasn't darkened or yellowed the Ash much.
Four coats of laquer. I'm really pleased that the laquer hasn't darkened or yellowed the Ash much.
Four coats of laquer. I'm really pleased that the laquer hasn't darkened or yellowed the Ash much. |
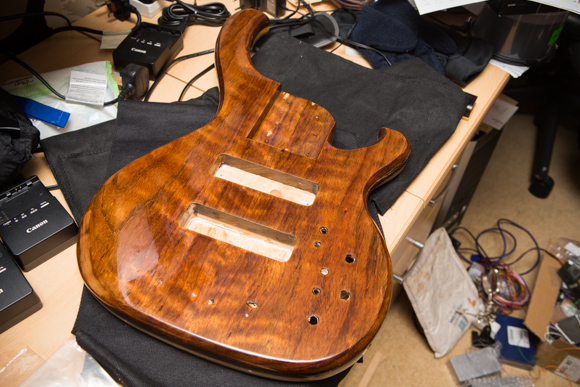
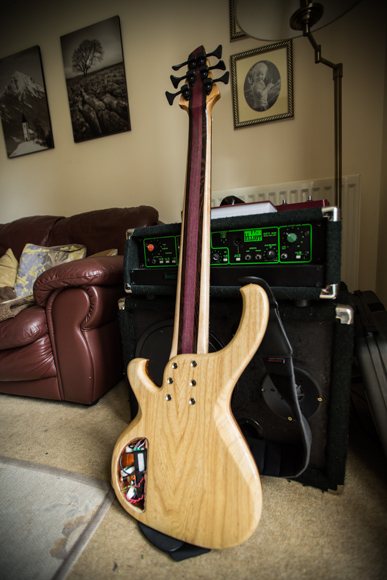
The Ash rear side of the body has had 9 coats of lacquer and it's really looking very nice and deep. I left this for a week and then sanded it back to 400 grit. I then went through the sanding grades to 4000 grit. I then used some car polish to add a top sheen. it's nice but not very shiney at the moment because the lacquer is still curing.
I then started on the Ovankol top, this so far has had 7 coats and only has a further three to go. The top is a lot more complex to paint, the pickup cavities, the neck joint cavity, the various pre-amp holes, the bridge holes and the fore arm radius relief carving each add to the complexity in trying to get an even coat. I can understand why some bass makers lacquer the body and finish sand / buff to a high gloss finish before they rout out these things. I might consider this in the future.
The lacquer is going on nice and even but hand applying using a foam brush is tricky to get an even coverage. Some coats go on a bit too thick than ideal...and they tend to be the coats which drip....which are difficult to prevent or make right once they have blobbed.
The neck is coming along well. I re-sanded the surfaces and took all the epoxy off. It's taken a bit of the Purple heart's colour away. So I might sand this down back to bare wood again, let it age a bit and then re-apply the lacquer.
So...all the lacquering is complete. I now have to leave it for a few weeks in the airing cupboard for the lacquer to cure / harden. I can flatten the surfaces with 400-800 grit papers at any point. But the longer I leave the lacquer the better the final shine will be. It will only polish fully once the lacquer has fully hardened. With cars, the autoshop sprays the lacquer on thicker and then puts it in a heat room to bake it. The level of finish is lower than a guitar, any levels of "Orange Peel" effect is not acceptable on a guitar. it's a lot smaller surface area and the curves are much sharper. |
|
|
I left the lacquer to cure for several weeks, but it still felt a little soft. I sanded back the body top and back surfaces. I sanded out a few drips using 400 grit paper. Only to find the drips hadn't fully cured in the centre of one of the drips. So I carried on sanding back through the grits to 12800. I then used T cut restorer to buff and then polished with a final polish of Zymol.
The finish is shiny but far from complete or dazzling. It's the max shine I can get while the lacquer is still setting. So what to do? It'll take about 6 weeks for this stuff to fully cure...that's a long time to be without my favorite bass!
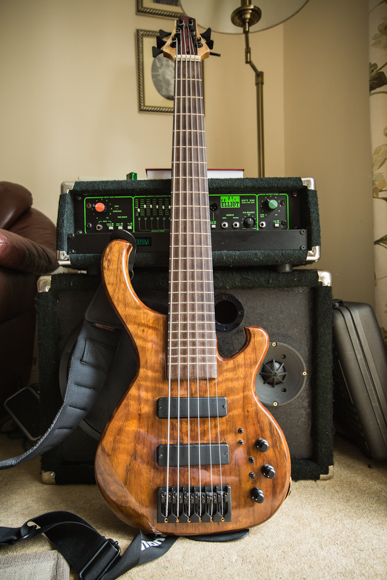
So I decided to put the instrument back together, fully assemble it and use it for 3-4 months and enjoy it. Then at a later date, I'll pull it all apart and finish the buffing and polishing.
It's looking really nice and from the photos...looks immaculate.
There's still afew jobs needing doing before it's really "done". The truss rod access need a cover to hide my router slip. The control cavity cover needs securing, I'm waiting for a set of rare earth magnets to use as hidden screws.
I'm also having problems again with the 1st three frets back bow. So I need to work out how to fix it. I suspect the lacquer has caused the neck to shift again when it was curing. I may need to remove the first 4 frets and fingerboard, add a thin wedge and re-fit....ho hum...there's always something to bug me! I guess that's hand made instruments for you! |