 |
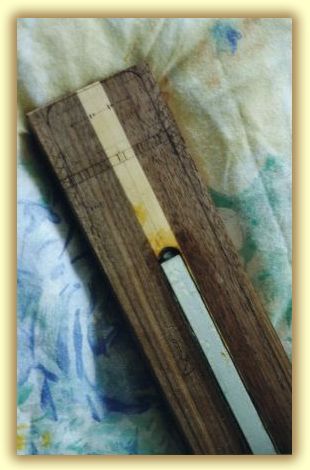
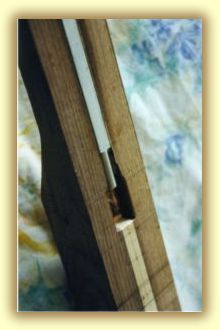
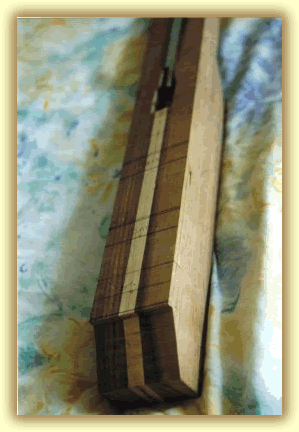
By the time I had gotten around to loading up my camera with film (roll on Digital) I had already made a lot of progress. I had already glued three of the neck laminates, 2 1" Walnut laminates and a 3/4" Maple Laminate. This was allowed to dry and cleaned up. I then cut out it's rough shape on a bansaw. Plained the sides and top square and flat and plained the neck angle on to it. <<< This is where the head piece will screw onto. 4 screw holes are marked and ready to drill. The nut is also marked out along with the neck's width taper. This photo also shows the end of the truss rod, the dark yellow stuff is Epoxy glue. I like to use Aluminium Box truss rods - very simple to install and adjust. All that is needed is a flat channel cut in to the neck surface, cut to the correct width and depth. Then the trussrod is carefully glued in, making sure the adjustment nut is free. Leave to set for a few days and job done. |
 |
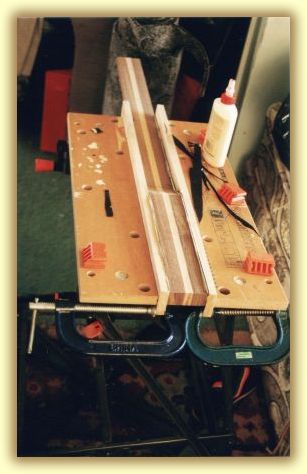 |
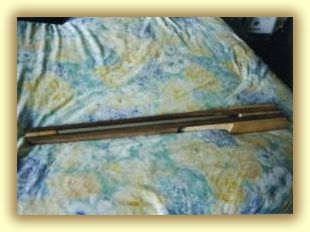
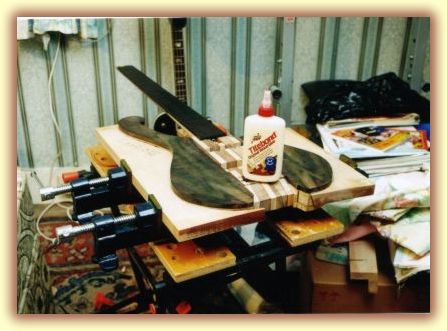
I marked up the pickup widths >>> Originally I was going to fit 2 Jazz style pickups, but later settled on a Neck Jazz and a Bridge Soapbar. I marked out the bridge dimensions and the required depth - I like to sink the bridge into the body so that it sits flush, not only does this look nice it also reduces the neck angle and increases string down force. The "Status" headless system uses a seperate tuner / tail piece which needs to be set at a steep angle in order to exert adequate down force. Bascially on a headless there is nothing else that can exert any down force, so in this case I have set the angle to around 28 degrees. <<< This picture shows the underside of the neck being glued up in my Work mate. This was left for a few days to set. In the mean time I drew out the body wings on the Ash blanks. Notice the Black veneer's sandwiched between the maple and Walnut. |
 |
|
|
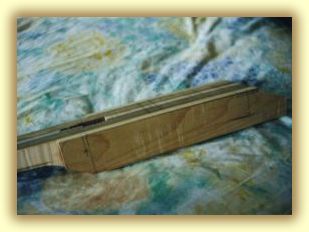
I cut the sides of the neck with the bandsaw. When the neck is profiled the black veneer and maple will give a snooker que look to the neck. The top and sides are planed and squared, then the bridge depth, width, pick up details and the finger board end and 24th fret are marked |
 |
||
|
Next I cut out the body shapes on a bandsaw. I hollowed out the centre laminate using a bandsaw for the rough cut and a router to neaten. I then glued the laminates together and sanded the sides smooth. I cut out the Pickup holes using a bandsaw and cut the bridge recess using a router |
 |
||
 |
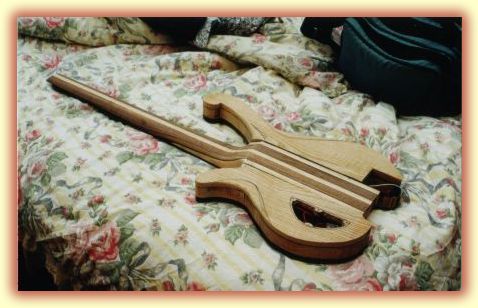
I roughly carved the neck profile using a spokeshave but I'll leave the final profiling for later.
I then glued the body wings on to the centre neck length. I glued them on one at a time using a pair of sash clamps. I left each wing to set for 2 days. |
 |
I used the excess of the body cut outs as a body mould to help with the clamping.
The gluing went well and there was only a little slippage, nothing that I couldn't cure with a plane. The top and bottom faces were then planed down to a smooth surface |
|
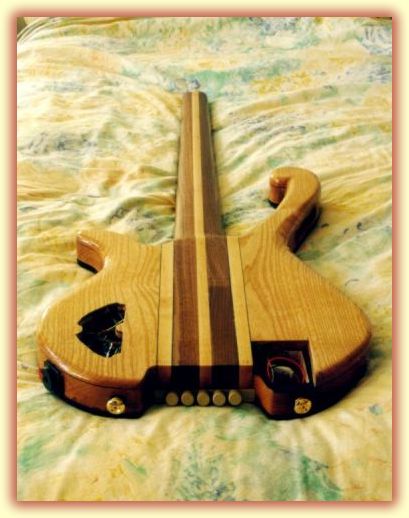
Here's the Body carcass. This stage is most inspirational, the bass is taking shape.
I cut the Piezo channel in the bridge recess and fitted the Piezo cable with Epoxy |
 |
|
|
 |
|
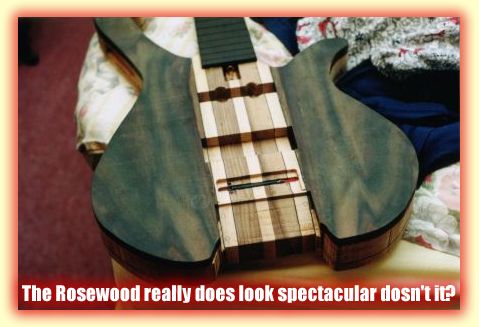
Here are two shots of the carcass. I have marked out the carving lines on the back of the bass, also you can see the battery compartment and the access hole for the electronics. I carved the heel and final neck profile using various files and spokeshaves. I like to spend a lot of time doing this and I because the profile effects a Basses playability and feel so much I like to get it right.
|
|
 |
Ash is really pretty, a light colour with a nice dark grain. I think the Walnut suits it well and the veneer helps define the edges. I particularly like the snooker que effect down the sides of the neck
|
 |
The sides are smooth,
the back is contored and the edges are rounded over. This is going to
be one killer axe!
|
|
 |
I fitted all the Hardware.
The head string retainer/nut assembly is an excellent unit, it can use
either double ball end strings or (with the help of a few grub screws)
normal strings. I fitted the pickups and the Neutrick locking jack socket.
I then resisted temptation to make it a lined fretless and started to
Fret the board.
|
|
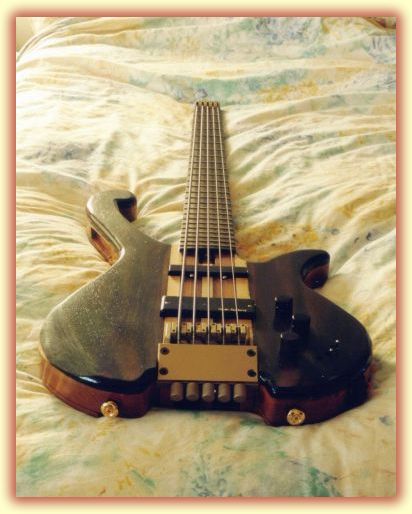 |
I applied the laquer (Rustins clear plastic coating) and buffed to a high gloss finish, but I left the grain still showing. I fitted the electronics and the pots ect and strung her up. I then spent several hours setting the bass up and trying her out. She sounds really good. |
 |