

Page Two
Return to Page 1 . Go to Page 3 . Go to Page 4 . Goto Page 5
|
Body Preparation I cut out the cavities using a band saw, there are 2 way of doing this, use a router with a template guide (which I did for the last bass) or do it free hand on a bandsaw. I chose the latter this time because the body is thinner and I want the cavity to go all the way through, the router method is better if I wan't to leave a bottom layer. But I am putting a cap over the top and bottom, it isn't a requirement.
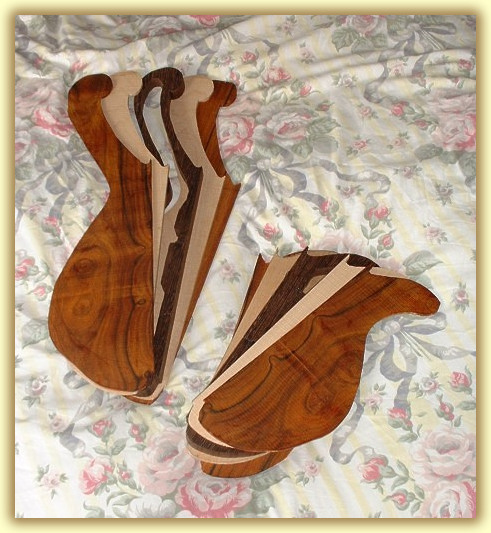
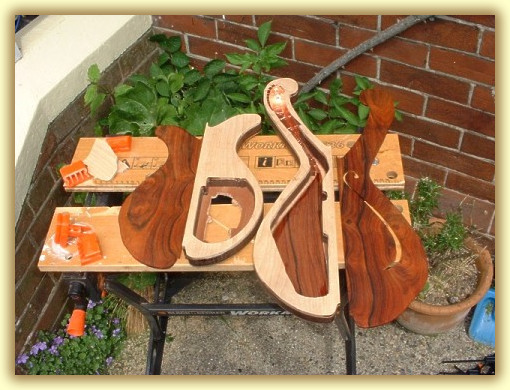
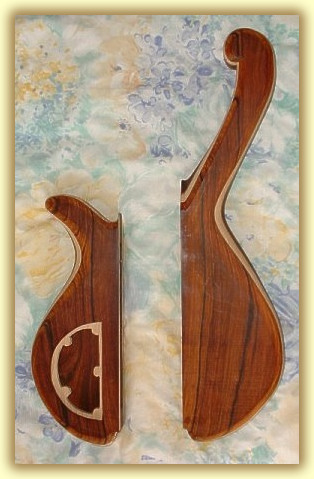
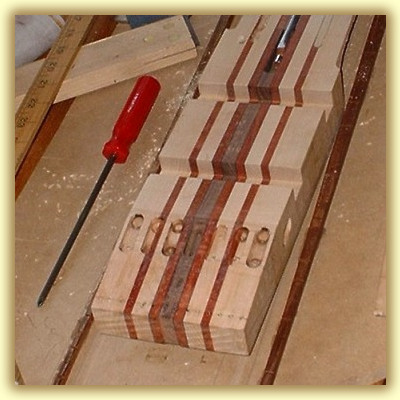
I cut out each Maple and Cocobolo laminate/plate using my trusty jigsaw. Normally I would use a bandsaw but the wood is only 1/4" thick so the jigsaw is adequate. I overcut the size by about 5mm to allow for slipage when I glue them. The Big hole on the right wing is for the control cavity. I have marked out the control cavity cover ready for cutting out. I have left a large area of wenge for the battery box. The large hole on the left body wing is the main acoustic chamber. This will have 2 distinct roles The odd spiky bits on the lower left wing are for strengthening when I cut the edge chamfering which will go all the way down to the wenge and will show both top laminates. One of the big headaches with making complex chambered instruments is thinking in 3D and remembering to leave enough material on the inside for the contouring. This all adds to the tedium and slow snail like progress. |
The plain Wenge boards looked so nice and was is heart breaking to hollow them out. The body looks little more then a skeleton at the moment but they are very very light, which had to be a bonus.
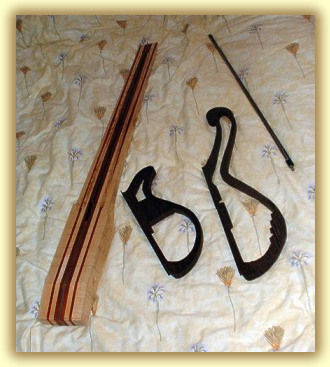
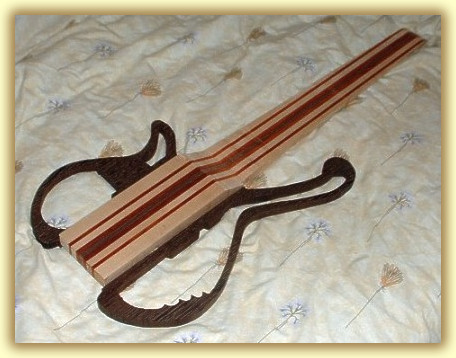
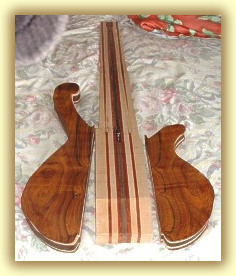
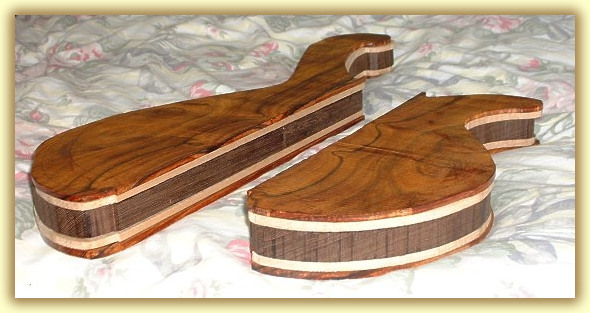
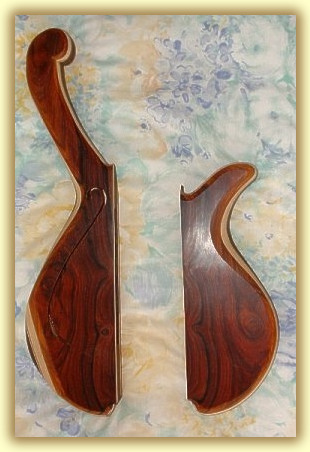
I cut out the maple boards first using a hand jig saw. the caps are only 1/4" thick so there's no reason to use the bandsaw and I can neaten the edges and the over-cut with a router later, using the wenge body as the guide. Then I cut the Cocobolo to suit. All of which need a lot of sanding to make their glueing surfaces smooth and flat. The Cocobolo plates are cut from 1/4" acoustic guitar backs blanks. These were a lot larger than I needed and I just managed to get a top left and a bottom right out of each side of the bookmatch. In other words I managed to get all four plates (top/bottom on both sides) out of one bookmatch set. This leaves me with another identical bookmatched set for a sister bass...nice. Hmm, so far I have the neck, and a matching cocobolo bookmatch set. |
|
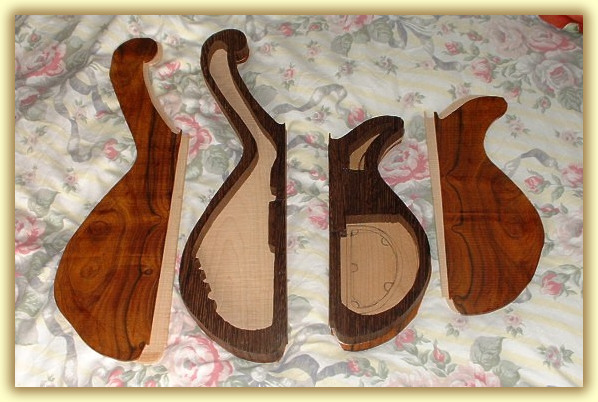
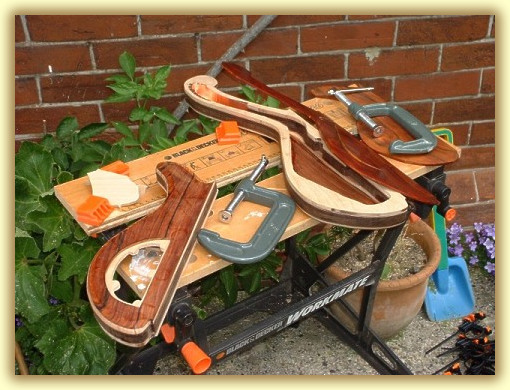
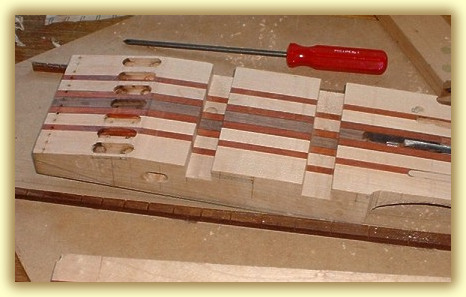
The Cocobolo plates were cut from 1/4" acoustic guitar backs. Theses blanks were a lot larger than I needed and was able to get a top left and a bottom right out of each side of the bookmatch. In other words I managed to get all four plates (top/bottom on both sides) out of one bookmatch set. This leaves me with another identical bookmatched set for a sister bass. Hmm, so far I have the neck, and a matching cocobolo bookmatch set. In this shot you can see the hollowed out Wenge centre with a maple plate on top and below, followed by Cocobolo plates either side. These will be sanded flat and glued together, I may use a veneer between each plate, this will look nice but make the glueing more complicated.
When the Cocobolo is oiled or laquered, the orangeness will turn into a deep chestnut red and will match the colour of the Padouk neck laminates. |
|
|
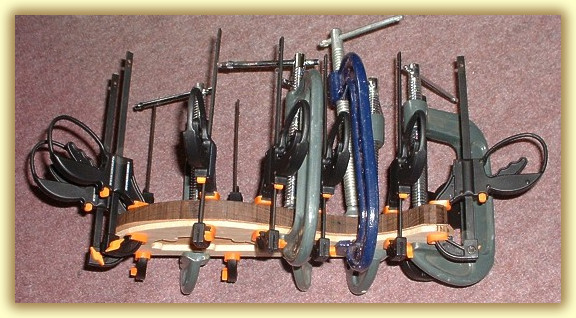
Because the maple (with a veneer) is so thin, the clamping has to be done very carefully. Lots of clamps but not too much pressure, this should even out the clamping force across the face of the plate. The last thing I want it to do is warp the wenge core with the moisture from the glue.
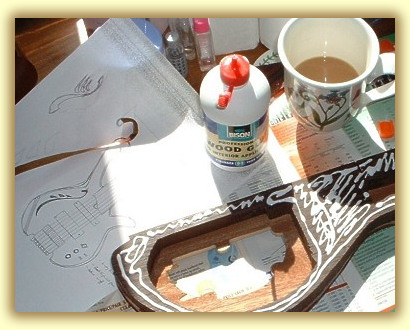
Ahh, a cup of tea, a good design, well prepared wood and of course copious amounts of glue: all in a day's work. |
I chose to glue the lower horn first (for no particular reason). The first layer to be glued was a 1/4" maple but I needed to cut the control access hole first. Then between the Maple and the underside of the Wenge core, I placed a single Mahogany veneer. Gluing more than one item at a time is a nightmare because of slippage. After the glue had set I pierced and cut out the control cavity hole with a template router bit (with a bearing). Afterwards I followed the body shape with the same bit to make the new laminate the same shape. I usually use a lot more glue than is required so that when it's all clamped up, it seeps out and I then know that the glue has spread evenly between the laminates. The glue will also fill any uneven dips in the wood surface, filling any voids. excess glue can be cleaned off later, too little glue and the join will be ugly and weak. << Ahh, a cup of tea, a good design, well prepared wood and of course copious amounts of glue: all in a day's work. This is my first time I have used "Bison Wood Glue" and I have to say that is certainly the best so far. It is strong but also isn't too thick. It sets within 20 mins which is a lot faster than PVA but it remians very viscous so I can slide joins about until they are aligned correctly before clamping. It is also the only wood glue which I have found that can bond to oily wood...such as Cocobolo, previously I have used Epoxy resin, which isn't ideal for such a large coverage. "Bison" is also very cheap. |
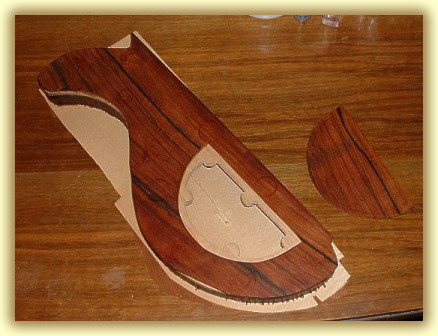 |
I cut out the control cavity cover using a very fine pilot saw. This was very tedious and slow. But the result was really worth the time spent. The cover fits into the hole and the line is nearly invisible. In this photo, I had glued the bottom Cocobolo laminate to the maple glued in the last photo and I had glued the maple/mahogany/maple veneer layers to the top of the Wenge core. Because of the brittle nature of glued veneers, I chose to cut out the centre with a coping saw. But I still edged the sides with my router. Just these few laminates took 2 weeks to glue. Progress is very slow and my patience is waring thin. |
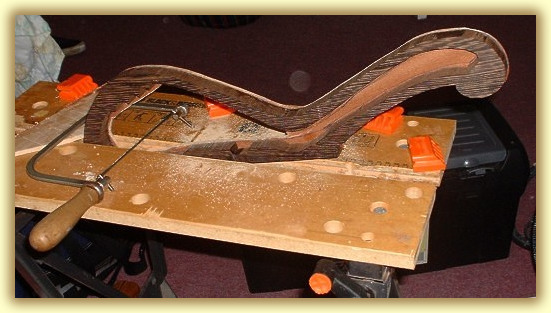 |
After each centre lamination
of the upper horn was glued and had dried, I cut out the centre freehand
with a coping saw. This is because of the differant layers and depths
required by the exterior contours and profiling. By now I am getting
really fed up with the amount of work each laminate requires. But the
end is in sight and the body wings are looking very nice.
|
 |
When the weather is nice, it is a pleasure to take my work outside and work my tan as well as my project! I cut out the "F" hole freehand with a 3 m/m router bit and neatened the line with a file. Not bad for free hand! These are the last two laminates. but I can't glue them until I have finished shielding the upper horn's tone contol cavity and cleared the wood below the "F" hole. This must be done neatly because once the tops are glued on there is no way to remedy any mistakes. |
 |
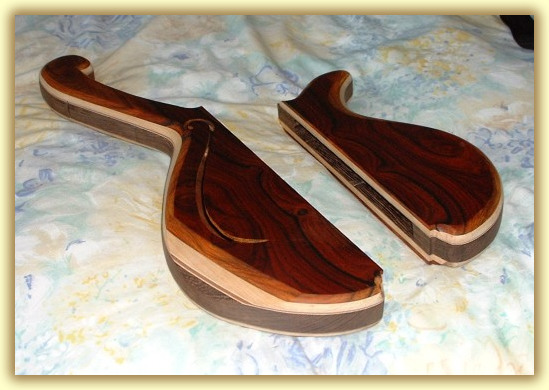
I neateded the edges with a template router bit and then rounded the edges with a 1/2" round over bit. The end result is very nice and shows the various layers. The veneers are only noticeble if you look for them, which is nice because it adds subtle detail. But I must admit that this bass is very slow and tedious in it's construction and it's design is over complcated. I am yearning to make something simpler. The thought of building another one of these is agony. I think for my next project I may tackle a nice simple Jazz bass. Maybe a "Supa Jazz" Hmm... a 5 string (or how about a 6 string?) with a 3 band EQ. I don't like bolt-ons so either a set neck or maybe an all through neck but with a body top which hides the neck laminates. I may even take a break from bass building for a while. |
 |
After gluing the tops on and squaring the edges I rounded then with my 1/2" round over router bit. The next thing I did was carve the various contours which has to be done with great care, constanly checking how much material is left in the courners. Too much carving and the body would be too weak to support a rock on roll life style. Too little carving would produce an uncomfortable bass to wear and play. This picture shows the copper foil in the upper horn control cavity and its complex inner construction. |
|
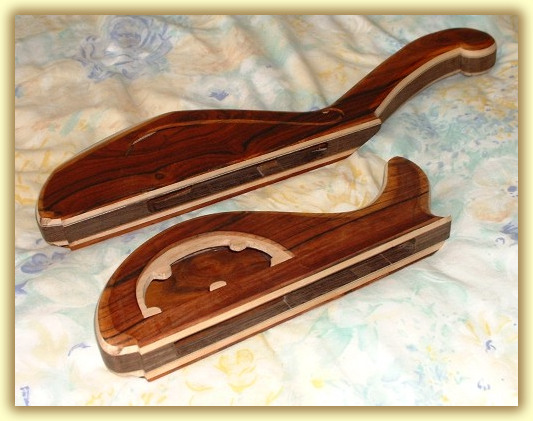
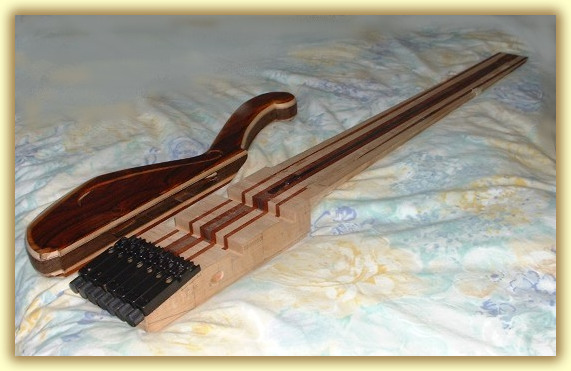
I have finally finished the laminate gluing and I have rounded al the edges with a 1/2" round over bit. I have also carved various contours and I am rather pleased with the results. In fact I'm glad that episode is over. With the body wings fairly complete I can now press ahead with the fingerboard. |
 |
Here are the body wings from the top showing the fore arm contour to the upper horn and deep radiusing around the waist areas.>>> <<< Here are the body wings from the underside showing the ribcage contour to the upper horn and deep radiusing around the waist areas. Also the neck to body contour can be clearly seen on the upper horn. The book matching of both sets is particularly apparent. |
 |
|
Thankfully all my extra effort has paid off and the body is nice and light but still ridgid enough to take the rigors of wear and tear. |
The fore arm contour is particularly pleasing. It cuts right through the Cocobolo, maple and all the various veneers, deeply into the Wenge. Showing the lovely grain structures of each laminate. One of my major concerns when designing and scribing the shape was having a big radius to the edges to really show off the wood layers but still to allowing enough material to make the structure ridgid. Some of the contours are very deep and extra provision for this has to be made during the design stage. |
|
I routed out a wide
cable cavity along the inside of the body wings. This channel is about
1/2" deep and about 1" wide. I did this so that the pickup
cables and the tone controls have a free run to the control cavity.
Also the fingerboard LED's will need wiring too.
|
 |
|
|
The headless tuner routs were quite tricky because they require a very tight fit. Which means that my routing had to be very accurate and neat. There was little room for error so I took it really slow. I drilled a nice big hole right through the neck blank to allow various wires to pass through to both sides of the body. The active tone circuit will be mounted on the upper horn so there wil be about shielded 5 wires running through it. There are also the pick up wires and the LED power cables. The Pick up channels were routed to the correct depth and width, but I'll leave the screw lug holes until later. It's difficult to see but I also sanded the neck angle. I also drilled out the Tuner block securing holes. |
|
|
The neck in this picture has the pick up slots routed out, the tuner block locating slots routed and the tuner holes drilled. The top neck angle has also been cut. The tuner blocks were screwed to the neck. In this picture the pick up slots routed out, the tuner block locating slots routed and the tuner holes drilled. |
Return to Page 1 . Go to Page 3 . Go to Page 4 . Goto Page 5