

Page Three
Return to Page 1 . Return to Page 2 . Go to Page 4 . Goto Page 5
|
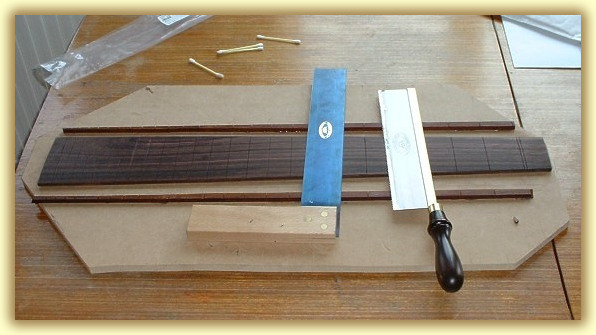
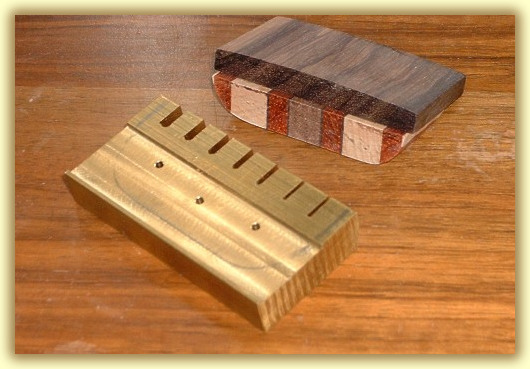
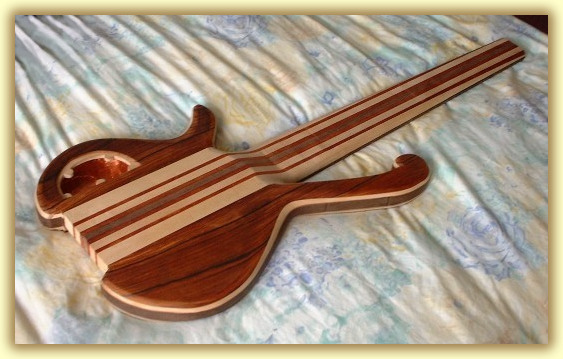
Carcass and Fingerboard I made a simple fret cutting board out of two sets of strips which I saved from my 4 string fretless fingerboard. It is always wise to keep the off cuts, essential if you need to match a small piece of wood for a later repair. I glued the 34" rails with Epoxy and made sure the slots were alined, I contoured the fingerboard radius with a fore plane and smoothed with a radiused sanding block. I took the fingerboard sanding through 60-500 grits and was hard work due to the width of the board. I cut the fret line slots by using a Fret saw which I bought from Luthiers Mercantile International, in California. When it arrived, it had "CROWNS OF SHEFFIELD" written on it! Typical, I could have bought it here in England and saved me some wedge. I used a top quality square to line up the slots for the saw to accurately cut. I cut the LED track slots with my trusty router and hand drilled out the LED holes very carefully. The LED's will be soldered 4 in series then each set in parallel. This keeps the brightness but will eat batteries, so I'll fit a switch to power them off when I don't want them on. I will hook up the LED's with 2 strips of sticky back copper foil (which I use for shielding) and solder each LED. |
Some tools really need to be of good quality. These two tools were quite expensive, but I hope to get good use out of them.
This bass is such hard work! I have deep respect for any double bass makers! |
|
|
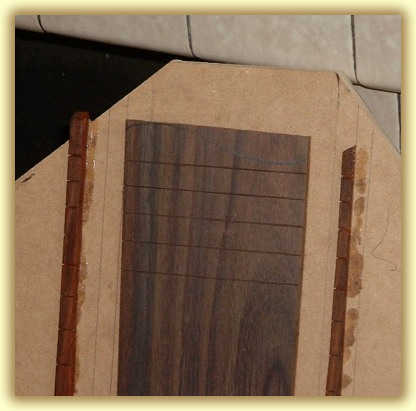
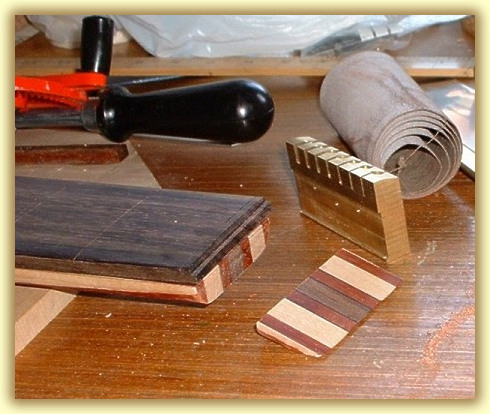
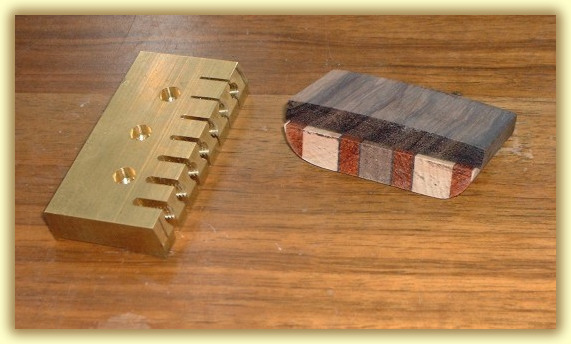
I scribed the Fingerboard end curve ready to cut, I started doing this on my last bass and it adds a nice feature to an otherwise blank end. It takes a little while to carefully cut it out on a jig saw, but it really adds to the final bass look. I filled the fret slots with thin strips of Box wood. Boxwood is slightly more yellow than maple and should look very nice against the rosewood fingerbroard. I sanded them down to the fingerboard but I'll leave the finishing until later. David King at Bass Guitar Systems in america milled a 7 string headpiece from a solid brass billet for me. I an deeply impressed how helpful he is. His workman ship it top notch and David was an absolute delight to deal with. David even cut the string slots to match my fingerboards radius! David also made the end cap from a much larger billet. So I have a lot of material to trim down and gives me a a few options concearning its final shape.
|
|
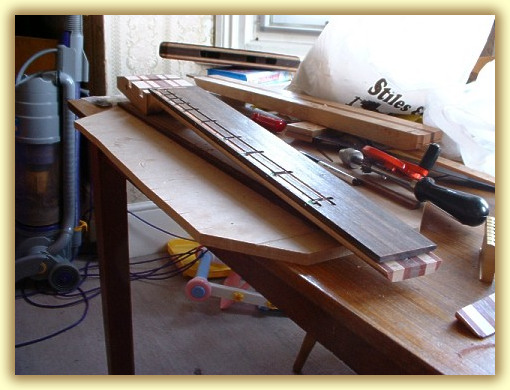
The Paduak really does look nice either side of the walnut centre. The black veneers sort of out lines the Walnut. The Maple will impart a crisp punch to the bass tone.
The fingerboard is a little thicker than I usually use, this is because I have used my usual radius, the added width of the board makes the hight of the centre a little taller.
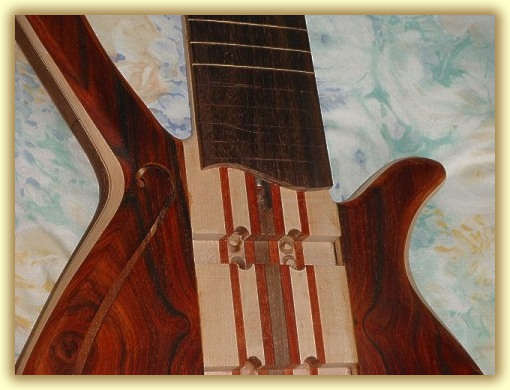
The End Cap design secures the strings by use of set screws and means that I can't use double ball ended strings. This isn't such a problem, there aren't any 7 string double ball end string sets available! Especially flatwounds! |
Notice that the fingerboard isn't quite quartersawn, it was the best I could get considering the width of the board.
I have chosen a flat profile to the back of the neck. Either side of the neck has a 1/2" radius. It should give the neck a very playable and thin feel. |
|
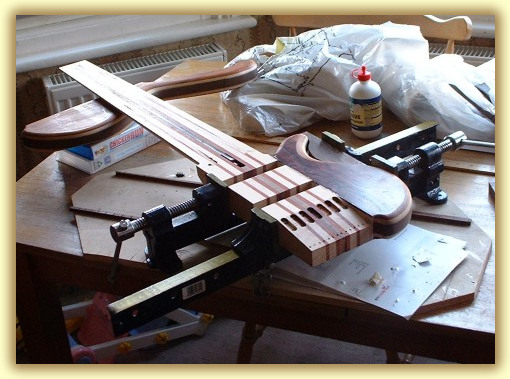
The Tuner routs are particularly clear from this shot. |
I glued on the body wings, one at a time using the excess wenge body blank to form a flat clamping surface. My sash clamps have paid for themselves many times over. The body wing glued very accurately and I am pleased with the results. I allowed several days for the glue to set before I removed the clamps on each wing. I allowed about a week before I glued up the second wing. |
|
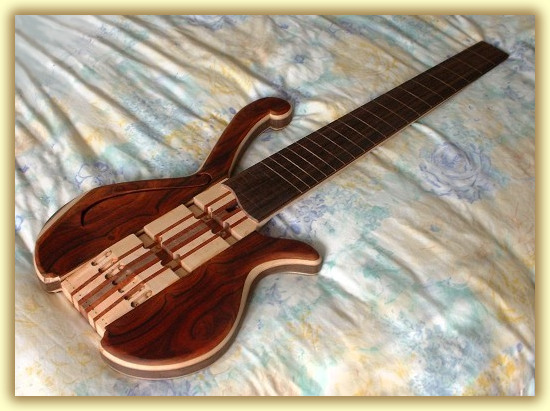
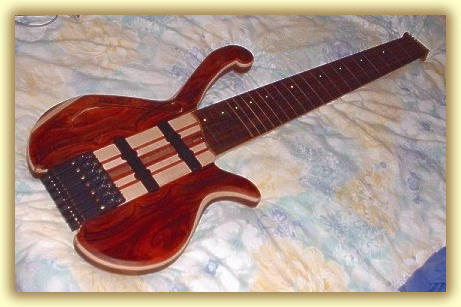
My wife says that this is her favorite and in her opinion my best bass yet. She also says that it looks like a work of art. I certainly hope so considering the effort!
The maple layer is very prominant against the blood red Cocobolo. I also like the maple and wenge contrast. |
The final look of the bass will be dramatically differant from the carcass. When all the hardware is fitted I am hoping that the black hardware won't detract the eye from the various wood's and coachline effect.
From the rear of the body, the size of this bass can be appeciated. The flat profile adds the the slim feel of the neck and should ensure a fast and playable neck.
The volumptous upper horn adds balance to the bass' handling and weight distribution as well as adding a unique (but not uncommon) styling feature.
When I carved the horn to body edge contours I added a deep waist line which looks particularly pleasing and gives a more sculptured look. It also hides some of the huge girth by making the eye follow the maple line and not the wenge. |
|
The "F" hole looks nice. It just needs a little more finishing and neatening. Fairly soon I will have my own workshop (i'm having my garage rebuilt and converted) so I hope to have a bit more inspiration in the future. It also means that I will be able to choose when I want to work on it, spending the odd hour here and there.
|
I cut the end of the fingerboard on a really top quality table jigsaw, in the past I have tried cheaper versions of these, but the good ones really are worth the extra money. My choice of curve is quite deep compared to the one I cut on my last bass. It somehow looked right so I guess it is right. The truss rod hole is quite narrow but is exactly the width of the walnut centre laminate. In the truss rod cavity, you can see the black veneer either side of the hole. It means that my routing was spot on. I have also cut out the Jazz style pickup screw hole lugs. They need a little neatening and the pickup holes are a little tapered. so I'll have to pad the cavites out with some identical pieces and re-rout them. Usually I make one mistake on each bass which I make, and I think that this was it. It's a pity because it is a lot harder to rectify it after the mistake has been made.
|
|
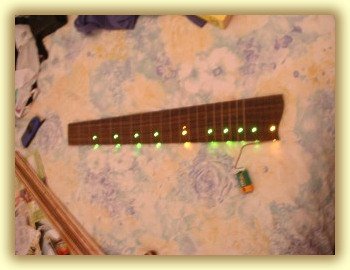
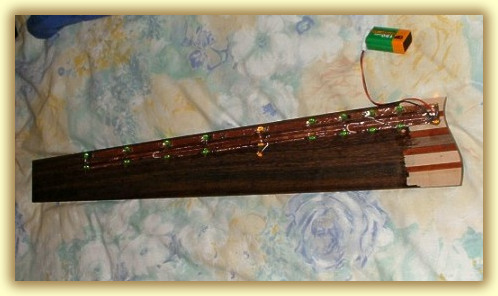
I took this photo without a flash to show how bright these LED's are. They eat batteries, but hey that's life. Sorry about the camera shake but it's the best I could when hand holding a digital camera at 11pm under normal lighting. I love the side dots. If my calculations are right, the fingerboard LED's should line up in the centre between the E and A string. |
 |
|
I placed all the parts together, resting uner their own weight, just to see how they look. I recently routed out the pickup holes to the correct width. This photo didn't show it but my routing wasn't very good. It's difficult to work to a high standard without a workshop. The flash gun has zapped the LED's in this picture, which is a shame. When this bass is finished, I think I'll load up my SLR and take some long exposure pics with a tripod. This bass is looking so nice. |
 |
|
The LED's are lodged
into carefully routed and drilled holes. Each LED is wired in series
with 2 other LED's. Each triplet is wired in parallel to create an even
brightness across the board. I used sticky copper foil as the + / -
and hook up tracks. This foil is great because it can be soldered and
is also very flexible. I fixed the LED's in place using Epoxy resin.
Each +/- track is routed in it's own long groove as are the LED's.
|
 |
|
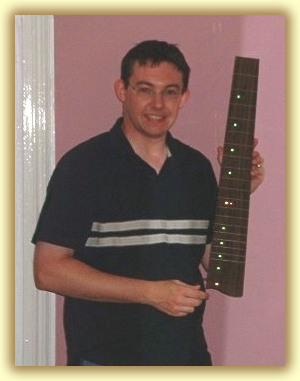
One proud and tired bass maker. Who ever thought of putting LED's onto a bass was a sadist. |
Here's a goofy shot of me just after I finished soldering up the LED's. This is a major milestone for me. The LED's have been a huge challenge and have added a certain complexity to the bass construction which I didn't account for. But they really do look the business, so I shouldn't moan. As you can see from this picture, I look quite chuffed. The curve on the fingerboard end does look very pleasing and the LED's are nice and bright. The choice of green LED's for the normal dots and yellow for the 12 and 24th frets is quite individual. I'm not sure if I'll bother to do this again but I have learnt some good lessons from it. If I had to do them again, I can fit them a lot simpler. It took about 3 hours to rout the various tracks, 3 hours to drill the holes, about 1 hour to fit the LED's, about 2 hours to rectify mistakes and about 2 Hours to solder them and test. I ripped apart the whole lot several times during the learning process. I make that 33 hours! This doesn't included the endless planning and ordering of LED's. If I did this again, I could probably do a good job in about 12 hours. |
Return to Page 1 . Return to Page 2 . Go to Page . 4Goto Page 5