

Page Four
Return to Page 1 . Return to Page 2 . Return to Page 3. Page 5 .
|
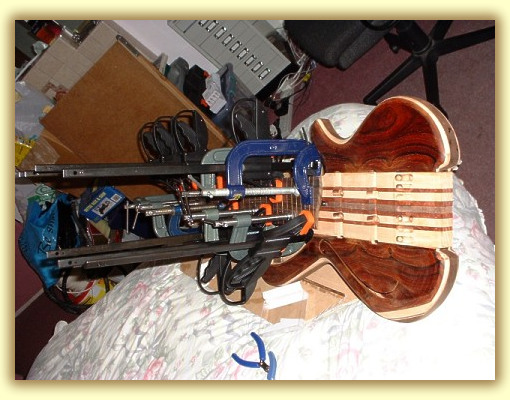
Fitting the Fingerboard I glued the fingerboard on to the neck in my usual way. But this is such a big wide fingerboard, I used all my clamps to hold it firm. I was worried about the LED routs weakening the board so I used Epoxy glue to fill the channels. I also used the same glue to fix the board on. The clamps exerted a lot of force on the board which held well. On hind sight this may not have been an ideal choice, epoxy is a surface glue and doesn't sink into the wood. As a result there is a visible glue line between the neck and the fingerboard. 15 clamps in total, that's my lot! Thankfully I didn't need any more. I noticed that when I was applying the Epoxy to the underside of the fingerboard the the Rosewood was quite dry and quickly soaked up the glue which meant that I had to let it dry, re-sand and re-glue the board again. I suspect that when I glued the board on, the Rosewood absorbed a lot of the moisture in the glue and tried to warp slightly, thankfully the clamps prevented the board going too wayward. But I don't feel very confident about this board's stability. While the glue was setting, I soldered the LED cable to the battery box's terminals. There are 2 cables running the length of the upper chamber, crossing through the neck near the bridge and into the lower chamber. |
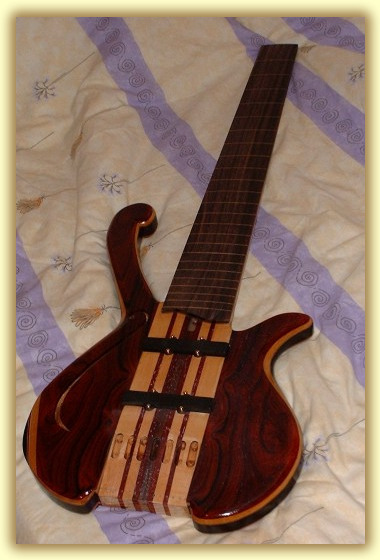
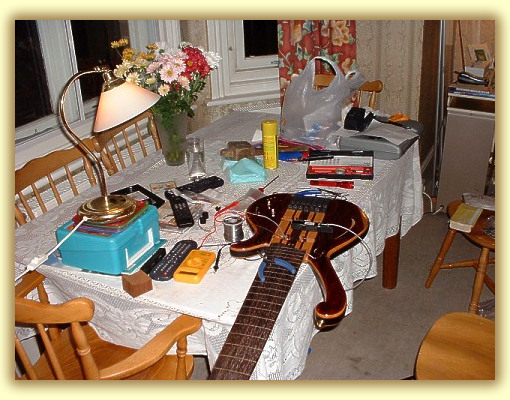
No I didn't glue it together on my bed, my wife would have gone mad! I just put it here for the photo. |
|
|
I sanded the entire body in 60-1000 grit sandpaper. This took 3 weeks. The fingerboard and neck were sanded or rather polished to 8000 grit and felt very silky. I applied a very thin coat of laquer using a rag, then I lightly sanded down the rag marks and did the same thing again a few hours later. Laquer this thin takes no time to dry and the wood soaks much of it up which is what I want. I am trying to sealing it so that when I apply thicker coats, the red pigments in the Paduak and Cocobolo doesn't run and soil the clean Maple. I fitted the pickups to check for their clearance and depth. The Pickups will be shortly removed so the final laquer coats can be applied. It takes about a week between coats so this gives me something to do and keeps my inspiration up. The first two coats were sealer coats, then I applies 4 thick coats to add a deep glassy lustre finish. Once polished this will be mirror shiny.
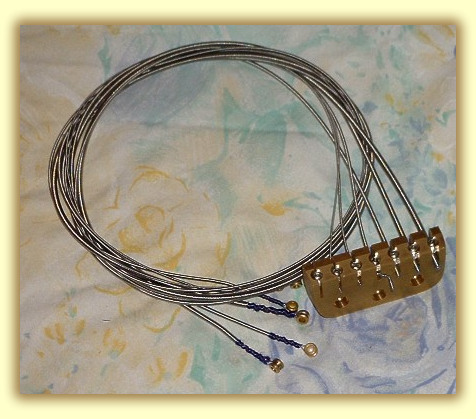
I trimmed down the head piece using a hack saw and smoothed off the edges with a various files. I then fitted the unit to the neck so that I could check the string alignment to the fingerboard's edge. When not in use I coiled up the string with the unit. The set screws provide ample securing for the strings but they don't like to be removed too often or the stings start to break. |
|
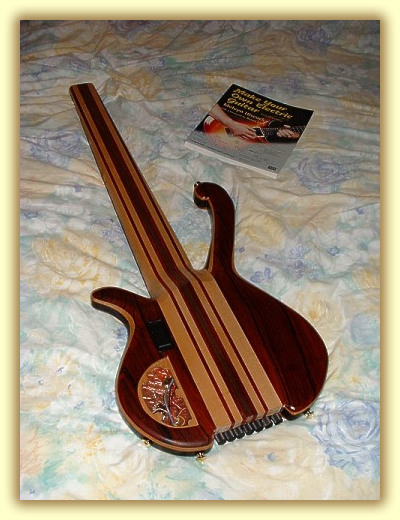
Melvyn, I owe all this to you. |
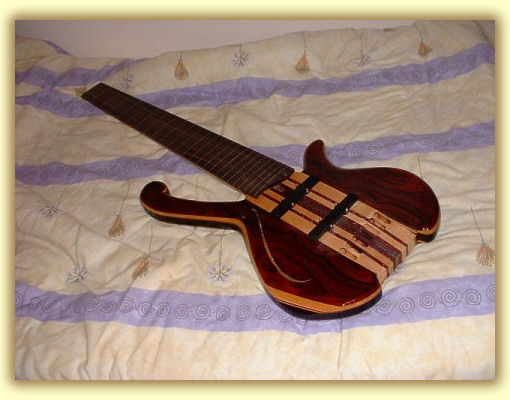
In the background is the book that started it all for me, Melvyn Hiscock's "Make Your Own Electric Guitar". It's a great read and a constant source of encouragement. I would advise anyone trying to build a guitar or bass to read this book first. The Cocobolo really does look splendid when it is laquered. Once laquered, the Paduak neck laminates have turned the simular shade to the Cocobolo and look like the same wood. In the control cavity I have drilled the Knob and switch holes. I have soldered them up and fitted the battery box properly. I then assembled all the hardware and started to solder the pickup wires in. From the back, the massive width can be appreciated. The through neck is 4" wide at the bridge! This bass is surprisingly light, considering the quantity of strings. In fact this bass is noticably lighter than my 5 string headless (which is very heavy considering it's hollow). The balance is spot on and although it needs a slightly differant playing technique it is still very easy to play. |
|
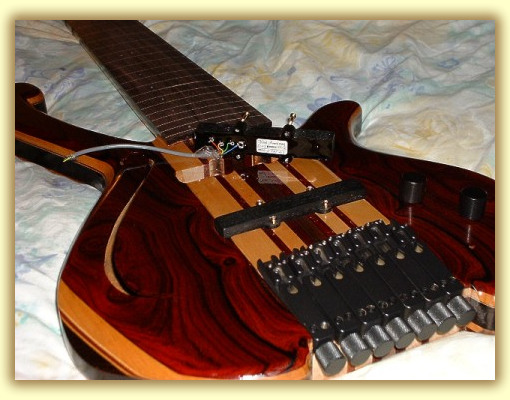
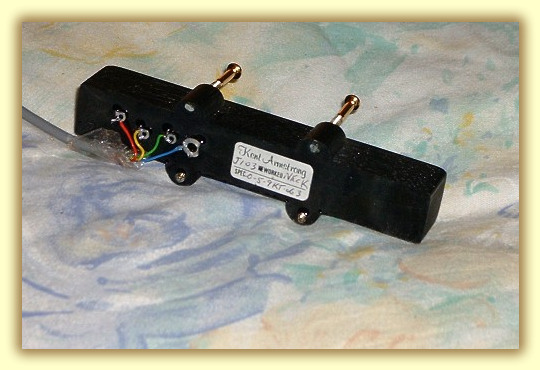
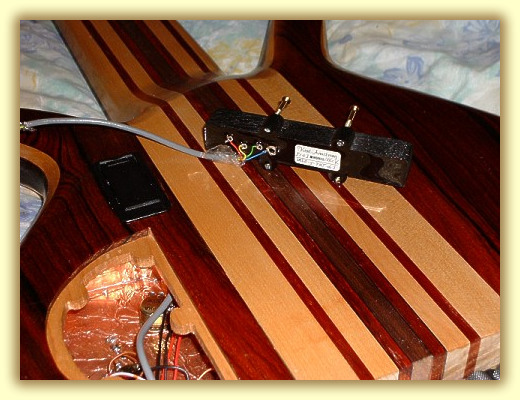
The pickups are custom wound for me by Kent Armstrong who has recently returned to America. This is a humbucking "J" set, each with coil winding selectors. This allows a lower or higher output, whilst keeping the humbucking configuration. It's a very expensive way to wire pickups because each coil needs a centre tap wired to each other. The two pickups are also wired out of phase, so when they are in parallel they partially cancel each other out.
The pickup shells have a distinctive wood grain finish to the plastic covers which I really like. They look like blocks of Ebony. I also like the Gold screws which I think add a little more subtle class.
Eventually I will fit a Bartolini 3 band Active EQ to the upper horn but I'll do this later in the year. But I have left a provision for an Active/Passive switch on the body (as well as an LED hole to light up with the active circuit).
The Colobolo caps have some delightful black streaks which look great against the red colour. They seem to melt into the bass around the edges and contours. It is difficult to photograph this bass with a flash because the maple turns yellow in the shots, although it's quite pale in real life. The Walnut is quite dark and breaks up the maple and paduak nicely.
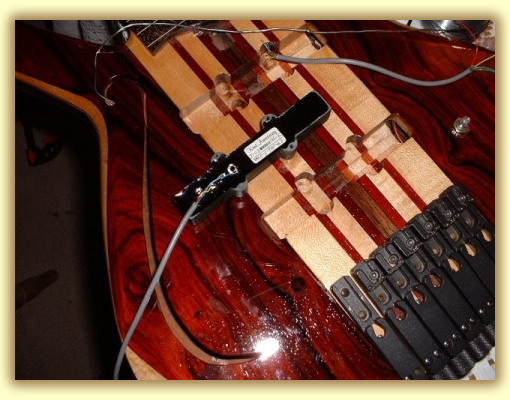
In this picture you can see inside the control cavity. It is fully shielded in copper foil and soldered around the edges. Currently only one knob and pickup is wired to the jack.
The jack is a strereo unit so that when I fit the active circuit, the battery is dissengaged when the jack isn't in use. The Ghoto Battery box is for the LED's. On hind sight I wish I'd bought a twin unit and made provision for it. so that the active circuit could run from it too, but I didn't...Duhhh! So I'll have to fit an internal spring clip inside the cavity. |
The finish is very shiny and really brings out the best in the Cocobolo top.
This is the underside of the Neck Pickup.
Notice the shine of the finish, you can clearly see the pickup's reflection. |
|
|
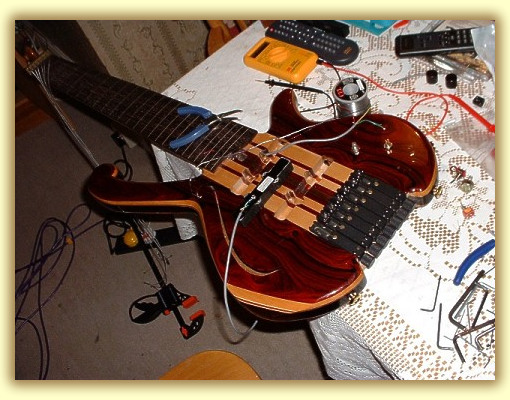
Time to get serious with the wiring. I usually hate this part of the bass construction. I often get very frustrated with the huge quantity of wires. Especially if something isn't working and I can't find out why. I usually burn myself several times with the soldering iron (soldering in a confined cavity is quite tricky) which really doesn't help my morale. But it has to be done. Eventually I will wire in a 3 switches. Giving me Parallel/Phased Parallel/Series wiring options (negating one of the volume pots). But I'll leave that to when I have more time to devote to it. I could also add a pull up switch to each knob and use these to jump between the coil taps for each pick up, this will be particularly effective with the phase options. This will give me a massive array of switching options, probably more than any of my other basses. I used 4 core screened wire for the pickup cables. which means that the signal is fully shielded from the source to the jack. I am getting a little buzzing from the grub screws on the knobs which is odd because they are shielded. I also routed out a thin wire channel in the pickup slots to allow the pickups to sit as low in the slots as possible.
Currently the LED's are wired to on of the pull up pots which works well. I'd like to fit an active circuit but I am unsure which one. I could add a stack knob with a single bass/treble pot and activate it with a switch (bartolini and EMG make very suitable units). Or I could fit a stack knob mid range pot with gain and frequency, that'd be nice. Or I could add a bartolini 3 band simular to the one I fitted to my 2nd bass on the upper horn. I could also for a John east U retro unit to the body which would replace the volume controls and switch the LED's from a mini toggle. Shortly after this Picture was taken, I strung her up for the first time and she sounds very sweet indeed. A very clear voice with plenty of Mmwahhh. Ringing harmonics and plenty of charector. The humbucking Jazz pickups sound very clean and articulate. |
|
The nearly finished articale. Fully playable and set up, but without it's full electrics yet. |
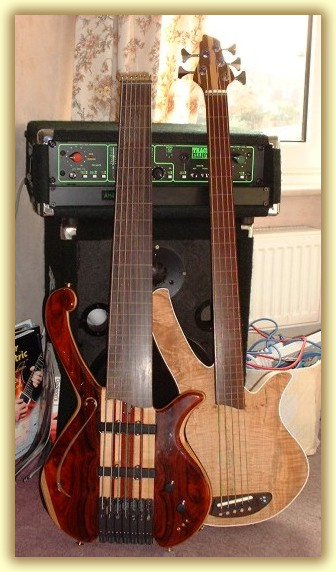
Hmmm....What's the plural for a fretless? Here's bass 5 and 4 (I really ought to start naming them) in front of my Trace Elliot AH400SM head and 1x12" cab (I recently recovered it to match my Trace). The seven string headless uses a normal 6 string set of strings but with an extra 0.25 guage tuned to a high F. Anything thinner tends to snap as does anything thicker. Currently she's waring "Status-Graphite's" new range of roundwounds which really sound very nice. I tried a set of half wound and a set of flat wounds but they just don't have that lovely round wound sound besides, I loaded bass 3 with flat wounds, so that covers that sound nicely, albeit on a 4 string. The two basses couldn't be further apart tonally. Bass 4 is a Thumpy EUB sounding sort of bass and my 7 string is a singing Hmmmwah monster. They look nice together don't they, the only design feature common to both is the lower horn styling. |
Return to Page 1 . Return to Page 2 . Return to Page 3 . Page 5 .