Page
2
|
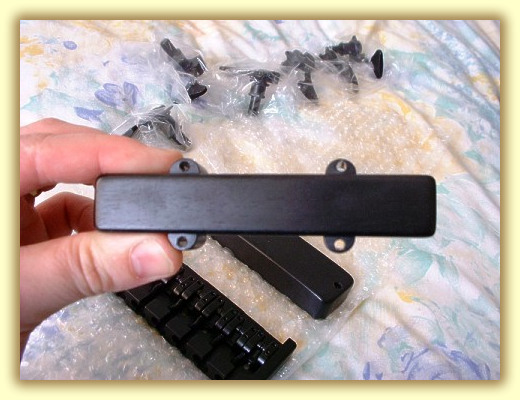
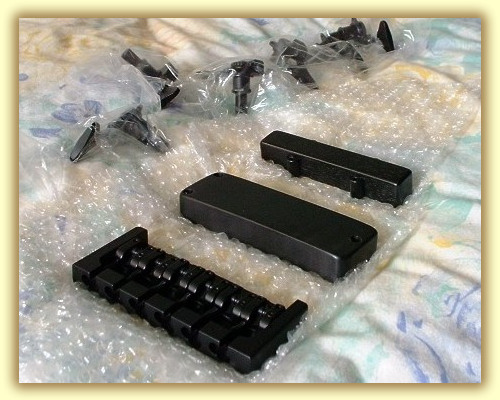
The working drawing is made, I've just got to get around to scanning it in! Mike's Bridge and Tuners have arrived from Hipshot USA so let the bass building begin. |
|
Mike's Pickups have arrived from Kent Armstrong. The first set had to be returned because they were too short and wouldn't do a 6 string. They would make made a fantastic 5, but that's not what I am building! Kent graciously wound a fresh set for me. A Jazz style humbucker with Alnico Magnets for a nice warm fat sound and Humbucker with Ceramic magnets, tapped with 4 wires for a solid but clear sound. Both pickups are custom wired with match impedance. The smaller narrow Jazz style pickup is in fact a humbucker also. It is wired so that is sounds like a single coil and it is loaded with alnico magnets for a warmer vintage tone. This should add a depth to the bass when both pickups are on and provide another sonic slant if it is used solo. Both pickups are typically heavy (for Kent pickups) which means they run hot.
|
Bass 6 Diary Of Construction: Mike's Bass The Bridge is a very useful Hipshot "A" style. It has the usual height and intonation adjustments but it also has an unusual side to side adjustment so that the string spacing can be adjusted. Also each saddle is at a different height, following the radius of the fingerboard which means that the break angle of the strings will be the same. Not massively important but a nice attention to detail. Naturally it's in Black. The Tuners have also arrived direct from Hipshot USA. 6 UltraLite magnesium alloy machine heads also in erm Black.
Construction: The first thing that I have done is plane down all the neck laminates to the correct thickness. So all the 1/4" laminates are the same ect. Mike is having a 7 piece neck which is quite a lot of work, 4 of which are the same thickness, so one mistake and all 4 have to go down to the new thickness. I also started to plane down one of the body blanks. Wow that's hard work, the Amazaque is so figured it tears really easily, I have to do it all by hand. Later this month the two carbon fiber rods will arrive from Staus-Graphite. I have also ordered some more veneers (my 7 string used the last of my stock) from crispins.
My next job is to prepare each laminate for gluing and then glue them up in to 3 larger laminates. This is a more accurate way of joining the pieces and helps reduce slippage - that nasty word again. I haven't decided yet if I'll use any coach line veneers in the neck construction yet but I'll definitely use some in the body. Unfortunately I can't get hold of any 2 way truss rods from Status-Graphite at the moment, so I'm going to have to hunt for them, probably from the USA. Which is a pity because the delivery time will slow me up a bit. |
|
|
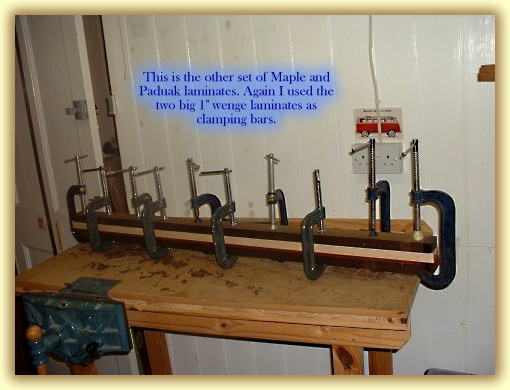
I started with the outer 1" Maple laminates because they were fairly straight grained and would glue better to the thinner Paduak laminates. I used two 1" Wenge laminates either side to act as clamping cauls. These keep the maple and paduak straight while the glue sets and also protect the maple from damage from the clamps. This is a slow process, one clamping session uses all 10 of my clamps and I have to leave the work clamped for a week to let the moisture in the glue to spread through the wood and dry out properly. This is another good reason to keep it clamped with caules either side - to lower the risk of warping or bowing. This process was repeated a week later with the other Maple and Paduak laminates. Sorry, no pictures of me using my new Thicknesser, maybe next time round. Mike's talking about me building him a 6 string Chambered bass simular to my 5 string. COOL. |
|
3 1\2" across, that's wide! I really like those veneers.
|
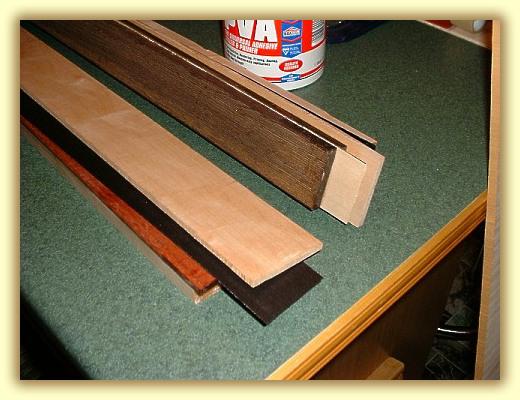
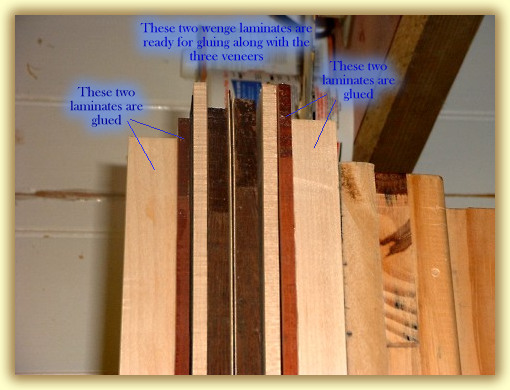
After removing the clamps I realized that I had planed the thinner laminated rather too well and had reduced the overall width of the complete neck by 1/2", duhhh! So after a lot of thought I decided to use two 2/3" Wenge laminates in the center instead and add 3 veneers between them. This looks very attractive, the two maple and single black veneer really stand out nicely against the two Wenge laminates. I also added a single black veneer between the 1/4" paduak and 1/4" maple laminates on either side. I glued the two wenge laminated and 3 veneers in one session. They look great and I am very pleased with them.
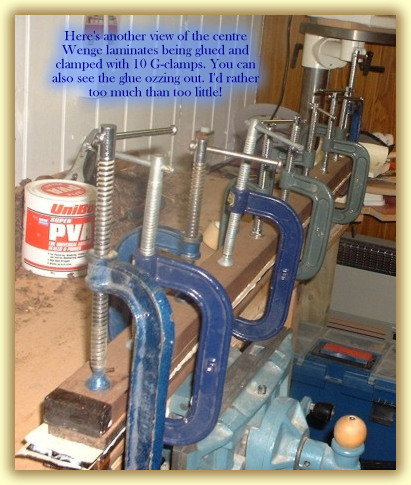
Again copious amounts of PVA glue was used. I prefer PVA for gluing neck laminates because it's quite thin and easily spreads, it doesn't gum up as it sets and it sets fairly slowly compared to Aliphatic resins so it stays workable for longer. Meaning that if I make a mistake and I don't spot it until 30 mins after I've clamped it all, there's a good chance that I can still rip it apart, clean it and re-glue it. |
|
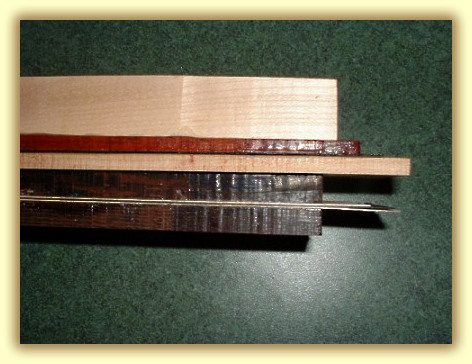
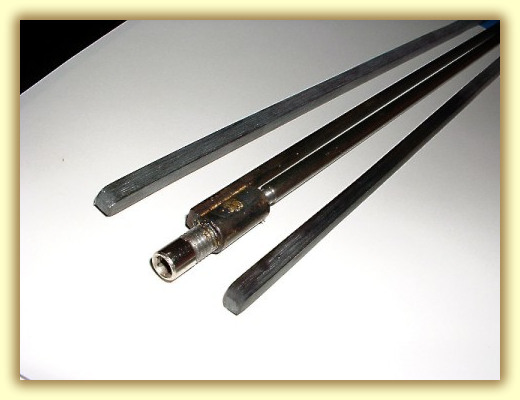
Here's a clear photo of the truss rod and the two graphite re-inforcing rods. Fortunately I was able to obtain the truss rod from David Dyke Luthier supplies, I bought the last 3 of his stock. The truss rod is a two way design which allows both back and forward bow to be adjusted. It's also a proper 35" length, a lot of luthiers use the same rods for 34" and 35", I try to get the right rod If I can. The two graphite fibre rods are 1/4" square section and about 20" long. These will be laid eiter side of the truss rod. These rods really do help with the neck strength and they allow me to get some really thin necks! |
 |
|
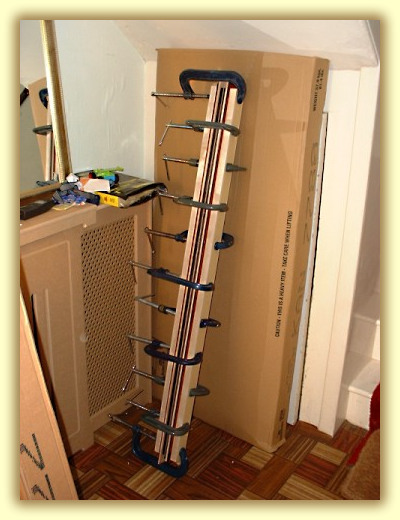
This shows the final clamping of all 8 laminates and 5 veneers. I left it standing for a week to dry thoroughly and allow the glue's moisture to settle in the wood. I really don't want this to warp now. This time I used 12 G-clamps. after a week I removed the clamps and left the blank to stand for a further week - tedious isn't it. I checked the inner wenge laminates and they are fairly straight, there's a slight deviation along the centre but it's fairly tight. A couple of m/m, but certainly within acceptable limits. (Ever noticed that Alembics often are way way off centre!)
That's a big bit of wood! 8 laminates, 5 veneers and 3 Wood types. Although the bridge is wider than the Neck blank, the saddles are well within the blank. This helps the sonic vibration transmit through the neck better. |
My next job was to plane the neck top and bottom square. This i did by hand and took 4 nights work. The wenge is so hard that it blunts the plane's blade after only a few passes. It's very time consuming and progress is slow.
Once this was complete, I started to mark up the blank dimensions ready for cutting. On the top I marked out the 35" scale bridge point, the Nut, followed but the headstock design. Then I drew the neck taper (to Mike's taste) and on the side I marked out the headstock's angle, the body thickness, neck taper, neck profile (again to Mike's taste) and the neck angle. You can just make out the pencil headstock markings on the photo above.
After triple checking all my dimensions she's ready for cutting. |
|
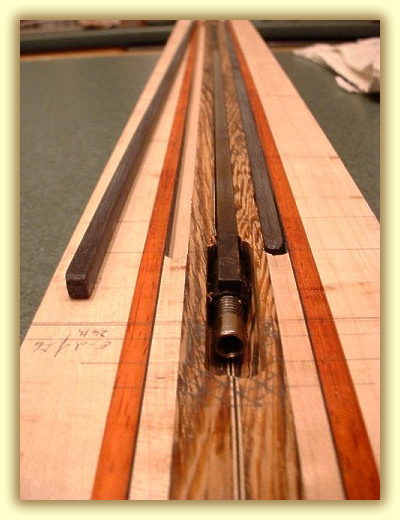
The Pencil cross-hatching is where the truss rod adjustment hole needs to be enlarged to so that I can get an "allen" key in there comfortably.
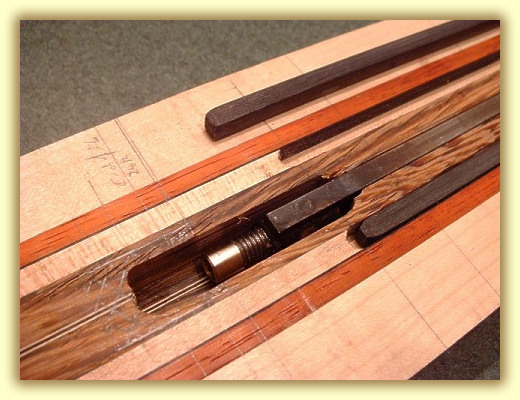
I routed out the Truss Rod slot, which changes depth by getting deeper slightly as it gets closer to the adjuster. I routed out the area around the adjusted, just enough so that the neck keeps it in place but not too much as to constrict the rod's action. When I glue the rod in, I'll only glue in the other end up to about 2" from the head. It sits nice and flush and won't belong until it's ready for glueing. The truss rod adjustment hole will need to be widened first, there's no point in having a truss rod if you can't adjust it is there? You can see my pencil markings for the end of the fingerboard and the 24th fret. Notice how distinct the maple and black veneer coachlines have turned out. Also the black veneer next to the Paduak adds a subtle shadow to the laminate. |
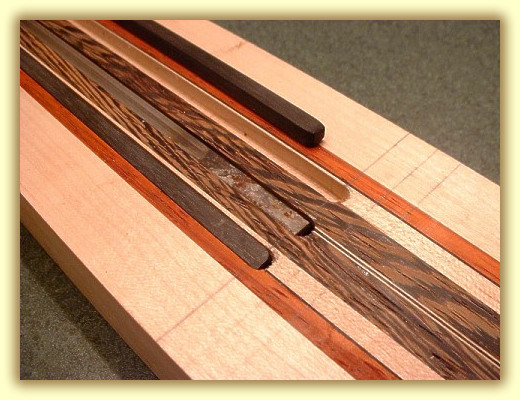
The two carbon rods are really easy to cut with a Router, 1/4" wide and 1/4" deep. .This was done with about 6 passes with the router. Rob Green cut them to match the 35" scale for me (and they match the truss rod's length too) and they also sit well in their slots, laying flush with the neck surface and nice and tight.
Latest update - I have bought my very own bandsaw and it's great. It's a Record Power CCBB 12", which I bought from www.Axeminster.com pictures to follow as with my workshop/garage |