
Page 4: Fretting over the Fingerboard
Page
1.
|
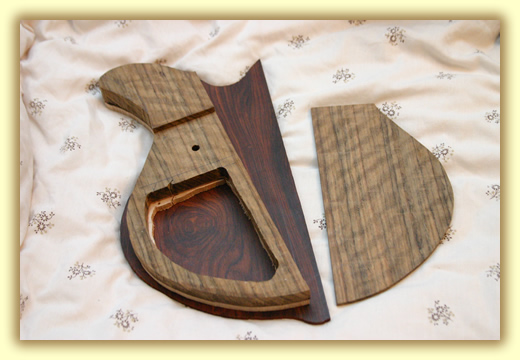
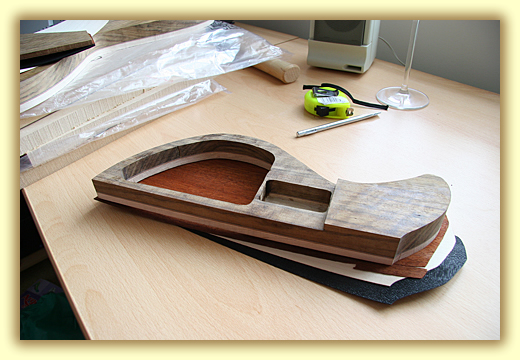
Now we turn our attention to the Fingerboard and neck area. At the moment this is an uneven slab of ebony. If we want to turn it inti a fingerboard then it will need to be squared and flattened on each side. Dips and high spots need to scraped, planed and sanded out, whilst keeping each side at right angle |
|
Bass 6 Diary Of Construction Page4: Finger-board Preparing the fingerboard is always a tedious time consuming task. The harder the board, more work is required. The wider the board, even more work. This being a sixer made from Ebony...ouch. It's usually the most difficult piece of wood to work on a guitar, especially if it's made from Ebony or Cocobolo. It doesn't matter if you sand or scrape, it takes hours to work with very little results. Also an exceptionally sharp blade is needed on your plane, which is only good for about 4-5 passes, then it has to be re-sharpened. The wider the board, the harder it is to work and thicker the board needs to be. The seven string that I made last has a Rosewood board which is a lot softer than Ebony, but because of it's width, it took about 3 times longer to flatten, square and radius than the 5 string ebony board and yet it was only 2 strings wider. So Mike's 6 string ebony board will probably take ages. I'd also like to work a compound radius too, but we'll see how it goes. I have already spent an hour scraping and planning the underside of the board flat and it's far from acceptable, so a LOT more work is required.
Whilst preparing the fingerboard, I decided that it was about time I made a decent fretboard slotting jig. Mike wants a 35" scale and my 34" jig that I used for my 7 string was a bit pants. Time for a better one. I'll probably make two, one a 35" scale and the other a 34". Because I need the 35" scale version now, I'll start that first. The trick to these jigs is to make them as sturdy as possible (so they don't flex when cutting) and also to get the saw guides as accurate as possible. So the saw guides have to be cut exactly on the fret lines and they have to be precisely right angles to the board. I got the spacings from a 35" board that I bought a while ago from Luthier's Mechantile International, during one of their summer sales. This Rosewood board is wide enough to do a five string but not much else. LMI, offer a very usefull slotting service and charge a few dollars to custom slot any board purchased from them, up to 36" scale. It cost me about £12 including slotting and postage from the USA, not a lot of money. I bought it for this purpose in mind, to create a slotting jig. When it arrived, I was stunned at it's quality. Perfect straight grain, spot on quarter sawn and a very nice purple colour too. My only critism is that the slots aren't exactly at rightangles to the centre of the board, but it's close enough. I have an idea for a 5 string Jazz that would sit well with this board….. I also bought a really sweet little engineer's square, it's SO usefull and I am wondering how I managed without one for so long!
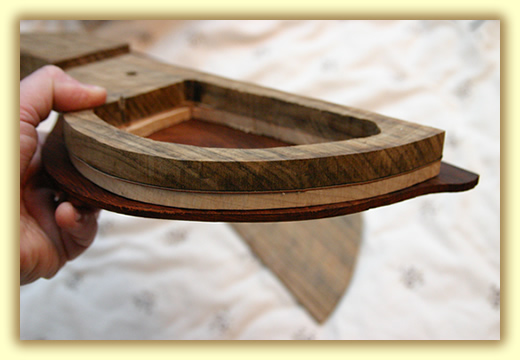
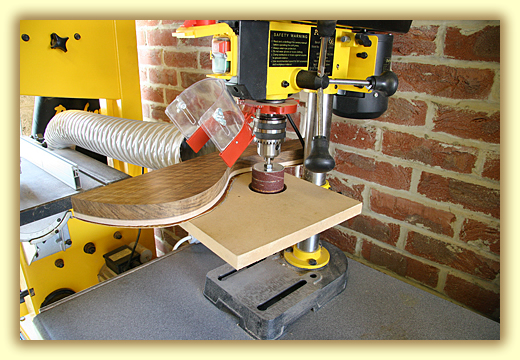
After many many hours of sanding with a 60 grit paper and block and scraping with a .8 mm cabinet scraper, Mike's fingerboard is now true and square along it's length and across it's faces. All sides are parallel too. This board can now be slotted and radius'd. I'll probably cut an 18" radius first which will be the wider radius at the 24th fret and use a 15-16" radius at the zero fret. The 18" radius I'll probably cut using my newly made Radius Jig. The narower radius I'll start off with the Radius jig at the zero fret and then join the radi together using a finely set plane and a flat sanding stick The next job for Mikes Bass is to neaten up the control cavity cover and to rout out a hole for the electrics. Before I can do this, I need to sand down and scrape the bandsawn sides of the cavity cover and the body cavity. The bandsaw left a lot of marks here because of the width of the cut, also this wood chips all too easily with a plane. So it's got to be laboriously done by hand. Once done, I can make a 3/4" MDF template to guide the router bit accurately and create the control access hole. Once all this is done, then I can start laminating the body layers together with a spread of veneers in between. When these are set fully, then I can neaten the sides with a template on the router. Hopefully getting a very nice, crisp edge to them. Another job that needs doing is to prepare the body/neck centre strut. The sides of the center strut at the body end need squaring. The top and bottom are parallel, but the sides are not exactly 90 deg just. It's not far off and they are parallel to each other and adequately straight, just not at right angles to the bottom. It is essiential that these sides are at right angles, because when I glue on the body wings any angle here would cause the body to be wonky. Additionally, Mike wants the Cocobolo top plate to cover the entire front of the bass. A Neck angle will need plaining in too. Once the body wings are glued on, createng a carcass. Then it'll start looking like a bass! I cut a big hole in my work top and made a jig for my drill to fit in upside down. So that I can use it as a drum sander. It does quite a good job and I'm very pleased with the results. I still need to get a big disk sander too so that I can cover all my sanding needs. I also need to get a chip/dust collector so that I can keep my working area tidy and healthy. The hole in my work surface also doubles up as a mini spindle moulder, useful for following templates or rounding over a radius. Again it's a simple MDF plate to which my Router fits so that the bit protudes though a hole from under the table. Simple and effective. I also need to build an odd Plywood structure called a "Shooting Plane" the idea is to create a way of plaining a piece of wood square by using block plane at 90* (on it's side) in a controlled fashion. It's a very accurate way of working but needs a very sharp blade, careful controlled use and of course it needs to be made to the highest accuracy. |
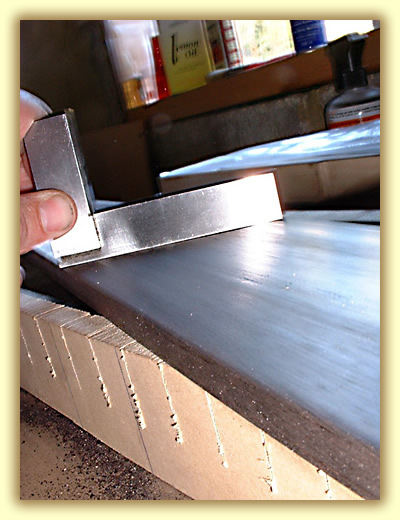
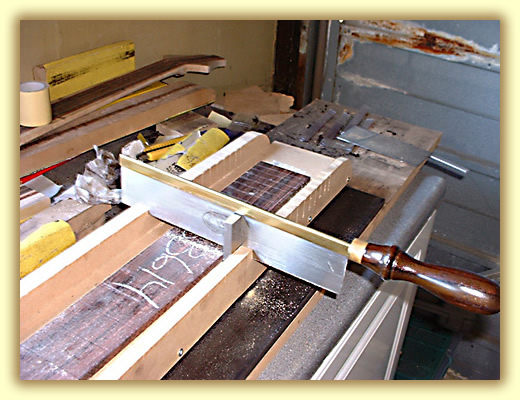
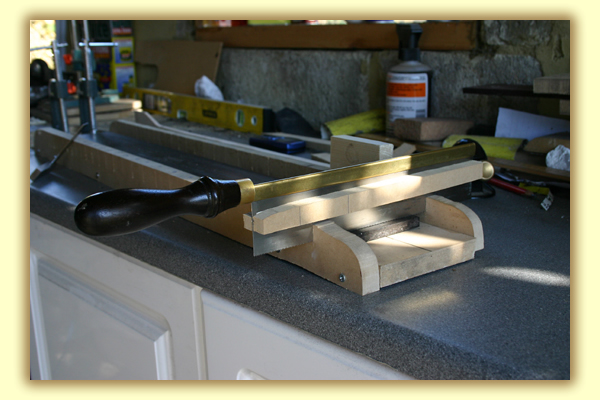
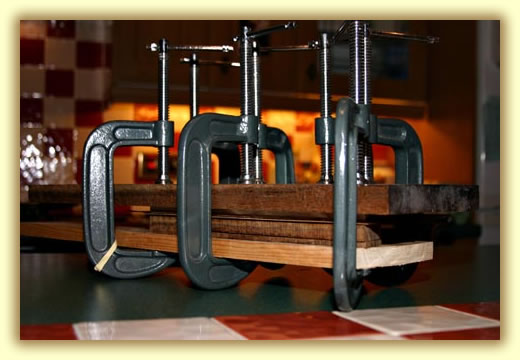
This is my 35" Scale fretting jig. I made it from 3/4" MDF. I used a 35" scale ready slotted board raised on a 1" board as a cutting guide, to create the slots for the saw to pass through.
These had to be cut as accuratly as possible and I used my 3" square butted against the saw to keep it 90 deg to the fingerboard. The depth of cut here was only about 5 mm (the depth of the fingerboard slots)
I then dropped the fingerboard by an inch and lined it back up again. Using my small square, I cut the slots all the way down to about 5 mm above the base.
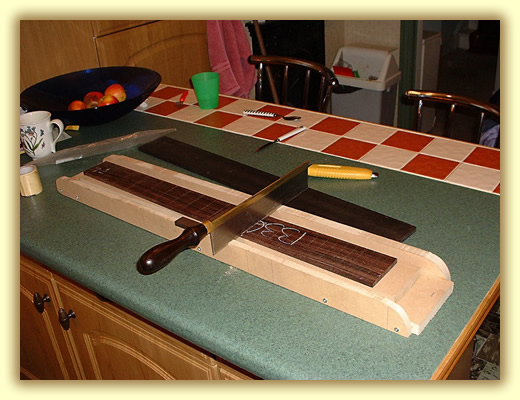
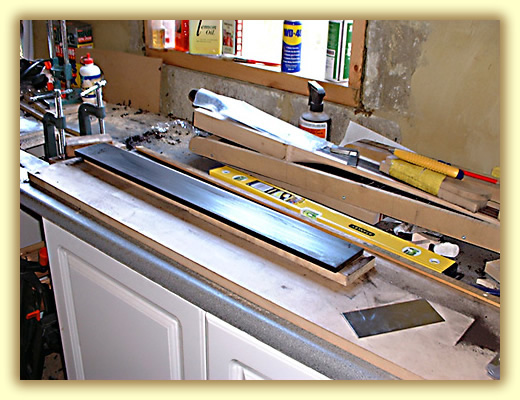
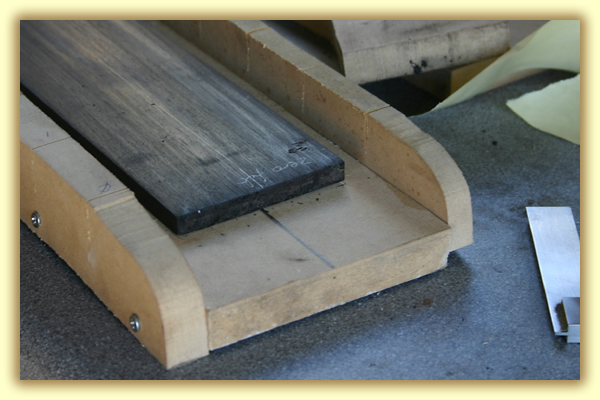
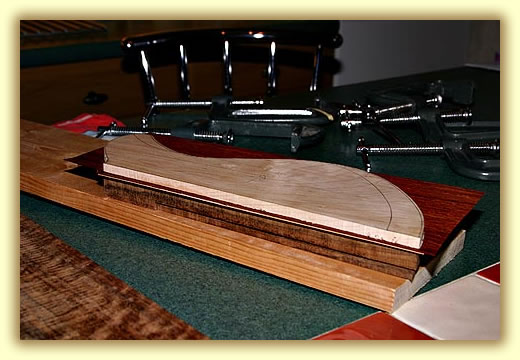
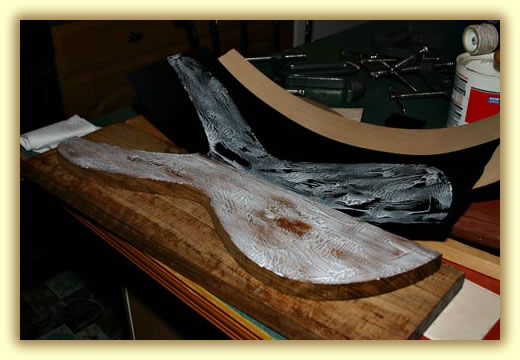
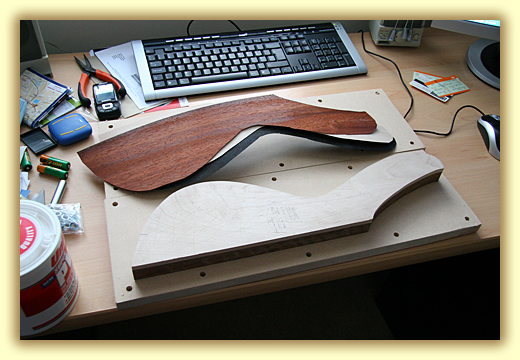
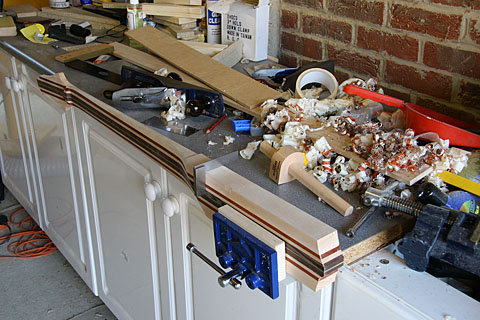
Here is the nearly flat fingerboard. I used a no 5 plane followed by a narrow angle small plane to get the board to a rough flatness across it's width and along it's length. Then I scraped and sanded the remaining peaks and troughs out. Continually checking with my 3" square and my Straight edge. The Oblong piece of metal to the lower right of the frame is my 0.8 mm scraper. The big yellow spririt level has a ground underside, which I use as my straight edge.
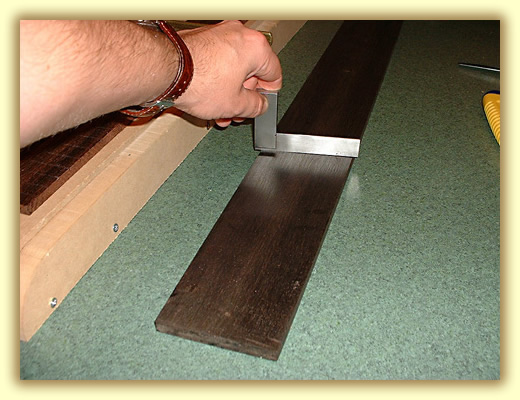
Now that's flat! with no visable light between the board and the square.
In the background you can clearly see the body cavity router template.
-------- 0 -------- |
|
-------- 0 --------
Next, I selected the top and underside of the fingerboard and then selected which way around the board would go. Then I carefully Marked out the centre line in preparation to cut the fret lines on this beautiful piece of Ebony. My new 35" scale fret slotting Jig was used here to great effect, coupled with my Grentlemans saw. I precisely stuck the board down with double sided tape (obtained from a carpet fitters) and double checked the squareness. This is greatly helped by the accuracy of the straight edges of my slotting jig. It's alway worth the time to make a Jig with straight edges, it's amazing how often I need them! Thus saving time in the long run. The Zero fret was also marked up too, just to remind me, in case I had to remove the board for any reason.. Fret Slot cutting is done nice and slowly and each pass with the saw making a carefully controlled accurate cut. The saw blade MUST sit square and flat to the board as possible, even with the jig. I also fitted a depth stop to the saw so the slots are of an even depth across the flat board. I don't go down to the final depth required because this will make the board weak when I radius it. Instead, I'll go down to half the board's thickness.
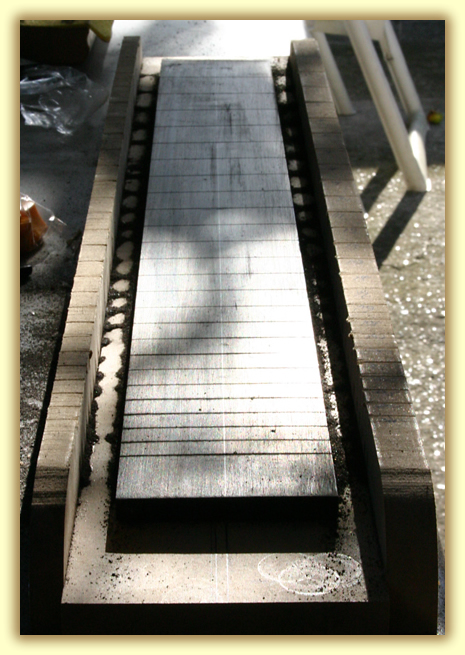
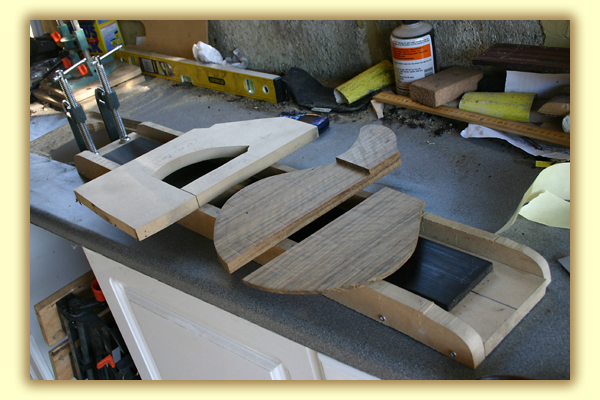
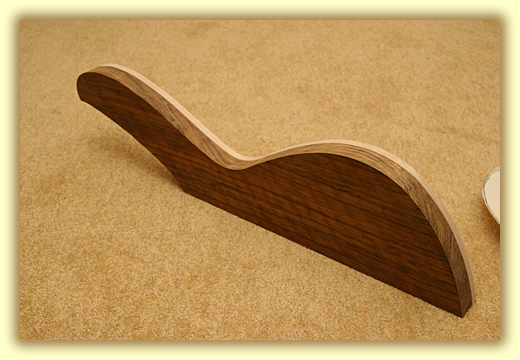
Above is the finished, fully slotted 6 string fingerboard, wearing an impressive 25 frets on a long 35" scale. The excess ebony dust will be carefully collected and used to create a matched wood filler (mixed with PVA). Once the board is radiused, I will re-slot the board to the required depth for the fret wire, but instead of the slots running at the same flat across the board, they will follow the radius of the board so that the depth of the slots is the same across the radiused board. After this is all completed, I can think about fitting it to the neck. The truss rod needs a thin 2mm maple fillet cover fitting so that it dosen't rattle in the future. The Fingerboard end needs the end curve (at the 25th fret) routing and dressing at the body to fretboard end. The lower Ovankol Body core needs to be sanded more and the control cavity needs cutting out. The upper Ovankol Boby core needs to be glued to the maple tone plate (with some veneers in between). Then I can do the same on the lower horn. The Cocobolo top plate needs it's centre line squaring on the shooting plane. Then I can cut out the fingerboard hole. After that the top plate can be joined together. Then I can glue the body wings on to the neck to form a carcass. Then I'll lower the body centre strut to the same level as the body and attach the cocobolo. |
Attaching the fingerboard to the slotting Jig.
The First Cut is always the hardest. Here the saw's depth stop can be seen.
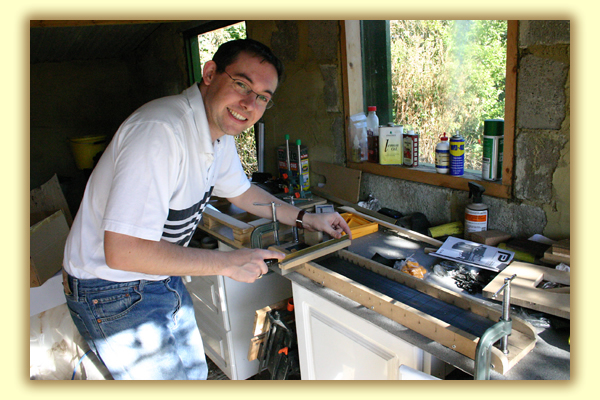
I invited Mike around to see his fingerboard being cut, I didn't want him around when I was flattening it though, to much swearing! Mike took this photo, Nice shot Mike.
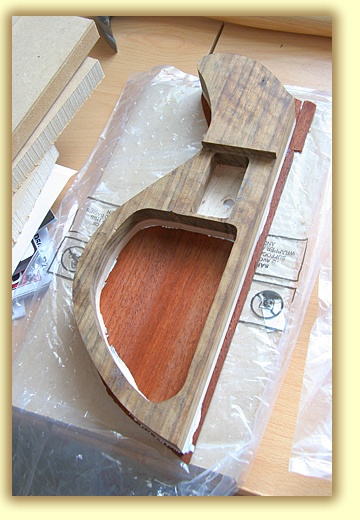
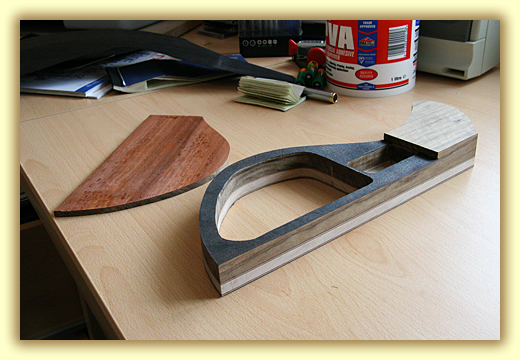
Here's the routing jig that I'm making for the control cavity. It's not quite ready yet. I took this shot with the lower body horn and the cavity cover to show it in context. I have also recently purchased a new router (with 1/4" and 1/2" collets - cool) and a new router table, which I haven't tried out yet. |
|
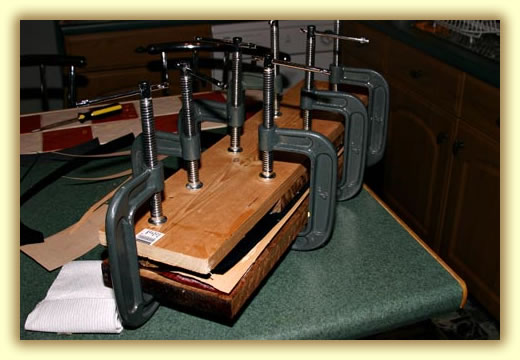
Gluing the Lower Body Horn Veneers.
I chose to glue the lower body horn first, because it's smaller and requires a little more work because I have already cut out the control cavity.
I like to sandwiched various Veneers between body laminates to add an air of distinction to the bass, it also helps to carry a theme through the instrument too. In Mike's case, I have used Paduak, maple and Black veneers in a simular way as the neck laminates. Paduak is a very simular colour to Cocobolo. Once laquered, it will give the impression of the same wood being used as a veneer or coachline.
The 1" thick flamed Ovankol/Amazaque was glued to the maple tone plate in the usual way. But I first had to glue a Black (dyed spruce) veneer, followed by a single maple, followed by a single Paduak (very nice) which was finally glued to the Maple tone plate.
This was left to dry overnight before removing the clamps. The whole lot was then stored for a week to allow the moisture in the glue to stabilise.
Once the wood had dried thoughly, I removed the numerous clamps and checked all the joins. Very nice and tight with a good seepage of glue which indicates a nice even spread of glue (with no dry spots or air bubbles). Then I trimmed off the excess veneer by using my Band saw. Once the veneers are glued 3 thick, they for a surprisingly strong resistance and it's best to cut them off with the band saw because a handsaw can easily cause one of the veneers to splinter close to the edge. |
|
|
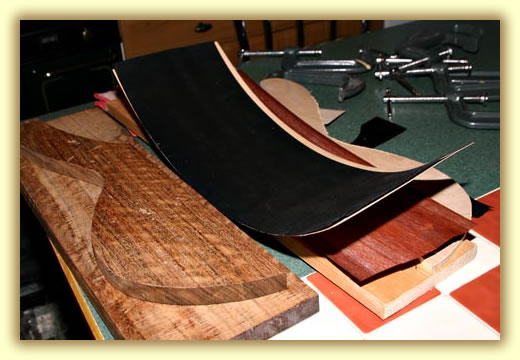
Gluing the Upper Body Horn Veneers.
The Glue was evenly spread across the face of the 1" Ovankol, then the first veneer way laid on top. This was then pressed and the removed to see of there were any air bubbles, just two big ones (a little hole was made to allow the air to excape and then the lamilatewas re-layed.
This was then clamped with a large flat piece of timber to act as a clamping caul. I left it for about 30 mins and the clamps were removed and the top surface of the black veneer was covered with glue in the same way.
The same process was then carried out for all three veneers, culminating up the final piece, the maple tone plate.
Once the whole upper body had been glued, it was left clamped overnight. the following day the clamps and cauls were removed and the glued body wing was allowed to stabilise for a week.
Once this had been allowed to set, I cut the excess of the veneers off using my band saw. The finished item can be seen below.
|
|
|
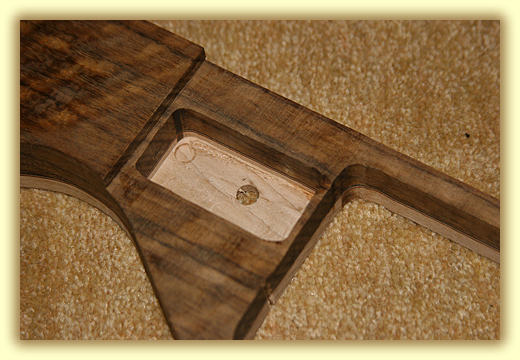
Cutting out the control cavity I attached my Control cavity template to the glued body laminate using double-sided carpet tape (it really sticks folkes!) and drilled 8 pilot holes for the router bit to feed from. Then I started routing from the inside of the hole. I took off about 2-3mm with each pass and I went down to the maple laminate. Once this was done, I fitted a Jeweller's saw through the pilot holes and rough cut out the maple laminate hole too. While I had the drill handy, I made a hole for the battery box route.
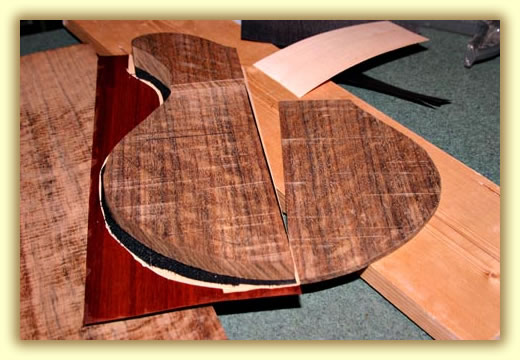
In this shot you can see the Lower Horn that I glued up earlier. The three veneers are very distinctive but not overpowering or garish. I think they add a nice air of distinction and contrast nicely with Mike's selection of woods.
Next, I'll neaten up this cavity using my router and I'll start work on the battery cavity which will only go down to the maple. I also need to glue some veneers to the underside of the cavity cover and I also want to dress the top of the cavity section.
|
 |
 |
|
|
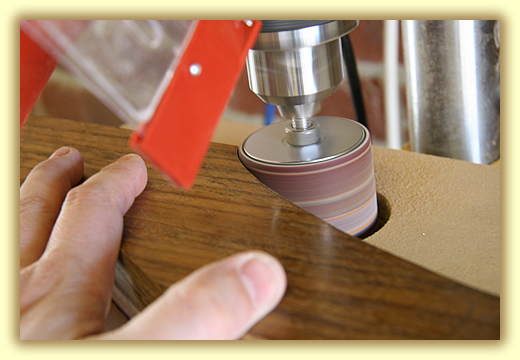
The next task was to rout out a battery compartment. This was done witha router and then neatened with my Drum sander. Here's the neatened cavity hole and I've also rough routed the battery hole. This was all neatened with a drum sander bobbin fitted to my Pillar Drill. The top surface of the lower body wing was a bit rough, esecially the upper face of the cavity area, So I hand sanded this to 120 grit. Which removed the saw marks left from the bandsaw and will allow a great gluing key for the black dressing veneer that'll go on top. The sides of the lower and upper horns/wings were neatened with the Drum sander attachment, which is a very welcome addition to my workshop!
--00--
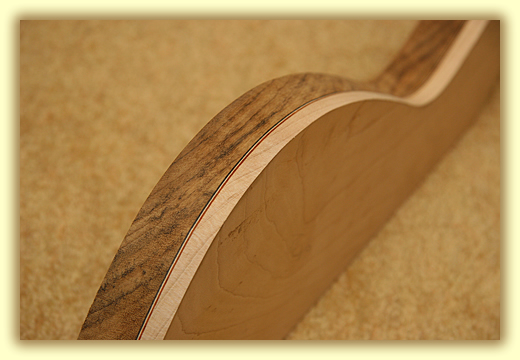
I've Dressed the top of the control cavity with a nice Black veneer and the underside of the cavity cover has a very nice looking Paduak veneer. I've also glued up 3 veneers on both the Horns/wings. Paduak, maple and Black veneers in reverse order to the last set, a sweet attention to detail and a nice theme to carry through the body of the bass. I've fitted the 35" dual acting truss rod into the slot and fixed the end in with 2 part Epoxy (Araldite...it's the best for this type of work, belive me I've tried other brands to my horror). I've fitted a simple maple fillet to cover the truss rod in it's slot. and flattened the top surface. It wasn't sitting too low in the slot but it's nice to cover it up and allow the rod to exert it's force into the neck and not against the fingerboard. it also keeps the fingerboard's wood glue from affecting the truss rod.. The fingerboard slots have been deepened and a 16" radius has been Sanded into the top surface of the board. This will later be a compond radius with 16" at the nut and 18" at the 24th fret. Also the fingerboard can be fixed to the neck soon. I can also glue the fret veneers in soon.
|
|
|
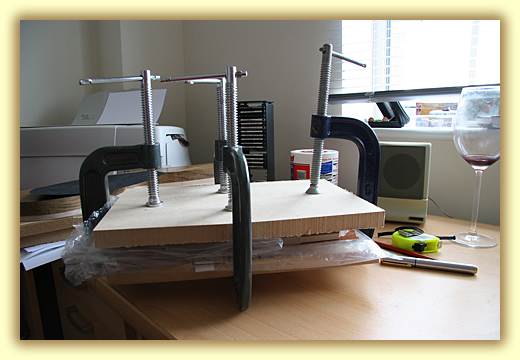
Here I was gluing of the first of three veneers that go between the Ovankol and the Cocobolo top. This veneer is Paduak, which is to be followed by Maple and then Black dyed Spruce. Each veneer must be glued and clamped seperatly and left to set for a whole week. this is very tedious and time consuming. Naturally a nice glass of Red wine helps the time go by.... The polythene protects the clamping plates from the glue and stops it getting every where! I like to glue and clamp in my office now, away from the dust and turmoil of my workshop. Also the lighting is better and I can pour more attention on it there.
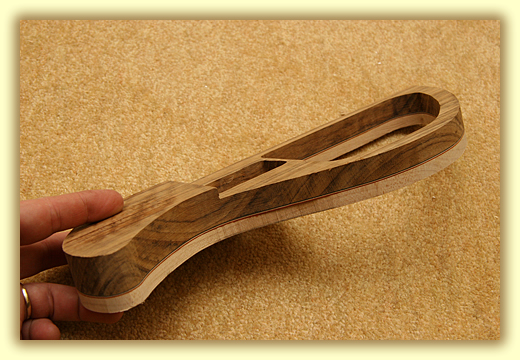
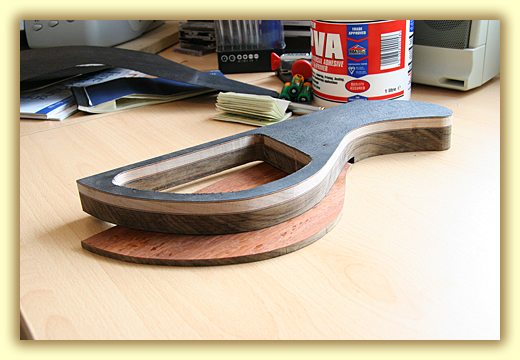
Here, I have finished all the veneering that this lower body wing is going to require. The control cavity cover has that lovely Paduak veneer on it too. Very Nice! I used the Back Spruce to dress the inside top of the control cavity recess. Looks very professional! I have also drum sanded the veneer's excess in these shots. All that's need for this lower horn is for the stright edge to be trued up on a shooting plane and thenit's ready to be fitted to the neck. |
|
|
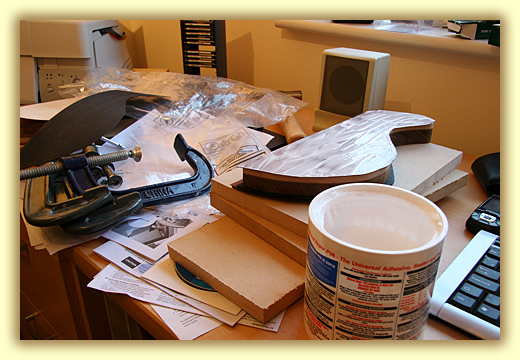
This is me laying out the three veneers for the upper body wing. The veneer comes in a long roll and I cut out an oversized shape using a sharp stanley knife. Then I wrote on the maple laminate exactly the order to glue so that I didn't do it wrong...bitter experience! Then I applied a healthy dose of PVA glue to the maple, spread it out with my fingers. Then thoughly wash them! I don't tough anything with glue fingers! Then I fitted the veneer to the body and placed a sheet of Polythene over the top and fitted the clapming plates with the G cramps. Tightened to a hefty force and left for a week to dry. Then I start the whole process again with the next veneer, this time it's the Maple veneer that's going to be glued to the previous Paduak. |
|
|
The sides of the lower and upper horns/wings were neatened with the Drum sander attachment, which is a very welcome addition to my workshop! This device has 4 different sizes drums, each with 4 differnt grits. I use my dust exstractor tube close by to remove the waste sanding dust. The other benefit to using one of these drum sanders is that they square the sides as well smooth out the length..
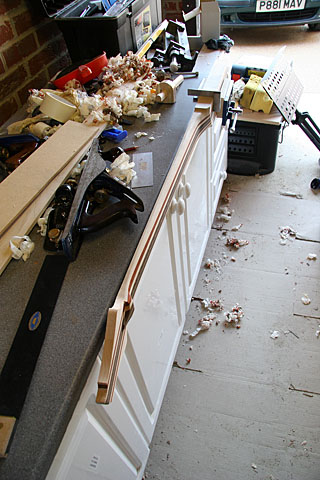
Before I can attach the body sides, the neck block needs some attention. The sides need to be flattened and squared much more accuratly. The left side is slightly tapered and has a convex bow to it. Time for some careful plaining with my trust No5 plane.
|
|


Page 1.