
Page 3: Body Building
Page
1
|
Now we begin the cutting and laminating process to turn our blanks into a rought body shape. Also the fingerboard will need to be squared and flattened. |
|
Bass 6 Diary Of Construction Page3: Body Building Over the last few weeks I have made some good progress with this bass. It seems that only a month ago the neck was uncut. While this has been going on, I've assembled and fitted a new workbench using kitchen units. They serve the purpose very well and some provide some good storage.
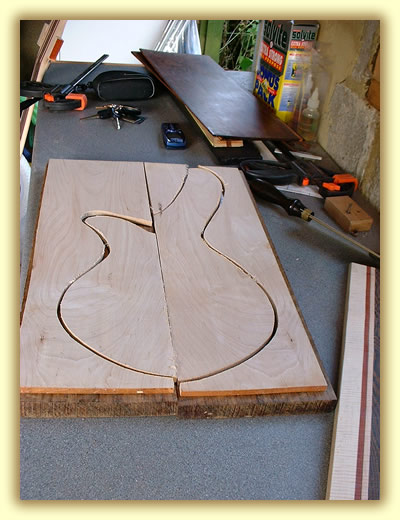
Freshly cut out Maple laminates. I placed the waste in the frame to show just how much is lost from the board. These are the maple tone plates that will sit between the Cocobolo top and the Ovankol bottom.
Then I cut out the Ovankol laminates. This was done freehand on my bandsaw to within 5mm of the marked line.
|
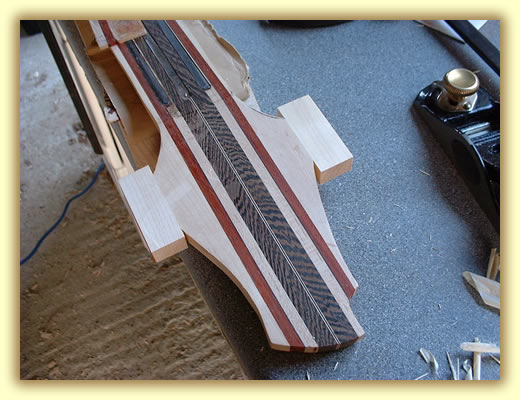
I plained the headstock extensions with a small narrow angle block plane.
Now that's flat! with no visable glue line either. The two pieces will eventually become the same colour too.
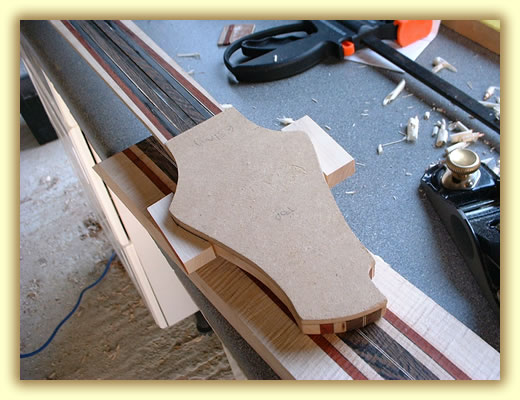
I drew round the headstock template with a black Biro before rough cutting on the bandsaw.
This is the Maple and Ovankol offered up to the body. I really like bookmatched plain maple, it gives a very nice grain pattern, but most people prefer it Quilted or Flamed. I find that pain maple has a very nice "natural wood" look.
-------- 0 -------- |
|
-------- 0 --------
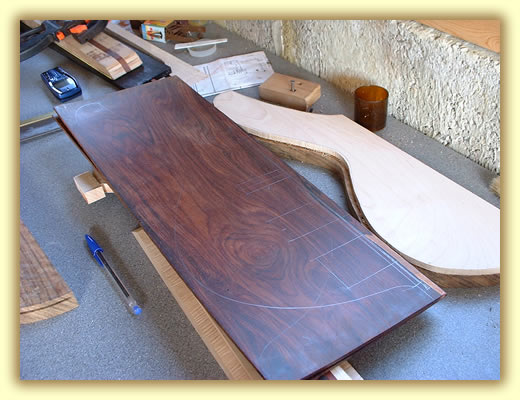
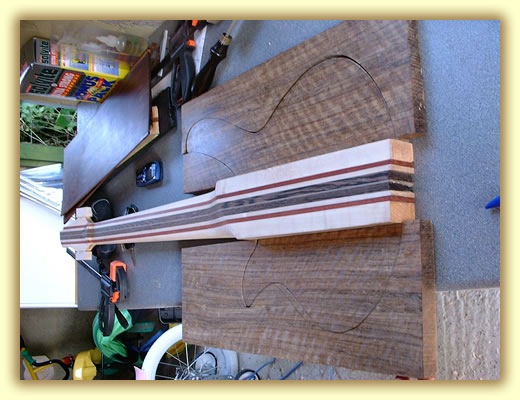
Next I carefully marked out the body shape onto both of the cocobolo plates. I also added the pickup markings and the bridge too for reference. It's good to do this because any mistakes at this stage can't be rectified and there's this set was hand selected my Mike himself. If I goof, there's no way to replace it - it's one of a kind.
Just to be sure, I cut the line very wide (about 10mm and I also cut the centre line about 20mm wide to, so that I have a lot of meterial to work with in the centre line joining process. Again I cut it free hand at the bandsaw. In this picture you can see the lower body horn being cut. I like to do it in one pass so that I get the whole off cut in one piece.
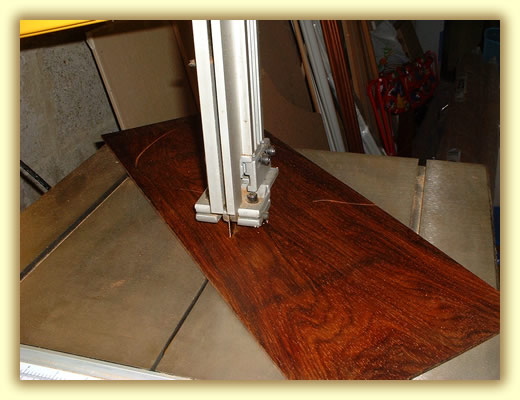
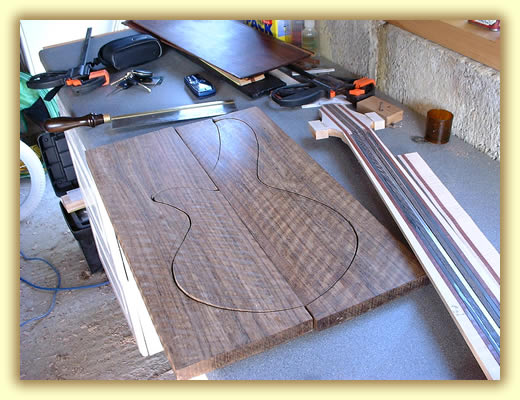
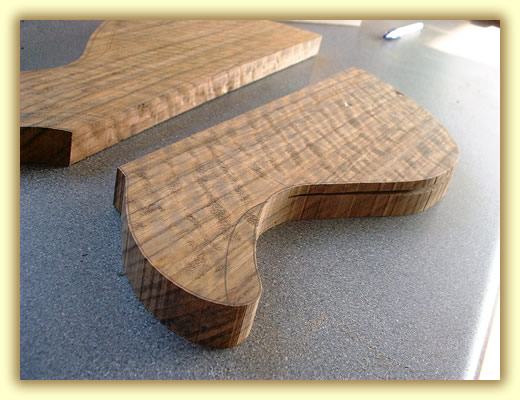
Here's the result. I had to use a 2B pencil to mark out the body shape because the Cocobolo is such an oily wood the Biro wouldn't dry. The problem with using such a soft pencil is that it smudges easily, so I have to be very careful with my handling of the wood. You can clearly see the Pencil line where I oversized the cut.
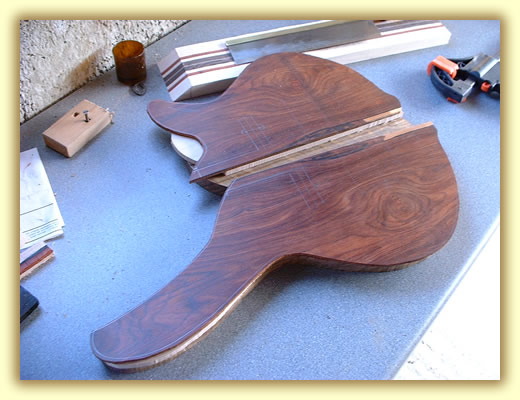
Here's the plates laid on top of each other giving an approximation of what the finished will look like. It also gives me an idea of how much work there is still to be done. The fingerboard alone takes weeks to prepare!
This is what the underside will roughly look like. It's such a stunning bookmatched set.
|
|
|
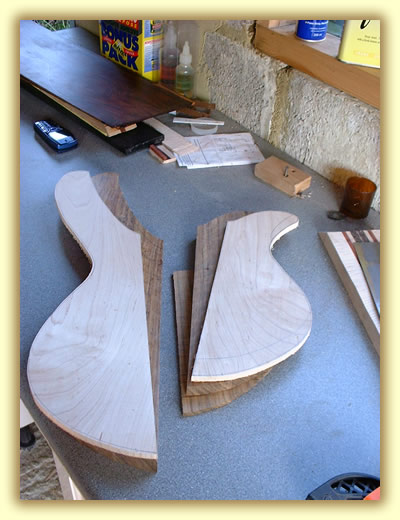
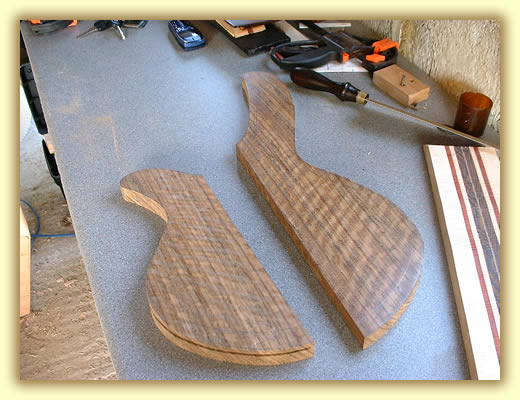
This is the freshly cut Ovankol laminates. Nice aren't they.
Here they are with the waste. I'll use these as clamping cauls when I glue the body to the neck. It's such a stunning bookmatched set.
More pictures of the Ovankol.
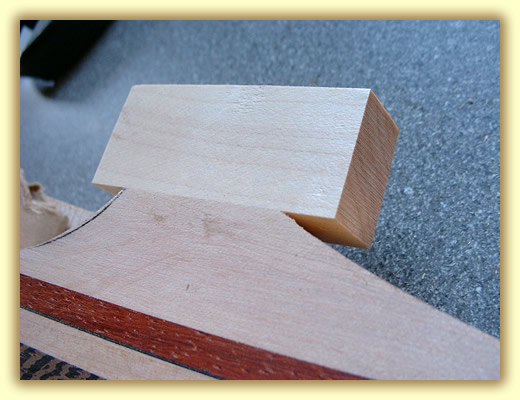
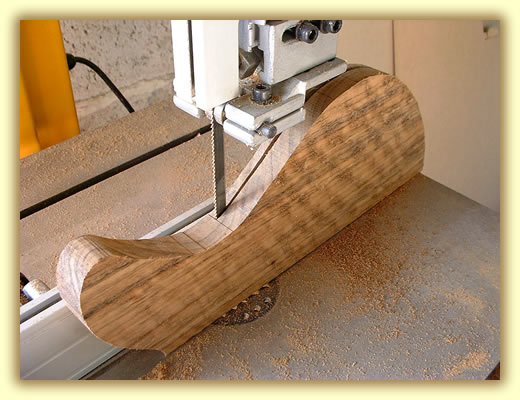
Bandsawing the Lower body horn's control cavity access cover. On the bass it'll be a long panel that covers most of the back. I like this method (Pedular like to use it) because it's very neat, allows a nice big access hole and allows the Ovankol to be seen better. The thichness lost because of the blade's cut will be made up with a few choice venirs. The bandsaw went through this like cheese, with a remarkably good cut. It'll need to clean up both surfaces naturally.
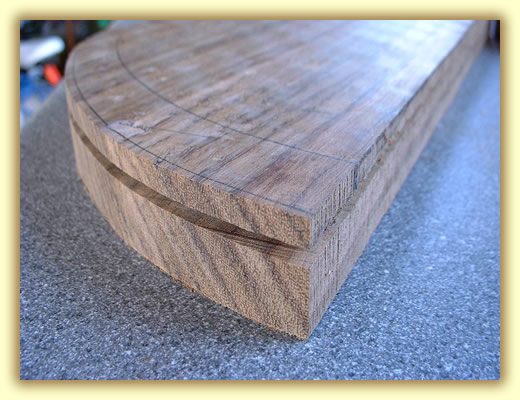
Even more pictures of the Ovankol set. I guess that I was getting a bit trigger happy. This is the lower horn after I cut the big slice on the bandsaw. This slice will form the control cavity access cover and will bolt on using 6 screws. I really like this idea because it shows off the fancy wood without interuptions and is a very clean presentation.
This is a close up of the Lower horn. The control cover is quite pronounced. The gap is a lot more than the cut of the band saw blade because the wood wants to curl out slightly.
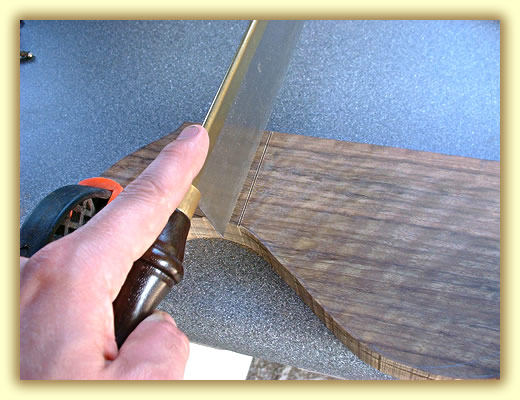
Gently does it with a fretsaw. This allows a really neat and tight shutline. Mike dosen't wasn't a Gotoh battery box, which I can understand. They look great but they are a bit fragile and are getting a bit of a reputation for falling apart. So far I've fitted 4 and ones broke, not good odds. Instead the battery will be under this cover but inside it's own cavity. |
|


Page 1.