
Page 5: Putting it all together
Page
1.
|
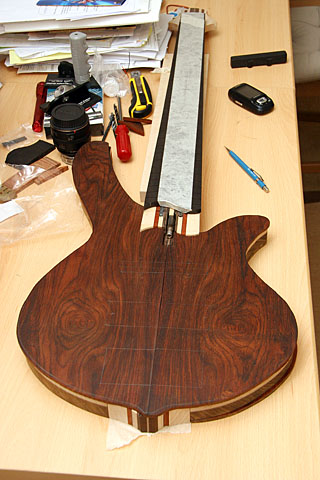
Now we turn our attention to putting this bass together from it's component parts. The fingerboard needs tapering and the curve added. Then it needs attaching to the neck. Fret lines need to be added too. The body wings need final squaring and then attaching to the body to make the bass Caracas. Then I need to rout the center section so that the Cocobolo top can be fitted correctly. Then the Cocobolo top needs to be canter joined and an exact hole needs to be cut for the fingerboard to poke through, that's gonna be complicated! |
|
Bass 6 Diary Of Construction Page5: Putting it all together Starting with the Fingerboard. The fingerboard needs it's sides tapering. Mike liked the curve that I've been putting on my fingerboards, each bass design has a slightly different curve. This time it's off canter and deeper. I cut an MDF template to exact dimension of how I want the fingerboard to be. I then carefully stuck it the fingerboard with doublesided carpet tape - very strong stuff, and clamped it so that I had a good adhesion. I then roughly cut around the template with the bandsaw, removing a lot of the waste material (no point in making the router cutter work harder than it needs to. This helps prolong the cutter's life and minimizes the time on the router table. I don't like using Router tables, they are very dangerous tools, but I have to use them and the quality of work that they produce is second to none.
I then used a 1/2" dia x 1" long router bit with a ball baring fitted at the bottom. The bearing follows the template as a guide and the top part cuts the fingerboard very precisely. I think that this type of cutter is called a template bit. Naturally the results were equal to the quality of my template and in this care were excellent.
|
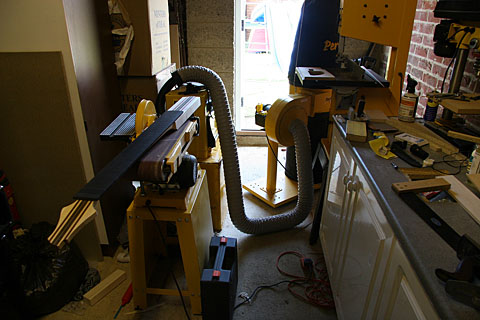
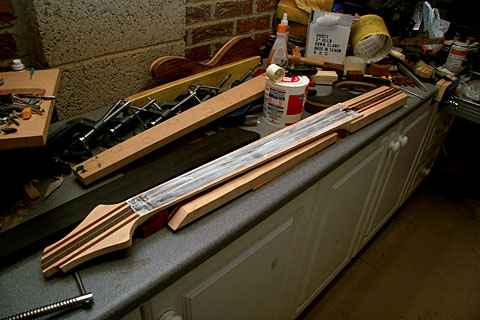
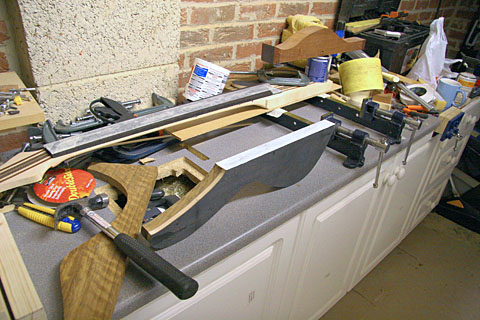
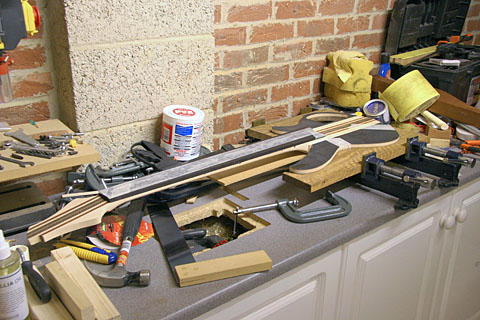
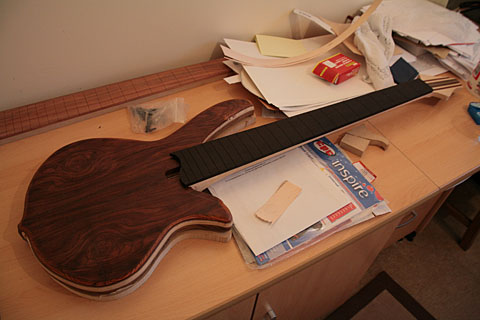
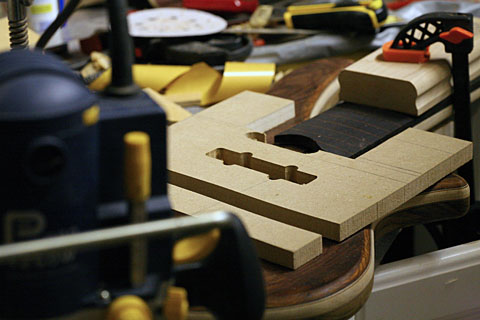
My chaotic workshop, Since taking this shot, I have brought my workshop to order!
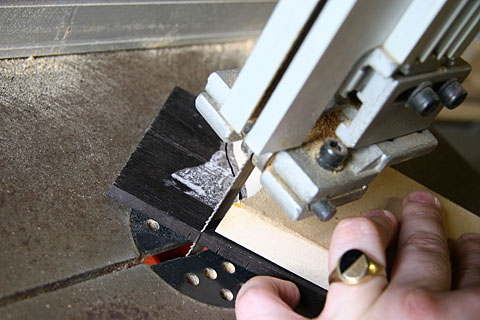
Cutting the excess from the fingerboard end curve.
Post bandsawing the end curve.
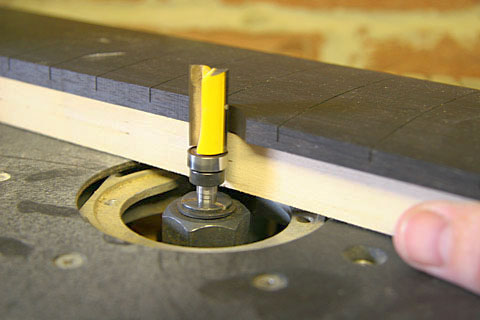
Routing the fingerboard's taper. |
|
The fingerboard end curve is deeper and more curvaceous than on my previous basses. This makes it harder to cut on a scroll saw and I don't have access to one at the moment! So I have to do this using my router. Again I cut a template, which is laboriously perfected as well as I can. Then I fixed the template to the underside of the fingerboard with doublesided carpet tape (great stuff). Then I used the band saw to remove a lot of the excess and used my router table, fitted with the template follower bit seen in the opposite picture. There are two types of template follower bits available, and it's a good idea to have one of each in the same size. One type (pictured here) has the bearing and collar at the base of the shank. This allows the router to follow a template that is below the item to be cut. This is useful because the fingerboard is already radiused and I can't fit a template on top of it. The other type is where the bearing is at the end of the shank, this allows cutting where the work would be bolw the template. Or the other way around if the router is removed from the table and used above the work. |
|
|
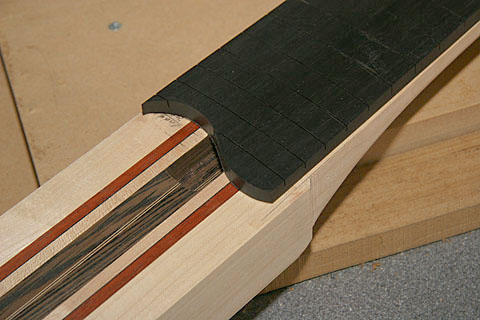
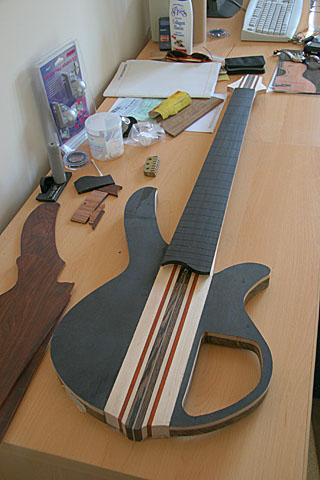
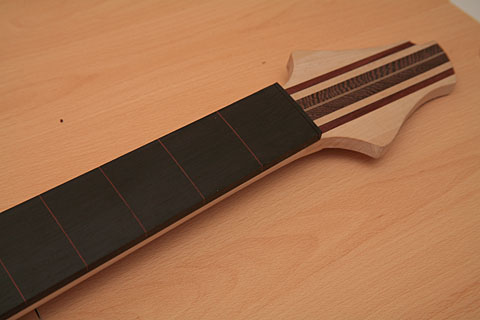
The fingerboard is now ready for gluing to the neck, but there's more work to do to the neck before it's ready for the fingerboard. This is a lovely piece of ebony for Mike's bass. Very straight grained and dark colored. It's very tough to sand and scrape too. It should be ideal for this fretless! -------- 0 -------- |
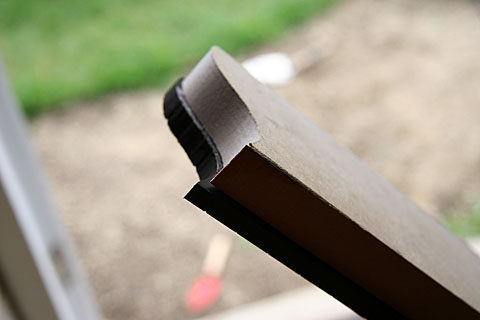
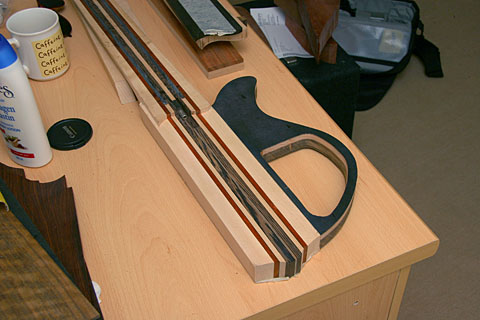
The nearly finished Fingerboard affixed to it's routing template.
The end Curve's looking really nice.
This Fingerboard's nearly ready for gluing to the neck.
|
|
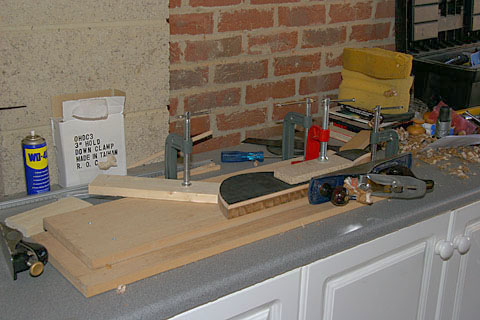
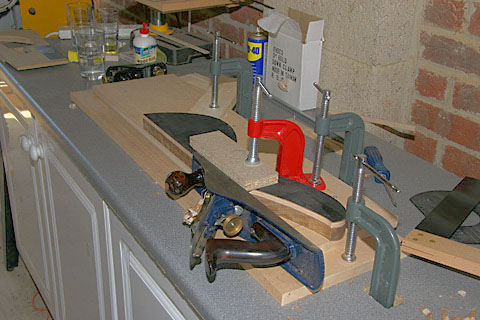
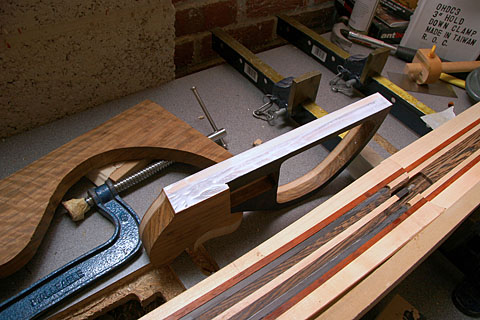
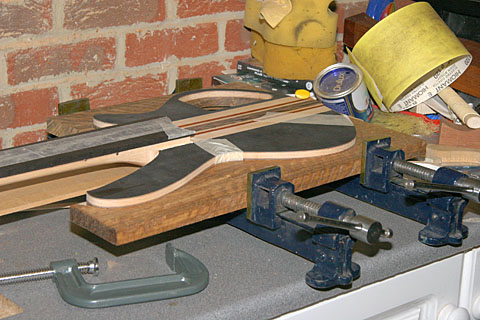
Here's a few shots of my flattening the edges of the body wings in preparation to their gluing to the neck. This is done with a freshly sharpened NO 5 plane and a shooting plane board. The shooting board is essentially a plaining jig and is used for very slow and accurate flattening. It produces whisper thin shavings and dust...that's it. After about 30 mins of flattening, both the body wings are ready. Then I did the same on the neck sides too. It's currently very hot here in Wiltshire and I sweated buckets getting this done. I think I need a cool beer!
|
Flattening the long side on a shooting Plane.
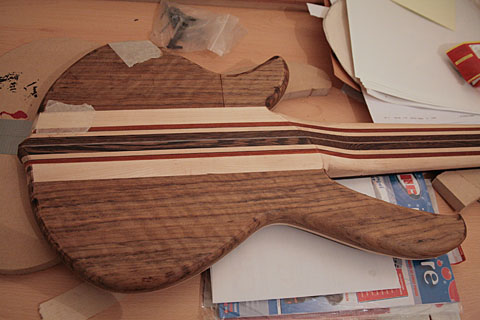
Now the two body wings are square and flat, they can now be glued to the neck. |
|
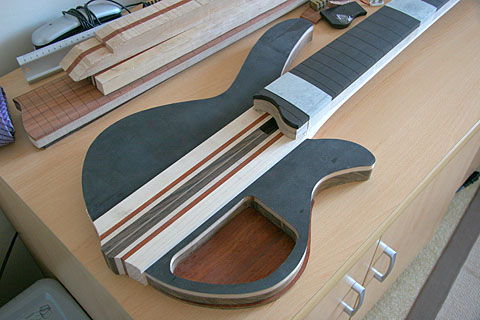
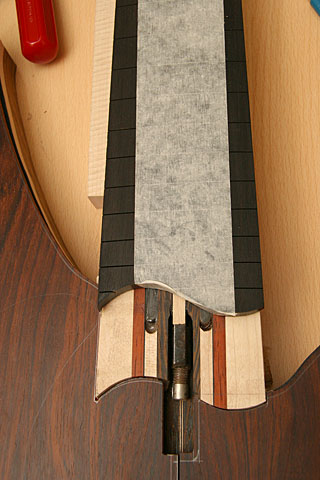
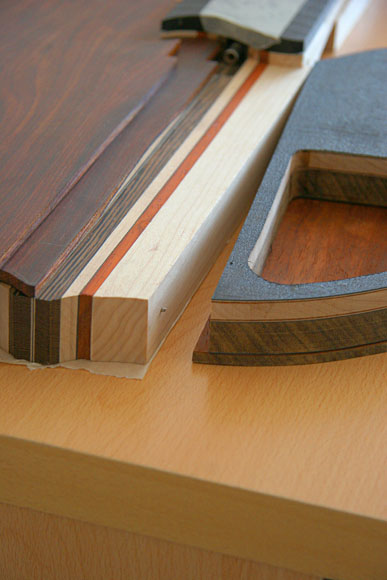
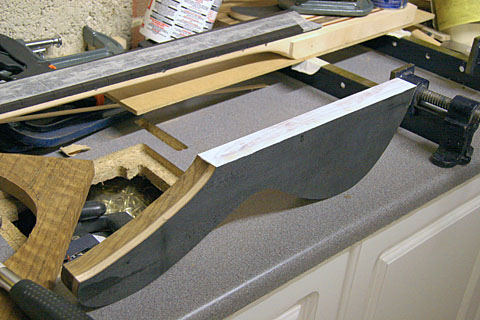
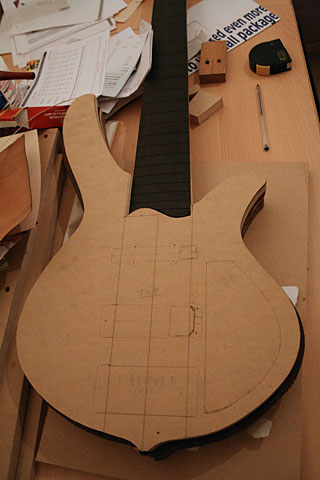
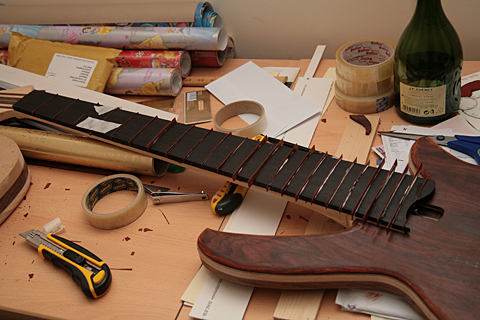
Next job is to rout around the fingerboard and lower the top face of the body end of the neck/canter sections so that the top cap can go over the entire body, hiding the through neck canter, making this bass look like a bolt on from the front. This is very complicated to do and needs to be done right...no second chances here! This needs to go down by a further 9mm. I did this with a router, sorry no pics for this. I needed to concentrate and I had no one to hold the camera for me. Using the table mounted router is a very dangerous tool and I need my wits about me.
It turned out very well, a little post router clean up is required using a plane and a scraper, but on the whole a very successful routing session. I had to create another duplicate fingerboard template because I needed the extra depth (2x19mm MDF templates) to rout around. I'm covered in little chippings from the router...I really need to sort out some permanent extraction system.
The next job that needed to be done is the smoothing and cleaning of the freshly routed top surface of the neck/canter section. Routers sometimes leave swirl marks in the wood and the "play" in the bearings sometimes causes a pass to be slightly deeper than it ought to be. So this needs laborious scraping and planing to smooth this out. There's no pictures of this because quite frankly, it's not that interesting. I'm very please with the results and the top surface is now ready to take the Cocobolo top.
Now that the sides of the canter/neck section are square and the body wing's sides are square too, I can begin the process of attaching them together to form the Caracas. Firstly, I line one body wing to the neck exactly where I want it to be. Then I carefully mark it's position. Then I take a pair of small nails and hammer them into the neck section (not too deep though, just about 3-4mm deep). I then cut off the nail heads (about 2-3mm out of the wood) and shape the ends to a point. I then place the body wing over the neck, exactly where it needs to go and clamp up the two together. The protruding nails spike into the body wing and will now act self-align when I ally glue to the join. This will prevent ANY gluing slippage and ensure a very accurate glued joint. I discovered this method when I was researching ways to stop fingerboard movement when gluing. I've just applied it to fitting the body wings. It's a lot slower process, but much more accurate and due to the complexity of this bass (with the overlaid top cap) this accuracy is essential. Once this has been done, I started on the two top cap halves. I need to plane the canter line perfectly so that the two pieces can be glued together without any glue line along it's book matched canter line. It also means that the grain must match perfectly and that the canter line is cut at the same depth into the wood on both halves, we're talking sub m/m accuracy here! Once done, I can cut the the end curve onto each half of the top cap. This needs to be very accurately marked and can only be cut free hand. This is very slow and needs very careful cutting. I take most go the excess off with a band saw, then I take down the rest with files and scrapers. This is a very stressful process too because the end of the fingerboard has a complicated shape (why didn't I insist on a square ended fingerboard?) to work around and it HAS to be done to a high standard. |
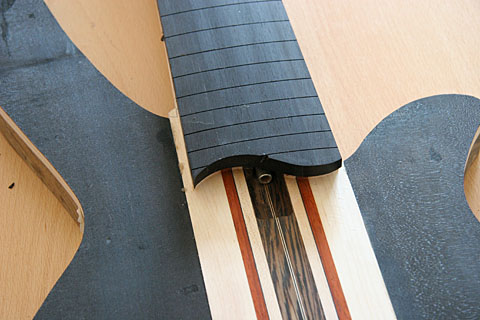
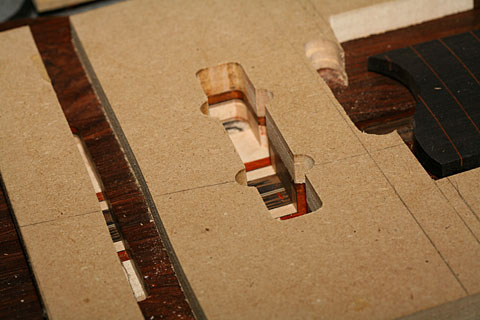
The canter neck needed to be lowered to meet the body so that the top plate can fit correctly.
This also means that I had to accurately rout around the fingerboard too. Not an easy task. It needs abit of finishing but not bad at all!
|
|
.
|
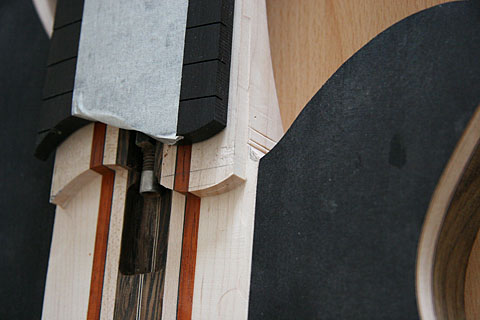
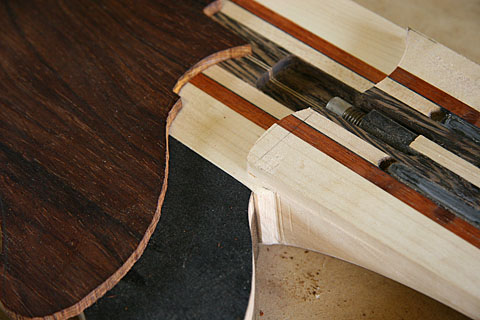
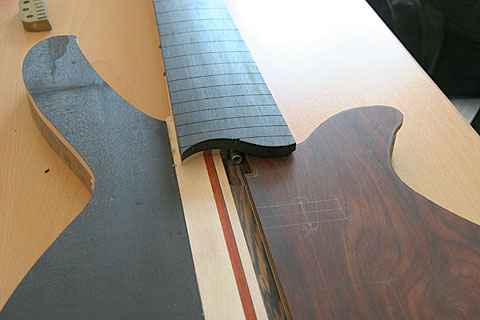
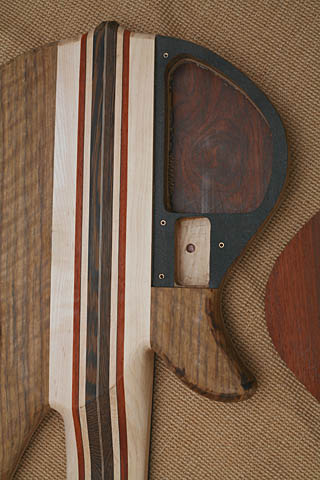
The Left Hand Side part of the cap still needs some refining around the fingerboard, currently it's about 1.5 mm out on both sides of the fingerboard and the truss rod adjustment hole needs to be made wider and slightly longer on both halves too. |
|
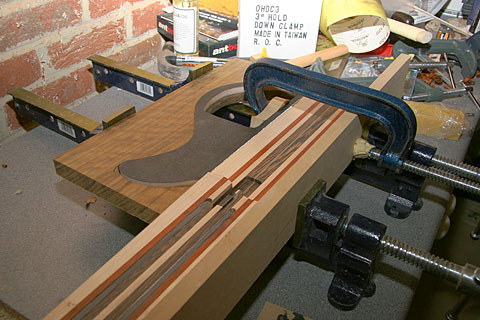
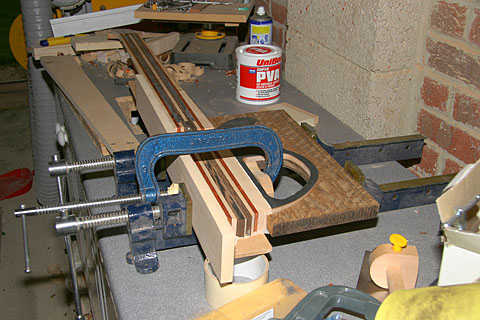
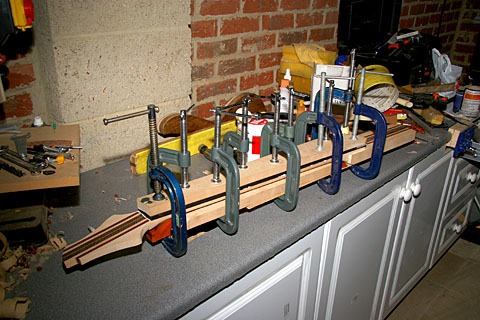
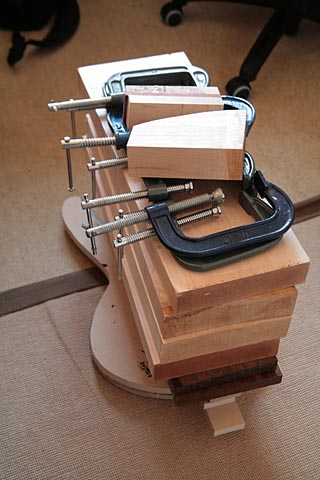
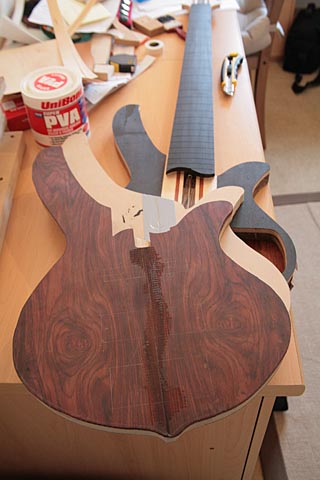
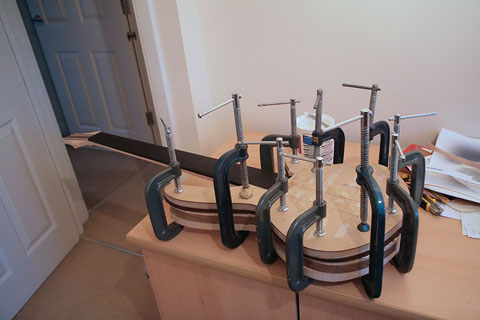
On each of the body wings, I tapped in a pair of small nails, I then clipped off the end of the nail head and sharpened the point to make a double ended nail. Then I precisely line up the wing to the body and press in into place. This creates a dent in the wing and turns the pair of nails into a line up jig. When I glue it, the wing will find it's own position and won't slip! Neat huh? I wish I'd known about this a few years ago! PVA Glue liberally applied Using my trusty sash clamps and the excess cut from the body wing blank I clamp it all together. This was let to set for 3 days before I removed the clamps. I removed the clamps and job done. One attached body wing. I am really pleased with how well this has glued.
|
|
|
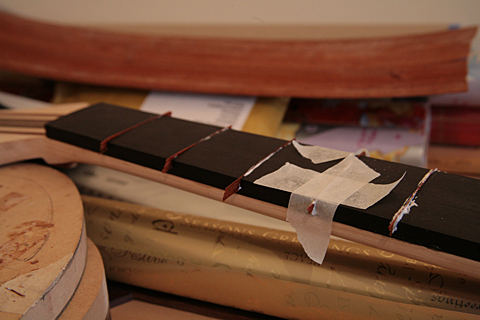
Instead of attaching the upper body wing, next, I turn my attention to the fingerboard. This is because the upper wing always (on my designs) meets the neck higher up the fingerboard then the lower wing (by design, it helps with resonance and adds strength to this area). which will interfere with the gluing of the fingerboard if it is attached, I basically need to get a G cramp on this spot! Again, 2 small nails to secure the non slippage and tight aligning of the two surfaces. The underside of the board and the top of the neck are carefully scored in a herring bone pattern with a blade to ensure deep penetration of the PVA glue. It also helps lower slippage. Clamped and glued in my usual way, but this time I used an MDF top and bottom cauls that I made, which are convexity curved to match the neck and fingerboard radius. This provides a much better clamping action and provides a more even distribution of grip across fingerboard as well as along it's length. This was allowed to set for a few days before I removed the clamps
|
|
|
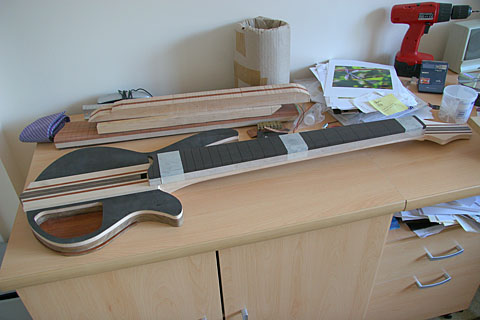
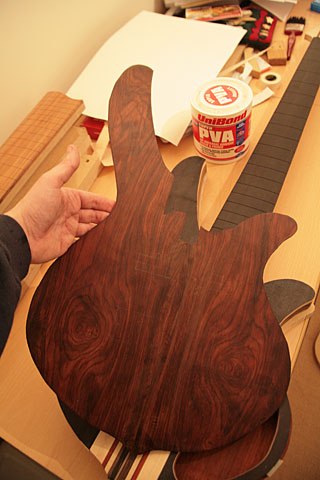
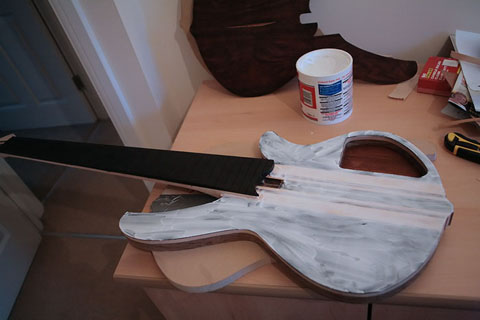
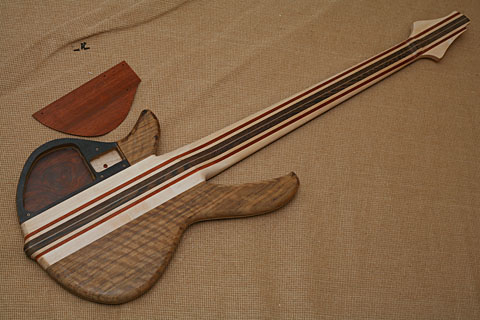
On to the upper body wing. The ovankol upper wing's gluing edge was for some reason no longer true. This is probably because of the heavy figure. This wood will continue to move until it's finally sealed. So I had to re-plane it on the shooting plane again. This was quite tricky and I was getting tired. Ovanlol is a very tough wood, especially when it's so heavily figured and only the very sharpest plane blades will cut it cleanly without tearing, and even with a very fine blade, it needs very careful handling. Shooting planes are also harder work than free hand. I used my 2 nails trick and again a liberally application of PVA glue. Clamped in the same fashion as the lower horn. This was allowed to set for a few days before the clamps removed then the whole bass Caracas was allowed to settle for a week in my office. This will let the moisture added to the bass by the glue to escape and stabile it's final drying better. So that's that bit done. Now it's time to contemplate the top Cocobolo cap.
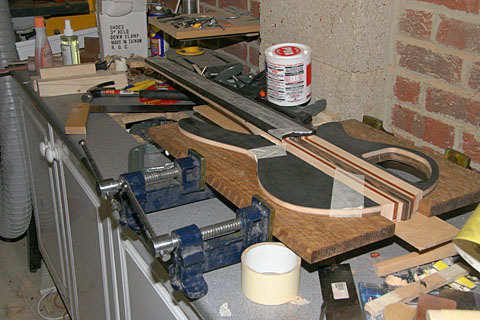
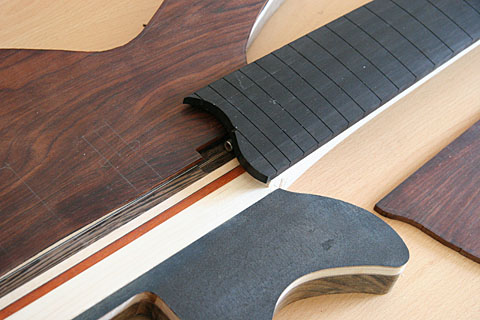
This is what it looks like once the clamps are off, The Colobolo top cap will need to be fitted next. |
|
|
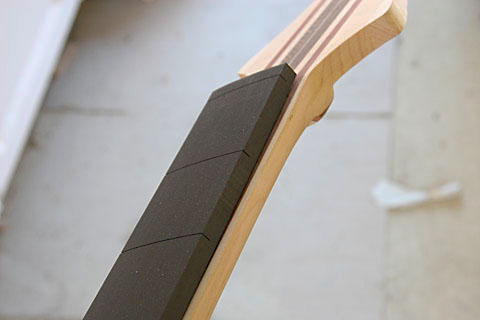
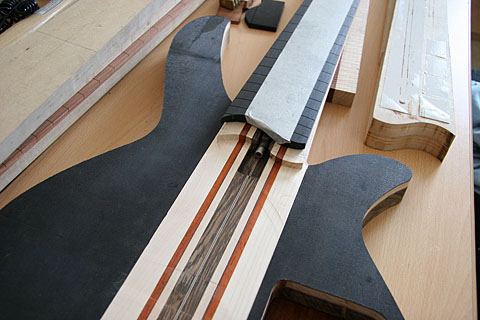
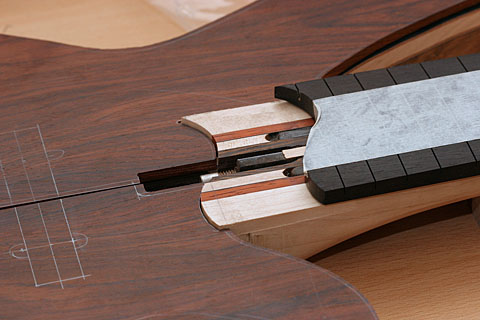
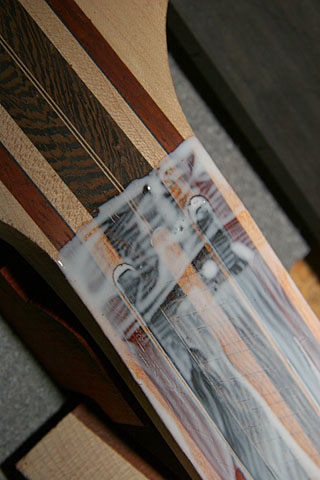
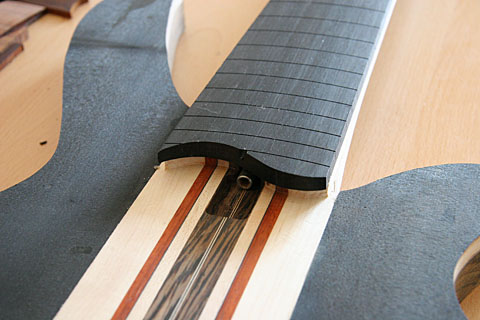
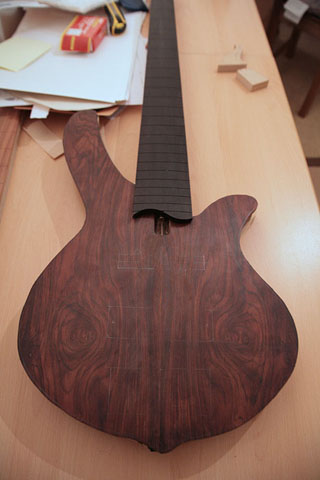
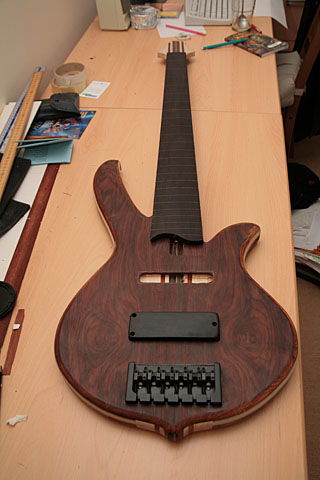
The fingerboard is raised above the body so that the strings can be presented to the bridge at the right height. I placed the fingerboard so that it jutts out over the end a little. I like it, but it also serves a purpose, hiding the cutting and glue line of the Cocobolo around the fingerboard.
|
|
|
I then cut out the fingerboard area on the MDF template so that I can use it for clamping the Cocobolo 2 piece cap. Gluing is going to by tricky because the top's canter join MUST line up with the thru-neck laminates. Slippage is a major concern. |
|
|
Fitting the tape to the MDF template and doing a trial run.
The centre joint is glued and pressed.
Now I have a single top plate...stuck to the MDF template.
At last! I removed the plate from the template.
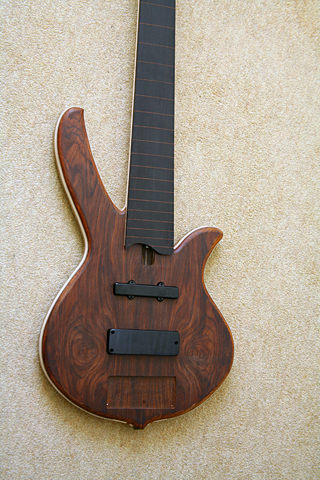
Now it's glued to the body but needs trimming
The top is now roughly rounded over
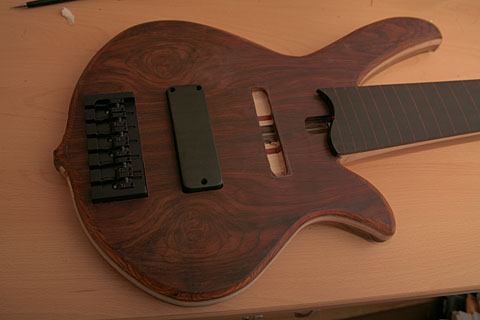
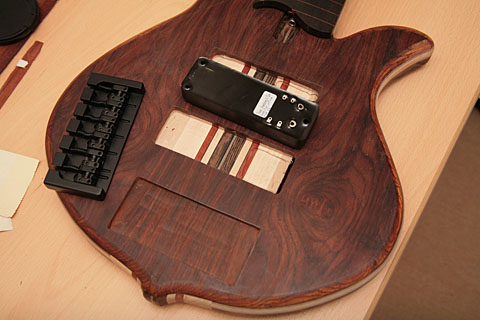
I then Routed the humbucker Pickup cavity and the bridge recess. I also made a start on the Jazz pick up cavity too. The Jazz pick up cavity is always a headache, the 4 lugs that the screws go though are very very tricky to get right. What doesn't help, is that Kent's pickups are hand made and that includes the carcases. The lugs on these "wood-look" pickups are attached as a bit of an after thought and looks like they were done by eye and not with any measurements. So rountin or drilling becomes really tough because it's hard to replicate an non symetrical shape and make it still look right.
I haven't shown the rear of this bass off for a while, so here's a few shots to show what's been going on. The control cavity is dressed in a black veneer and the cover has a sweet paduak veneer to match the cocobolo top. There's a little more work still needed around the battery hole, but it's starting to come together. I've used brass ferrules for the cover's screws and at the moment I'm using black Allen bolts.
The next headache for me to tackle was the routing for the Jazz Pickup. Humbuckers are a lot easier to rout, four square sides. Get the depth right and chose a router bit that has the correct radius for the corners to match the pickup. Jazz pick ups are a whole different ball game. 4 round lugs that need precise placing. A thin body which means that there is less room for errors and tight radius' in the corners. In addition, Kent's custom pickups are rarely perfect. The look great but the mould is made from wood, so it's not a perfect casting to start with and then the mold moves during the curing process so there is always an "unique" nature to he's Jazz pickups. I spent ages making an accurate MDF template. In fact I ended up making about 7, each was rejected because of either a poor fit or it didn't look right. On the 7th attempt I got it just right (my new Fret saw helped an awfull lot). I made it out of 5mm MDF and then made another identical 19mm version using a router with a bit and bearing. I tested the new template on a piece of scrap and the pick up fit snugly in. Just tight enough to look neat but still hold the pickup in place, perfect. This is a time consuming task but the effort was well worth it, a neat and professional job. Before I could use the new template, I removed a lot of the material from the target area. This was done free hand and is very nerve racking. I penciled in the pickup shape and MADE sure that I didn't get too close to the line. This removal helps the bearing guided router bit a lot but reducing the cutting stress and heat build up. Cutters have a fixed life and it's best to let a heavy duty cutter do the big stuff and more delicate cutters can neaten up the job and attend to more accurate work. The other worry when using a small bit to remove a lot of material is that the cutter chaffs the wood and causes it to splinter. Thankfully that didn;t happen here. Clean cutters, slow methodical pace and never remove too much in one pass is the key here. The routing alone took 3 hours. Add the time the template took, we are looking at several days work for one aperture (complex though)
Recently I've dropped using double sided tape as a temporary fixing. It's actually too sticky, and it's really difficult to remove afterwards. Acetone (nail polish remover) is suposed to help but it's so sticky, it rarely does help much. Now I use Carpet tape. It's very wide and broard (3"), cheap and removes far better. It leaves no sticky residue which helps me enormously. As a tempory adhesive, it sticks just as mucg as I need. Firm but not unseparable and it also doesn't lift out weaker grain either.
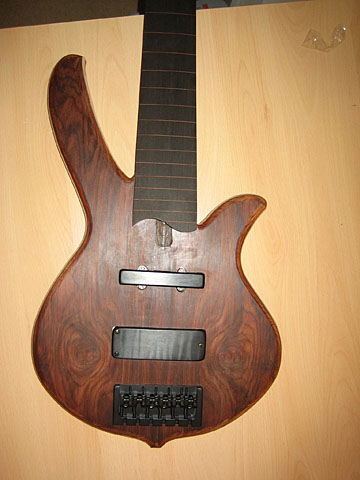
Without the Bridge placed on the bass
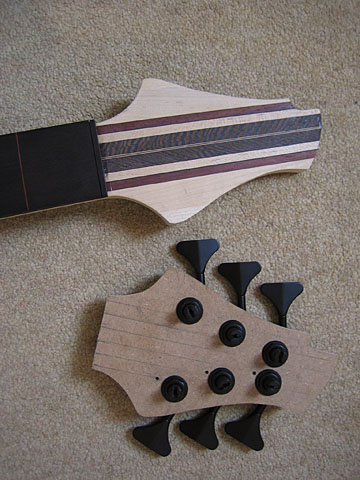
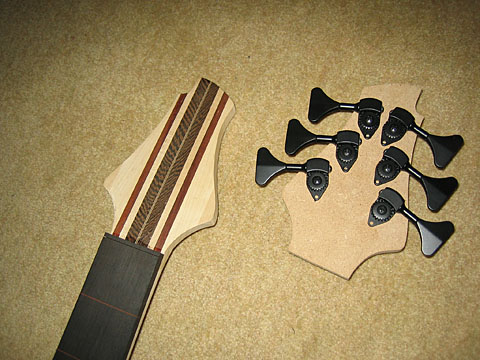
With the Bridge placed on the bass I've made a new Headstock template to try out some machine head (tuner) placements. I think i need to consult with Mike.... The headstock shape was rough cut from MDF and then routed around the original template on a router with a bit follower. I marked out the aproximate string placement at the nut and followed the strings across the face if the template so that I could see where the tuners should go. I then drilled pilot holes to mark the centre of each tuner post. The angle of the tuners will be decided later. (Swept back, forwards on one side and swept on the other ot parallel) As usual I can't cut any holes in the template because Hipshot have changed from imperial to metric for their tuners (since I last used them) and I don't have a forsner drill bit in that size...Duhhh! Now on order.
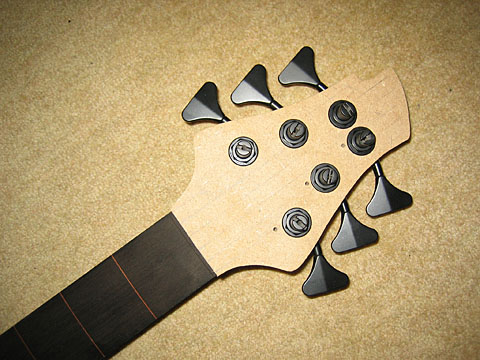
Now that I have the right forsner drill bit, I've drilled the tuner centre pole holes. I've descided to sweep the tuners back. Why? Because it looks SO COOL! Swept forwards looked rubbish and normal didn't look any where near as nice.
|
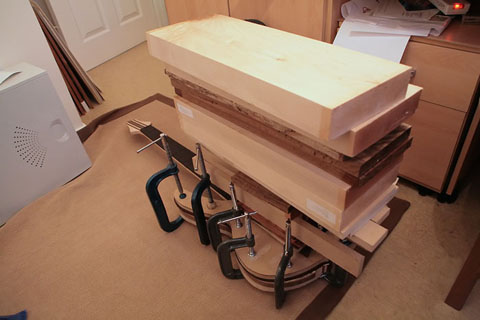
I decided to join the 2 pieces first to make a single plate and then attach it to the body. I made another 19mm MDF body template, this new one has the fingerboard area cut out so that I could us it as a clamping caul for the top of the bass later I applied PVA glue to the canter line of the Cocobolo top cap. I stuck one side of the top cap down using double sided sticky tape (great stuff). This Cocobolo is really thin and a board this size will not glue flat without a little help. The tape forces the board to glue flat, especially when a lot of weight is applied as it is drying. I then placed the second leaf next to is and aligned the two boards as accurately as I could. Then I sandwiched the Cocobolo cap between the two templates and placed a lot of weight on top of it. This is left for a few nights to cure. Once set I removed the weight and separated the two MDF templates. Removing the Cap from the Doublesided taped MDF template was quite difficult...it was really well stuck! I then removed the excess glue around the center area and this plate is now ready to be glued to the body.
Copious amounts of PVA was used to ensure a good join between the Cocobolo cap and the body. This glue was leveled and smoothed. The underside of the CoCobolo cap was scored using a blunt craft knife.
As soon as I had the cap in the right place and under clamping load (which was easier said than done, I had to remove the clamps 4 times before I got it right) I placed a lod of wood stock on the centre area, to push down under weight and gravity to ensure a flat, tight and level surface. Because the clamps operate around the edges, the forces may cause the centre to bow slightly, so weight has to be applied to the centre to remind the pieces of wood how we want this to set.
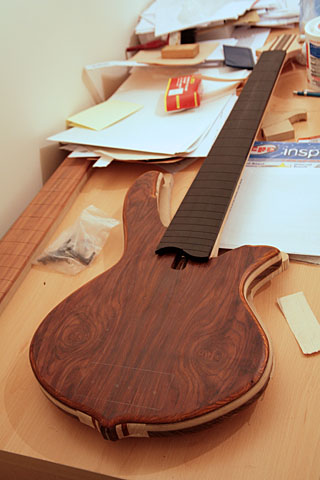
I placed the cap very carefully onto the glue and aligned it to my satisfaction. Then I placed the tailored MDF template on top and place the original template underneath. This was then very very carefully clamped using 10 Clamps. The templates acted like cauls, spreading out the load across the body. Slippage was a major concearn here because of the surface area being glued. The top cap likes to drift across the surface of the glue when it is being clamped. G clamps have a twisting action so it's important to balance out the clamping action on either side, if I turn a clamp 1/4 turn on the left side, I have to turn and identical clamp on the right side by the same amount or the wood will slip as it dries. The top cap has glued to the body, nice and flat with a perfectly aligned centre line. It's looking very classy. I allowed the body to thoughly dry for about a week before I trim up the edges of the top cap. I'm looking at upto 5mm in some places. In addition, the whole body needs about 3-4 mm removing from it's edges too. I trimmed the Cocobolo cap flush to the sides of the bass carcass and removed the excess from around the sides of the body so that it matched the body template.
I then used my trusty 3/4" round over router bit and rounded over as much of the top and bottom corners that the router could clear...This is looking really nice. The bit tends to burn lighter woods and is not un-common, the resins in the wood heat up due to the friction of the cuter's blade. The ovankol burns a fair bit more than most woods and has burnt in a number of places around the body edges. This can be sanded out easily and is usually just a wee bit below the surface.
I then started to fit the Paduak Fret lines
These need to have the undersides radiused to fit the slot correctly
Once sanded down...they look like this.
A pre-rout. it's always good to take a lot of the material out first so the it doesn't stress the bit too much
One of the problems with routing front pickups is that the routing template has to be thick enough so that the base of the router clears the fingerboard. The other problem is that the template has to be large enough so that the router can move around with out rocking or tiping. That's why I placed an additional support for the router to sit on
A nice clean rout. No burning or chaffing. The black in the upper corner of the rout hole is the black veneer showing through.
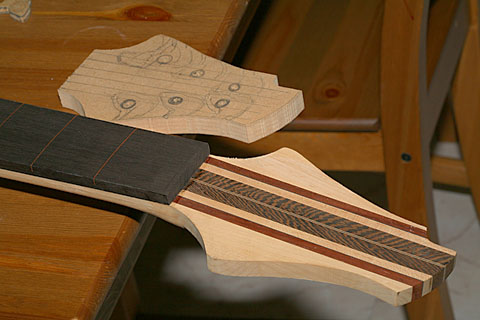
This is a headstock template that I've made for the purposes of tuner placement.
Now that I have the right drill bit for the tuners, I can place the tuners in position on the template. I have descided to sweep the tuners back - they look so cool like this.
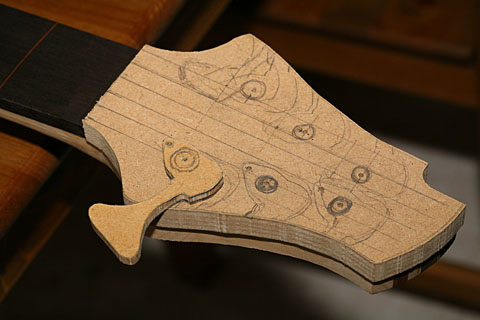
Here, I've placed the template over the headstock to get an idea what it will look like.
|


Page 1.