
Page 2: Taking Shape
Page
1.Page
3
|
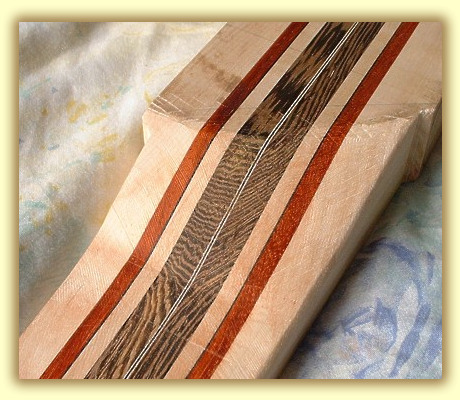
The neck laminates are plained, glued and squared, this forms the neck blank. Then it was marked and now we begin the carving process to turn our blank into a rought neck. |
|
Bass 6 Diary Of Construction Page2: Taking Shape After an eternity, it's really nice to be back making basses. Now that my Workshop is slowly becoming more useful, I hope to produce a lot more in the near future. I need to make another 7 string headless (but this time, fretted), I also want to make a Jazz style Bass. I want a sixer plus I want to rework my first and second basses, tidying up some areas. I also want to start making some very exotic electric guitars and maybe an acoustic bass. I invited Mike over to observe his bass nack taking shape, and to stand, watch and take photos. So he took lots of shots of me working on my new Bandsaw. Nice, big and yellow isn't it.
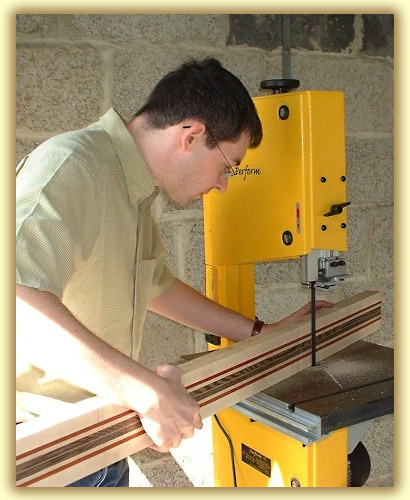
This was the first cut and I was a little nervous as Mike watched anxiously, with the camera in hand.
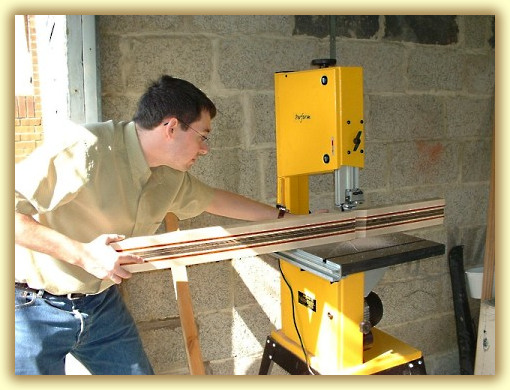
I am so chuffed; the bandsaw works a treat and Mike's bass neck is coming along.
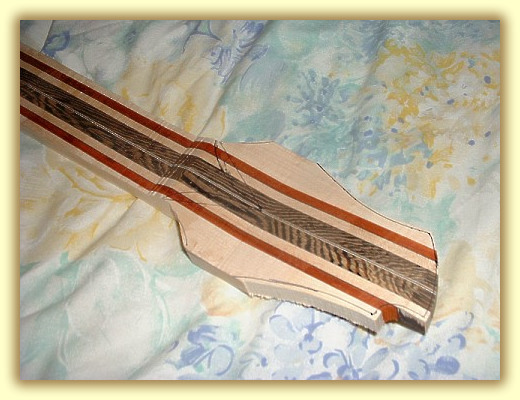
A very proud Mike. It's starting to look like a Bass! This is going to look SO nice. |
This is probably THE most usefull tool in a bass maker's workshop, second only to a good router. The rip speed that can be achieved from a quality bandsaw has to be seen to be believed and it just can't be done by hand or with hand tools. They are very accurate considering the thickness of wood that it can cut. You don't get a very nice finish from it, the marks left by the orbital saw blade always need tidying up. But this is a fair trade for the flexibilty that a bandsaw brings - you just can't do this with a jigsaw or circular saw. Here I am cross-cutting through 9.5cm of laminated quarter sawn hardwood. Although I had to feed the blank though the blade quite slowly, the blade cut it like it was a piece of cheese. I used a fresh 1/2" blade with 6 teeth/inch. This gave a nice straight cut but leaves quite a rough finish. This is normal for a bandsaw. I could have used a 10tpi blade for a cleaner cut but they tend to generate a lot more heat. Often burning the wood but would have given a smoother finish. Also the feed speed would have been even more pedestrian. The 1/2" blade doesn't like to turn or cut curves, but it's great for this sort of straight line work.
Steady as she goes...nice and slow, keep the blade on the right side of the line.
Gareth...Smile for the camera...now get back to work!
|
|
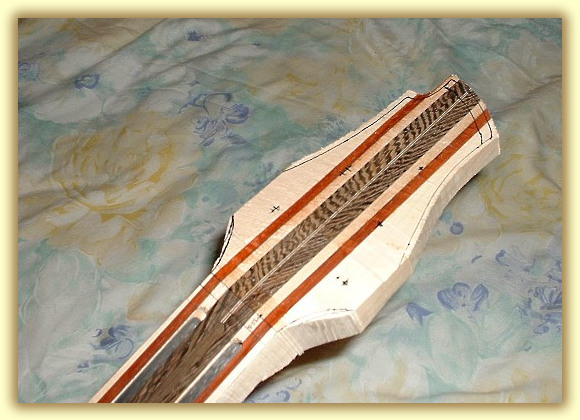
I cut out the headstock shape very roughly on my bandsaw. Because I have a 1/2" blade fitted, it currently doesn't want to cut tight radius curves so I didn't want to get too glose to the line, the idea is to get close enough for the router to do it's job easily, too much wood and the routing becomes tedious, too little and the routing becomes very tricky. While I was at the bandsaw, I cut out the neck taper too. Again I left a few m/m either side to allow for smoothing and sanding.
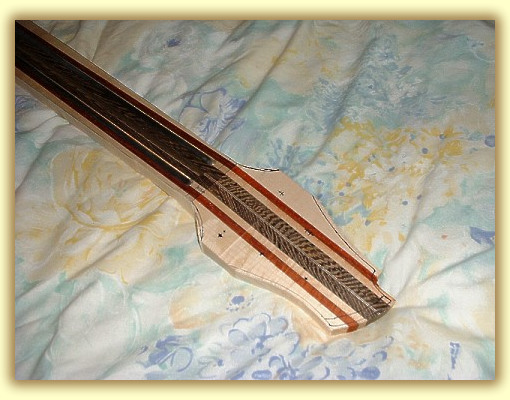
This is the underside of the roughly cut headstock. The volute is only marked and the headstock needs cutting around the volute shape so that the volute protudes out of the headstock (it's currently wedge shaped).
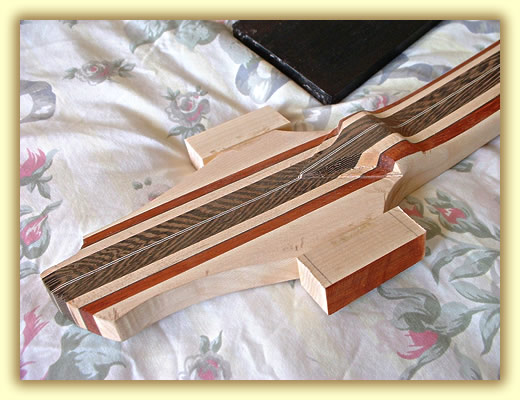
The Neck to body heel on a neck through design needs a lot of carefull consideration but also lot of rough crude carving to get right. It's a case of hacking great big lumps off - but making sure they are the right bits! This is the first stage of carving, taking out the bandsaw marks, smoothing the whole area down and carving the lower body horn to neck radius. (I really ought to make a web page describing the anatomy of a bass.) This is starting to look like a bass neck! My next job is to cut out and add the headstock width extensions and rough carve out the neck profile. I also need to carve the volute a bit more to shape and I will soon need to start on the body shape too. |
I drew out the headstock shape from my 1/4" MDF template and marked out the Tuner gear centres. I like to mark out with a black biro, the ink dosen't sink into the wood and pencil smears too easily.
I stuck my 1/4" MDF headstock template on to the headstock using doublesided tape and routed around it using a template follower bit in my router. This has given it a nice fresh, clean edge.
This is a clear shot of the underside of the headstock. It shows the roughly cut volute very nicely. Previously the headstock was the same thickness as the volute, which I reduced to the required ammount using a template and a router. This worked well enough for a rough cut and I will neaten and carve it later.
|
|
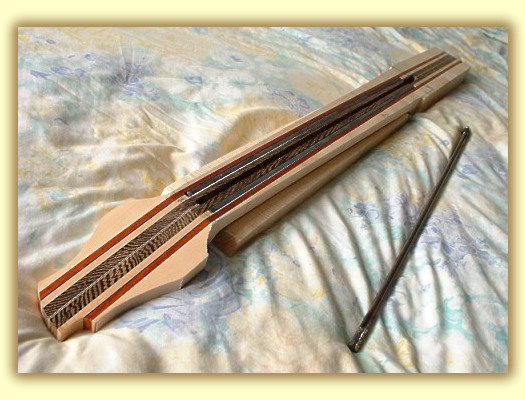
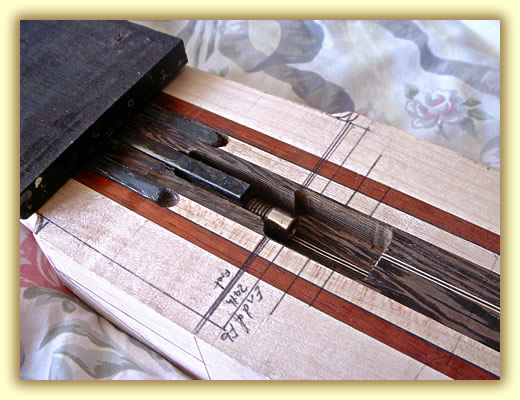
I also neatened the Carbon rod slots and epoxied them in, making sure the rods were seated properly in their slots. I also addressed the trussrd slot, the nut adjuster was sitting a little flust of the neck surface and needed to be deepened slightly. the adjuster hole still needs a little more work before I can set in the truss rod. I must confess to realy liking the 2 way adjustable rods. Luckily for Mike I was able to source a rod to fit 35" scale.
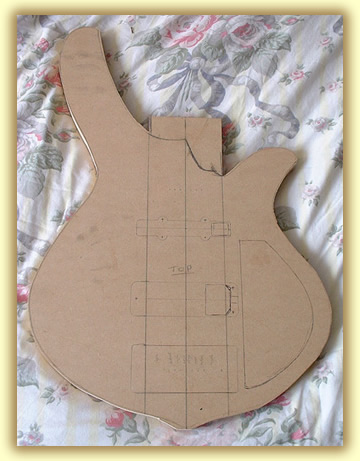
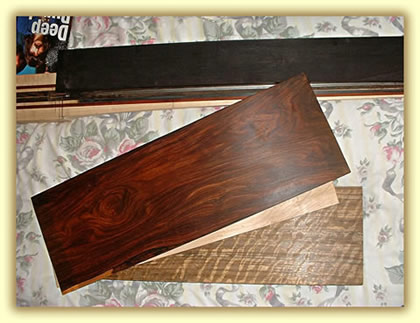
Below is the unfiniahed body Template, which I have rough cut out of 3/4" MDF. Once I have the body laminated and this template is complete, I intend to cut around it with a router to create the body blank shape. I have marked out the centre line, Pickup outlines, the bridge outline and the through-neck block. To the right is the electrics cavity. What do you think? This is the first time that I've made a bass with a tail. I like it and I wouldn't mind doing it again.
So all in all it's been a slow but productive few months. I've started to smooth the body laminates. One of the maple laminates is nearly ready for gluing but neither the Ovankol or the Cocobolo is ready yet.
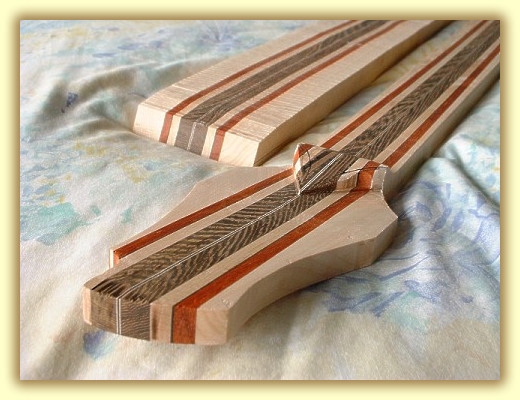
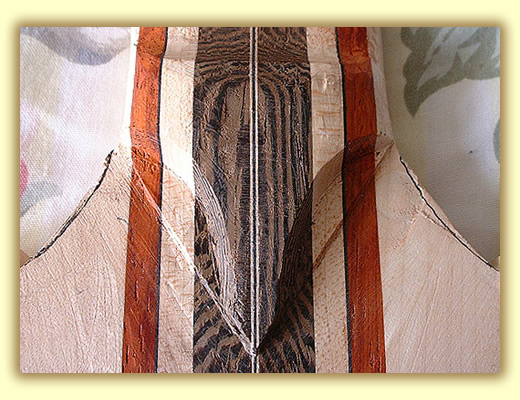
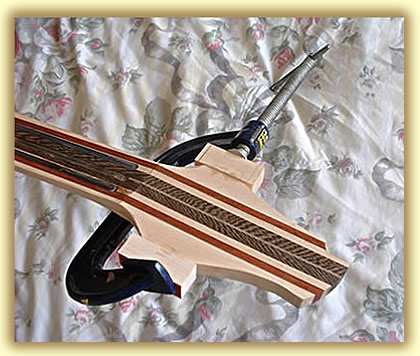
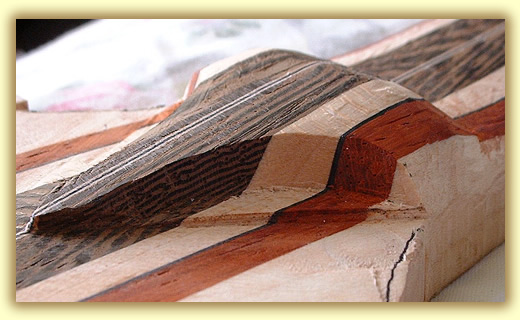
This is the hand carved Volute in an unsanded - rough form. It took a whole afternoon just to get this far and it's looking good. The wenge is a nightmare to carve, it's so hard and keeping my chistles sharp is a challenge. But the symetry's there as, is the shape. The lower V step has worked better than I'd hoped. Next, I'll sand it smooth and neaten the lines and surfaces.
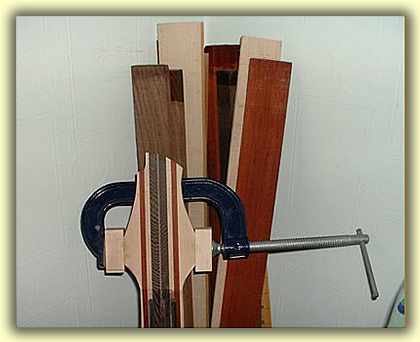
I wasn't very happy with the headstock extensions. There was avery visable glue line and one of the joints wasn't very secure, so I plained them down and made some new ones. This time I glued it with a thicker glue and one big heavy duty clamp. Also I prepared the surfaces better and made sure that they were very very flat.
I deliberatly oversized the extensions so that any slippage (that horrid word again) can be corrected by plaining the surface flush. Slippage is a fact of life with G-clamps!
While this was going on, I thicknessed the Ovankol/Amazaque board to equal thichness. These pieces of wood are so figured that I can't use a plane on them, if I do the grain tears out all too easily. So I have taken the boards down to 3/4" thick by hand using 60 grit sand paper, 0.6mm scraper and a lot of effort. Then I did the same to each of the other laminates, that makes 12 surfaces in total, all finished to 240 grit. This is a marathon job in it's own right! Now the boards are ready for gluing up and rough cutting out. I have blisters on my blisters. |
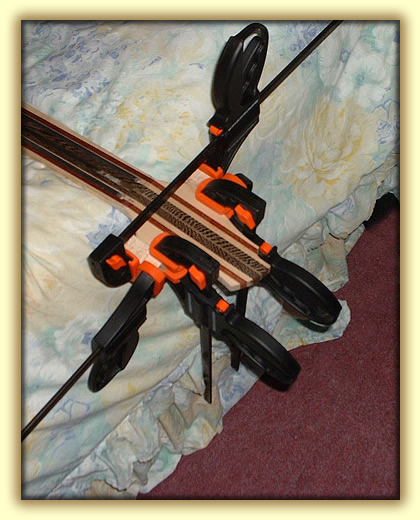
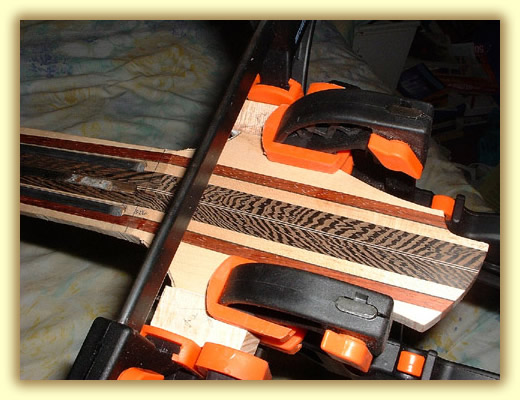
I needed to add some extra maple either side of the headstock to make the required width for the template. This is quite tricky to do with small pieces of wood and getting enough pressure with the clamps is very difficult. I ususally use a differant type of wood to draw attention away from the join line, but Mike and I agreed that in this case it wouldn't suit and needed to be a maple to maple join. It seems odd that paduak or wenge to maple joint would seem cleaner than a maple tp maple joint, but I guess that it's just one of those things! I didn't have any G clamps that could extend wide enough so I used Quick grips instead. I'm not too happy about the joint because the clamps couldn't exert as much pressure as I'd have liked. As you can see from the picture, I used 4 clamps, securing each block in 2 directions. This ensured that either of the extra maple blocks didn't move during the drying process. Although these clamps aren't as strong as G-clamps, they are a lot more accurate, they certainly don't have a twisting action and they also don't creep as the glue dries. I could have used a sash clamp but they really aren't designed for small work and would have proved unmanageable.
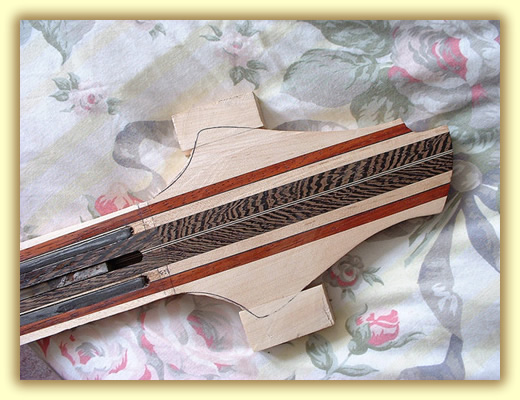
After the calmps were removed, I plained down the new blocks to the same thickness, so that the surfaces were reasonably smooth (I'll finish it off later) and I re-drew the headstock cutting line to show the headstock shape.
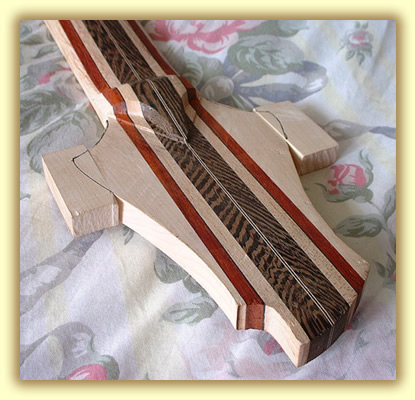
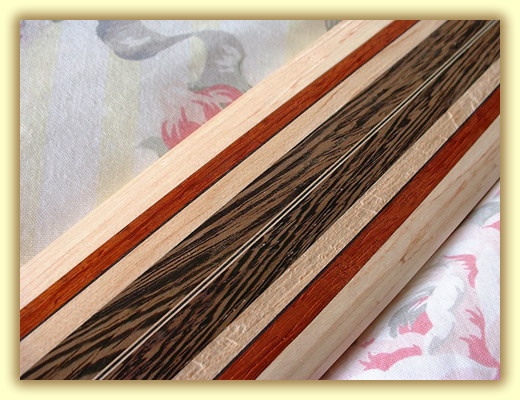
I have also rough carved out the neck profile. It's a shallow D shape and it fits the hand very nicely. Mike wanted me to copy his Dean 6 string, so I've matched it as closely as I intend too, sorry Mike, but I've a reputation to keep, it's gotta be a bit thinner than that! I love this picture because it really brings out the colour and grain (texture?) of the multi-laminate neck.
I really like this carved Volute, but it is taking ages, thankfully Mike is very patient with me.
I routed out the Truss rod access cavity to a more suitable size, enough to swing an Allen wrench. I was trying theebony fingerboard blank for size at the same time. a lot of work is needed before the fingerboard is ready.
The clamps are off and they have done a much better job that the speed clamps. The glue is dry and has set well. Next job is to trim them down.
|


Page 1.Page
3